

 Grilling steak on a charcoal grill delivers unmatched flavor that gas grills simply cannot replicate.
The high heat and smoky essence from burning charcoal creates a perfect sear while infusing the meat with distinctive taste.
Many home cooks struggle with achieving restaurant-quality results, often ending up with overcooked or unevenly heated steaks.
The best way to grill steak on charcoal involves selecting the right cut, setting up proper heat zones, and mastering the searing technique to create a flavorful crust while maintaining a juicy interior.
Success depends on understanding how different steak thicknesses respond to direct heat and knowing when to move the meat to cooler zones for even cooking.
This comprehensive guide walks through every essential step, from choosing quality cuts like ribeye or New York strip to building the perfect fire setup.
Readers will learn proper preparation techniques, temperature management, and timing methods that ensure consistent results.
The process becomes straightforward once cooks understand the fundamental principles of charcoal grilling and steak preparation.
Choosing the Perfect Steak

The right steak cut, thickness, and quality determine the success of charcoal grilling.
Prime cuts with proper marbling and adequate thickness deliver superior flavor and texture when cooked over charcoal.
Best Cuts for Grilling
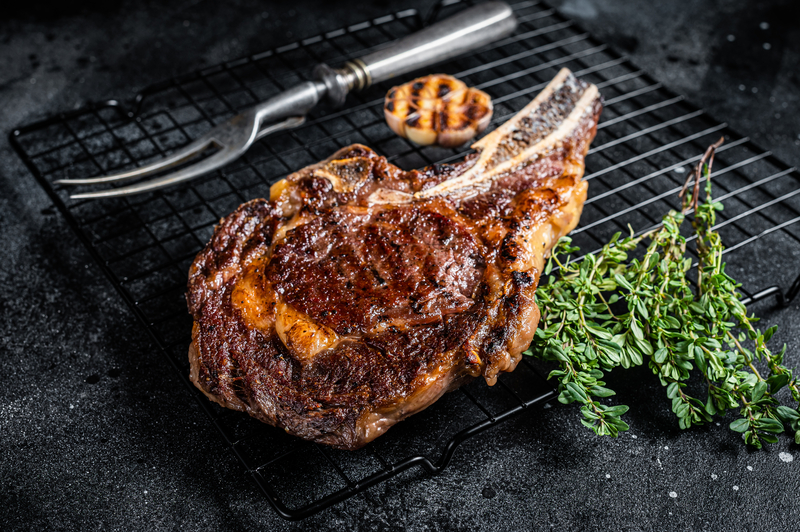
Ribeye stands as the top choice for charcoal grilling.
The abundant marbling creates exceptional flavor and prevents overcooking. The fat content makes it forgiving for beginners.
New York Strip offers excellent texture with moderate marbling.
This cut develops a beautiful crust on a charcoal grill while maintaining tenderness.
The uniform shape ensures even cooking.
Filet Mignon provides the most tender eating experience.
However, it requires careful attention due to its lean nature.
The mild flavor allows the charcoal smoke to enhance the meat.
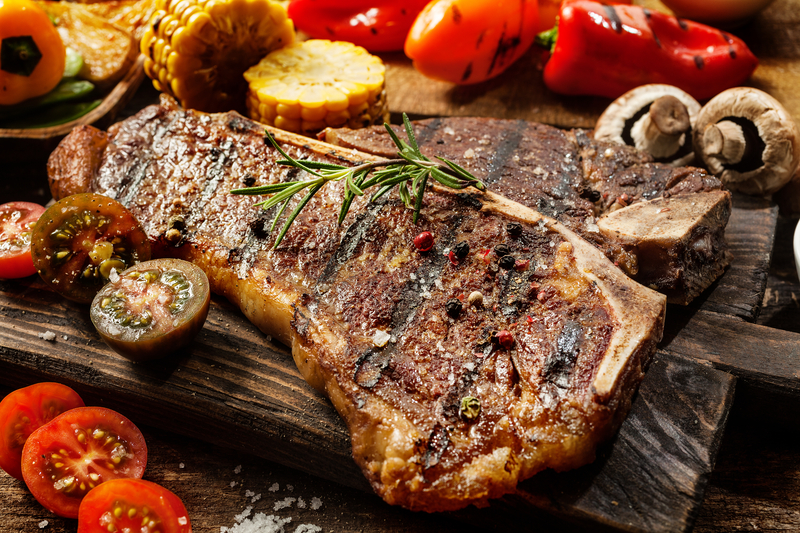
T-bone and Porterhouse combine two cuts in one.
These steaks offer both the strip’s texture and the filet’s tenderness.
The bone adds flavor during grilling.
Sirloin delivers good flavor at a lower price point.
While less tender than premium cuts, proper preparation yields excellent results on charcoal grills.
Selecting the Right Thickness
1 to 1.5 inches represents the ideal thickness for charcoal grilling.
This allows proper searing while achieving desired doneness.
Thicker cuts provide better heat distribution.
Steaks under 1 inch cook too quickly on charcoal grills.
They often become overcooked before developing a proper crust. These thin cuts work better for pan cooking.
2-inch or thicker steaks require special techniques.
Reverse searing works well – starting over indirect heat then finishing with high heat.
A meat thermometer becomes essential for accuracy.
The thickness affects cooking time significantly.
Thicker steaks need longer cooking periods and benefit from two-zone setups on charcoal grills.
Quality and Grading of Beef
USDA Prime grade offers the highest marbling and tenderness.
This grade performs exceptionally well on charcoal grills due to superior fat distribution.
Prime beef costs more but delivers restaurant-quality results.
USDA Choice provides good marbling at moderate prices.
Most grocery stores carry Choice grade beef. It grills well when proper techniques are applied.
Dry-aged beef concentrates flavors through moisture loss.
The intensified taste pairs excellently with charcoal smoke.
Expect to pay premium prices for dry-aged cuts.
Fresh color indicates quality beef.
Look for bright red meat without brown spots.
Avoid steaks with excessive liquid in packaging.
Marbling appears as white fat streaks throughout the meat.
Higher marbling grades produce juicier, more flavorful results on charcoal grills.
Essential Tools and Charcoal Grill Setup

Success in charcoal steak grilling depends on selecting the right grill, understanding charcoal types, and having proper tools ready.
The foundation starts with choosing a charcoal grill that fits cooking needs and assembling essential equipment.
Selecting a Charcoal Grill
A quality charcoal grill provides superior heat control and flavor development for steak cooking.
Kettle-style grills offer excellent versatility with their dome shape promoting even heat circulation.
Key features include adjustable bottom vents for airflow control and removable cooking grates for easy coal management.
Grills measuring 22 inches provide adequate cooking space for most home needs.
Kamado-style ceramic grills excel at heat retention but require higher investment.
They maintain consistent temperatures and use less charcoal than traditional models.
Basic barrel grills work for budget-conscious buyers but lack advanced temperature control features.
The cooking area should accommodate multiple steaks without overcrowding.
Types of Charcoal: Lump vs Briquettes
Charcoal briquettes burn consistently and maintain steady temperatures longer than lump charcoal.
They light uniformly and cost less per cooking session.
Briquettes work best for beginners learning temperature control.
They contain binders that create predictable burn rates and heat output.
Lump charcoal burns hotter and imparts cleaner flavor without chemical additives.
It lights faster but burns through more quickly than briquettes.
Natural hardwood lump produces less ash and reaches higher temperatures for superior searing.
The irregular pieces can create hot spots requiring careful coal arrangement.
Many experienced grillers prefer starting with briquettes before experimenting with lump varieties.
 Olivette Organic Charcoal Briquettes are made from recycled olive tree byproducts and USDA certified for quality.
These eco-friendly briquettes are ready to light and provide a long-lasting, consistent heat for perfect BBQs.
At 6.6 lb, they deliver the same grilling power as a 20 lb bag of regular charcoal, making them both efficient and sustainable.
Necessary Grilling Tools
Essential tools ensure safe handling and precise cooking control.
Long-handled tongs prevent burns while providing secure steak grip during flipping.
A chimney starter eliminates lighter fluid taste and lights coals evenly.
Fill it with 7 quarts of charcoal for full-sized kettle grills.
 The Weber Rapidfire Chimney Starter, designed for quick and even charcoal ignition.
Its standard silver design is durable, safe, and easy to use, getting your coals ready in minutes without lighter fluid.
Perfect for every grill master, it ensures a smoky, flavorful BBQ every time.
Instant-read thermometers verify internal steak temperatures accurately.
Digital models respond faster than analog versions.
Heavy-duty grill brushes clean cooking grates before and after use.
 The Kitchen Perfection Safe Wire Grill Brush, featuring an extended handle for effortless cleaning.
This all-in-one kit includes a grill scraper and grill mat, making it easy to remove grease and residue after every BBQ.
Durable and safe, it’s the perfect tool for maintaining a pristine, ready-to-grill surface every time.
Heat-resistant gloves protect hands when adjusting vents or moving coals.
 Protect your hands while grilling with Kitchen Perfection Silicone Smoker Oven Gloves, designed for extreme heat resistance.
Perfect for handling hot food directly from your smoker, grill, fryer, or pit, these waterproof oven mitts keep you safe and comfortable.
The set comes with superior value plus three bonus accessories, making it a must-have for every BBQ enthusiast.
Additional useful items include:
- Grill spatula for delicate cuts
- Spray bottle for flare-up control
- Aluminum drip pans for indirect cooking
- Timer for consistent cooking intervals
Preparing the Steak for Grilling
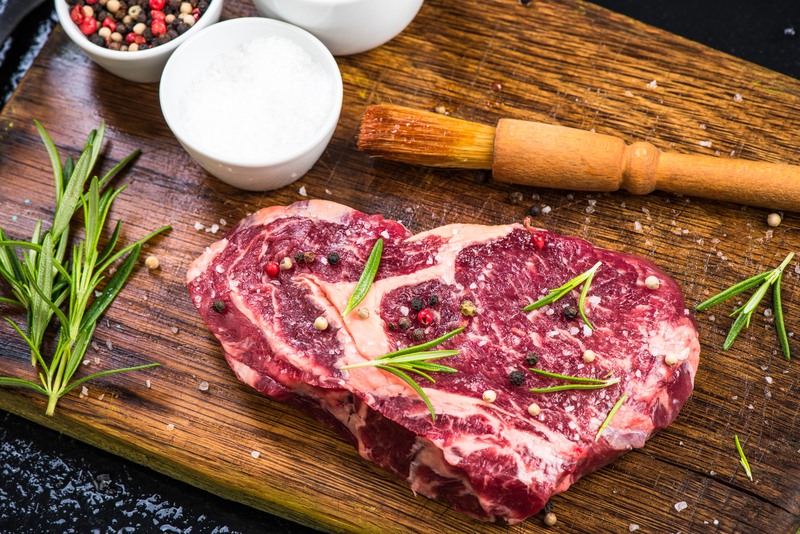
Proper preparation involves seasoning steaks at least 30 minutes before grilling, allowing them to reach room temperature, and applying any marinades or rubs well in advance for maximum flavor penetration.
Proper Seasoning Techniques
Salt draws out moisture initially, then the juices dissolve the salt and get reabsorbed into the meat.
This process requires at least 30 minutes for thin steaks and up to 2 hours for thicker cuts.
Basic seasoning timing:
- 1-inch thick steaks: 30-45 minutes
- 1.5-2 inch thick steaks: 1-2 hours
- Thin cuts (under 1 inch): 15-30 minutes
Coarse kosher salt or sea salt works best because it dissolves more slowly than table salt.
Apply approximately 1 teaspoon of salt per pound of steak.
Black pepper should be added just before grilling since it can burn at high temperatures.
Garlic powder, onion powder, and paprika also work well as pre-grilling seasonings.
The steak surface should look slightly wet when properly salted and ready for grilling.
This indicates the salt has drawn out and reabsorbed the natural juices.
Bringing Steak to Room Temperature
Cold steaks cook unevenly because the exterior reaches high temperatures while the interior remains cold.
Room temperature steaks cook more uniformly from edge to center.
Remove steaks from refrigeration 30-60 minutes before grilling depending on thickness.
Thicker steaks need more time to warm through completely.
Temperature timing guide:
- 1-inch steaks: 30 minutes
- 1.5-inch steaks: 45 minutes
- 2-inch steaks: 60 minutes
The steak should feel cool but not cold when touched. Internal temperature should reach approximately 65-70°F before grilling begins.
Cover steaks loosely with plastic wrap or place them on a covered plate.
This prevents surface drying while allowing temperature equalization.
Applying Marinades and Rubs
Marinades penetrate only 1-2 millimeters into meat surface, so they primarily affect flavor rather than tenderness.
Acidic marinades can break down surface proteins if used too long.
Marinating time limits:
- Tender cuts (ribeye, strip): 2-4 hours maximum
- Tougher cuts (sirloin, flank): 4-24 hours
- Never exceed 24 hours for any cut
Oil-based marinades help prevent sticking and add moisture.
Remove excess marinade before grilling to prevent flare-ups and bitter charring.
Dry rubs create flavorful crusts when combined with high heat.
Apply rubs 1-4 hours before grilling for deeper flavor penetration.
Effective rub ingredients:
- Brown sugar (caramelizes well)
- Smoked paprika (adds color and flavor)
- Cumin and chili powder (for heat)
- Dried herbs like thyme or rosemary
Pat steaks dry after marinating or applying wet rubs.
Excess moisture prevents proper searing and crust formation on the charcoal grill.
Building and Managing Charcoal Fire

Proper fire management creates the foundation for perfectly grilled steak, requiring strategic charcoal placement and consistent heat control.
The right lighting technique and zone setup determine whether your steak develops the ideal crust while maintaining juiciness.
Charcoal Arrangement and Zones
Creating heat zones on a charcoal grill provides temperature control essential for steak cooking.
The two-zone method works best for most grilling situations.
Hot Zone Setup:
- Pile 75% of charcoal on one side of the grill
- Stack coals 2-3 briquettes high for direct high heat
- This zone reaches 450-550°F for searing
Cool Zone Setup:
- Distribute remaining 25% of charcoal thinly on opposite side
- Creates indirect heat around 300-350°F
- Use for finishing thicker steaks without burning
The hot zone provides intense heat for developing the steak’s crust.
The cool zone allows completion of cooking without overcooking the exterior.
For thicker steaks over 1.5 inches, sear on the hot side first.
Move to the cool zone to reach desired internal temperature.
This prevents burnt exteriors with raw centers.
Lighting Without Lighter Fluid
Chemical lighter fluid imparts unwanted flavors to steak.
Natural lighting methods preserve the meat’s taste while ensuring even ignition.
Chimney Starter Method:
- Fill chimney with desired amount of charcoal
- Place crumpled newspaper in bottom compartment
- Light newspaper from multiple points
- Wait 15-20 minutes until coals show white ash coverage
Electric charcoal starters provide another chemical-free option.
Insert the heating element into the charcoal pile and plug in for 8-10 minutes.
Natural Fire Starter Cubes:
- Made from compressed sawdust and wax
- Light 2-3 cubes and nestle in charcoal
- Burn cleanly without chemical residue
Paper towels soaked in cooking oil work as emergency starters.
Never use gasoline, alcohol, or other dangerous accelerants.
Managing Heat for Searing and Cooking
Temperature management determines steak quality.
Proper heat control creates the perfect sear while preventing overcooking.
Optimal Searing Temperature:
- Target 500-550°F for initial sear
- Test by holding hand 5 inches above grate
- Should only tolerate 2-3 seconds at proper heat
Heat Regulation Techniques:
- Increase heat: Open bottom and top vents fully
- Decrease heat: Close vents partially to restrict airflow
- Add fuel: Place new coals on edges, not center
Monitor heat levels throughout cooking.
Adjust vents gradually since temperature changes take 5-10 minutes to stabilize.
Maintaining Cooking Heat:
- Keep temperature steady at 400-450°F after searing
- Add 5-8 fresh coals every 30 minutes for longer sessions
- Position new charcoal away from food to prevent flare-ups
Use the hand test regularly to gauge heat levels.
Move steaks between zones based on their cooking progress rather than fighting temperature swings.
Grilling the Steak to Perfection
The key to exceptional steak lies in mastering heat management and timing.
Understanding when to use direct versus indirect heat, creating the perfect crust, and adjusting cooking times based on thickness ensures consistent results.
Direct vs Indirect Heat Methods
Direct heat cooking places the steak directly over hot coals.
This method works best for steaks under 1 inch thick.
The high heat creates an excellent sear while cooking the interior quickly.
Position coals on one side of the grill for indirect heat zones.
Direct heat typically reaches 450-500°F, perfect for initial searing.
This intense heat caramelizes proteins on the steak’s surface.
Indirect heat involves cooking away from direct flame.
Move coals to create hot and cool zones on the grill.
This two-zone setup allows precise temperature control.
Thick steaks over 1.5 inches benefit from combination cooking.
Start with direct heat for searing, then move to indirect heat to finish.
This prevents burning while ensuring even doneness throughout.
The indirect zone maintains temperatures around 300-350°F.
This gentler heat cooks the steak’s center without overcooking the exterior.
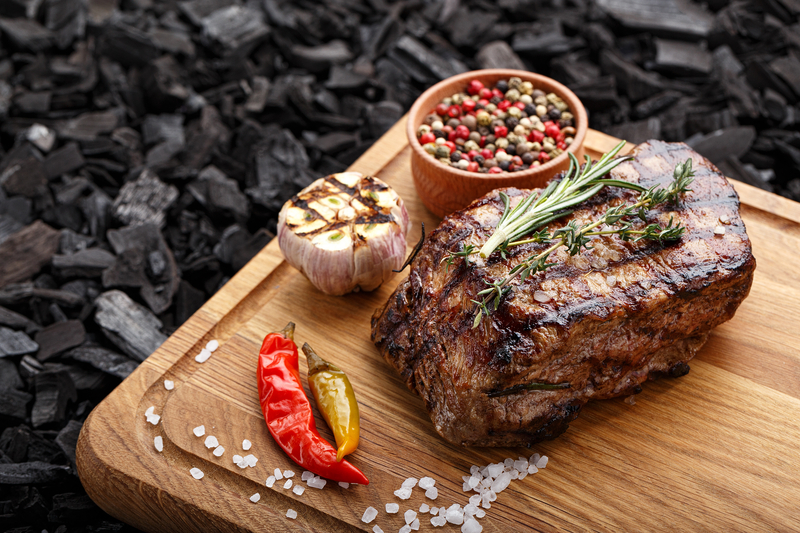
Achieving the Ideal Sear
A proper sear requires extremely hot grates and dry steak surfaces.
Pat steaks completely dry with paper towels before grilling. Moisture prevents proper browning and creates steam instead of sear.
Heat grates to at least 450°F before placing steaks.
Clean grates with a wire brush and oil lightly to prevent sticking.
The steak should sizzle immediately upon contact.
Avoid moving the steak for 3-4 minutes per side.
This allows proteins to develop the Maillard reaction, creating flavor compounds and attractive grill marks.
Press gently with tongs to test doneness without cutting.
The steak firms up as it cooks. Rare steaks feel soft, while well-done steaks feel very firm.
Oil the steak lightly rather than the grates if sticking occurs.
High-quality cuts with good marbling require minimal added fat for proper searing.
Timing for Different Steak Thickness
Cooking times vary significantly based on steak thickness and desired doneness.
A meat thermometer provides the most accurate results for internal temperature monitoring.
 If you’re seeking a high-performance digital meat thermometer, the ThermoMaven Professional Meat Thermometer stands out.
It delivers ultra-fast readings in just 0.5 seconds with NIST-certified accuracy of ±0.5°F.
Its IP67 waterproof rating ensures durability, while the auto-rotating backlit display and lift-to-wake functionality enhance usability.
This thermometer is ideal for grilling, candy making, and precise cooking.
| Thickness | Rare (120-125°F) | Medium-Rare (130-135°F) | Medium (140-145°F) |
|---|---|---|---|
| 1 inch | 3-4 min per side | 4-5 min per side | 5-6 min per side |
| 1.5 inch | 4-5 min per side | 5-6 min per side | 6-7 min per side |
| 2 inch | 5-6 min per side | 6-8 min per side | 8-10 min per side |
Thick steaks require lower heat after initial searing.
Move to indirect heat after achieving proper crust development. This prevents exterior burning while the interior reaches target temperature.
Insert the meat thermometer horizontally into the thickest part.
Avoid touching bone or fat, which can give false readings.
Remove steaks 5°F before target temperature since they continue cooking during rest.
Thin steaks under 3/4 inch cook entirely over direct heat.
These cuts reach doneness quickly and require constant attention to prevent overcooking.
Checking Doneness and Serving
Accurate temperature measurement determines steak quality and safety, while proper resting and slicing techniques preserve juices and maximize tenderness.
The difference between perfectly cooked and overcooked steak often comes down to precise monitoring and handling.
Using a Meat Thermometer Correctly
A meat thermometer provides the most reliable method for determining steak doneness.
Digital instant-read thermometers offer the fastest and most accurate readings.
Insert the thermometer probe into the thickest part of the steak, avoiding fat and bone.
The probe should penetrate at least one inch deep for accurate readings.
Take temperature readings during the indirect cooking phase when the steak reaches approximately 10 degrees below the target temperature.
This allows time to move the steak to direct heat for final searing.
Calibrate the thermometer regularly by testing it in ice water, which should read 32°F.
Clean the probe between uses to prevent cross-contamination.
For thick steaks over 1.5 inches, check multiple spots to ensure even cooking throughout.
Temperature variations of 5-10 degrees between different areas are normal.
Steak Temperatures and Doneness Levels
Different doneness levels require specific internal temperatures for optimal taste and texture.
These temperatures represent the final resting temperature after cooking.
| Doneness Level | Internal Temperature | Center Color | Texture |
|---|---|---|---|
| Rare | 120-125°F | Cool red center | Very tender, soft |
| Medium-rare | 130-135°F | Warm red center | Tender, slightly firm |
| Medium | 140-145°F | Pink center | Firm, some juice |
| Medium-well | 150-155°F | Slight pink center | Firmer, less juice |
| Well-done | 160°F+ | No pink | Firm, minimal juice |
Medium-rare remains the most popular choice as it balances tenderness with safety.
The steak continues cooking 5-10 degrees during resting due to carryover heat.
Remove steaks from the grill when they reach 5 degrees below the target temperature.
This prevents overcooking during the resting period.
Resting and Slicing Techniques
Resting allows juices to redistribute throughout the meat, preventing them from running out when cut.
This step significantly impacts the final texture and moisture content.
Place cooked steaks on a cutting board and tent loosely with foil.
Rest for 5-10 minutes depending on thickness – thicker steaks require longer resting periods.
The internal temperature will continue rising during this time.
Monitor with a meat thermometer to ensure the steak reaches the desired final temperature.
Slice against the grain for maximum tenderness.
Identify the direction of muscle fibers and cut perpendicular to them using a sharp knife.
Cut steaks into strips approximately ¼ to ½ inch thick.
Thinner slices work better for tougher cuts, while premium cuts can handle slightly thicker slices.
Serve immediately after slicing to maintain optimal temperature and prevent further moisture loss.