

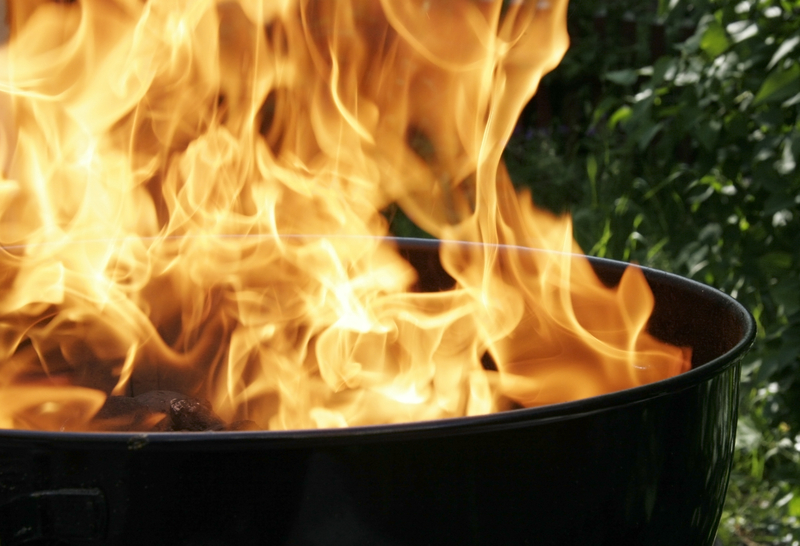
Nothing beats the smoky flavor that comes from cooking over real charcoal, but many people feel nervous about getting their grill started properly.
The best way to light a charcoal grill safely is using a chimney starter with newspaper, which takes about 10-15 minutes and eliminates the need for lighter fluid.
Learning the right technique makes all the difference between a quick, easy start and a frustrating experience with weak flames or dangerous flare-ups.
The process involves more than just throwing charcoal in the grill and hoping for the best.
Proper preparation, the right tools, and safe lighting methods ensure consistent results every time.
This guide covers everything from selecting the right type of charcoal to managing heat levels once the coals are ready.
Whether someone prefers using a chimney starter, lighter fluid, or alternative methods, mastering these techniques leads to better grilling and safer cooking sessions.
Choosing Charcoal for Grilling
 The type of charcoal you select affects burn time, heat output, and flavor.
Lump charcoal burns hotter and faster, while briquettes provide steady, long-lasting heat for extended cooking sessions.
Understanding Lump Charcoal
Lump charcoal consists of 100% natural hardwood with no additives or binders.
It comes from burning wood in low-oxygen environments until only carbon remains.
This type of charcoal lights quickly and reaches high temperatures fast.
It burns hotter than briquettes, making it ideal for searing steaks or cooking foods that need intense heat.
Key benefits of lump charcoal:
- Burns cleaner with less ash
- Lights faster than briquettes
- Reaches higher temperatures
- Produces strong smoky flavor
- No chemical additives
Lump charcoal pieces vary in size and shape.
Larger pieces burn longer while smaller pieces ignite easier but burn out faster.
The irregular shapes can create uneven heat zones in the grill.
Some grillers prefer this for cooking different foods at varying temperatures.
 FOGO Premium Oak Restaurant Grade Lump Charcoal is an all-natural hardwood charcoal made from dense Central American hardwoods with no chemicals or fillers.
It comes in a mix of medium (2–3 inch) and small (1–2 inch) pieces, designed to light quickly, burn very hot, and produce a clean wood-smoked flavor.
Strengths:
- Burns hot, great for searing.
- Clean, natural hardwood flavor.
- Less ash and cleaner burn than cheap charcoals.
- Sustainably sourced.
- Works especially well in ceramic/kamado grills.
Weaknesses:
- Non-uniform lump sizes can cause uneven burning.
- Some popping/sparking in open grills.
- Harder to hold steady low temps for long smoking.
- More expensive than standard briquettes.
Best for: Everyday grilling and high-heat cooking.
For long low-and-slow sessions, FOGO’s “Super Premium/Gold” larger lump version is often preferred.
Tips: Arrange lumps for even burn, light with a chimney/torch, manage airflow carefully, clean ash between uses, and keep stored dry.
Overall, this is a premium lump charcoal that offers excellent heat and flavor, with a few quirks typical of natural lump charcoals.
Overview of Charcoal Briquettes
Charcoal briquettes are manufactured products made from compressed charcoal dust, sawdust, and binding agents.
They form uniform pillow shapes that stack easily.
Most briquettes contain additives like starch or limestone to help them hold together.
Some include lighter fluid for easier ignition.
Briquette characteristics:
- Uniform size and shape
- Burn longer than lump charcoal
- Provide consistent heat
- Cost less than lump charcoal
- Create more ash
Briquettes take longer to light but maintain steady temperatures once burning.
They work well for foods that need longer cooking times like whole chickens or pork shoulders.
The consistent shape allows for even heat distribution across the grill surface.
This makes temperature control easier for beginners.
") Kingsford Original Charcoal Briquettes is a classic charcoal briquette blend designed for grilling.
Kingsford Original Charcoal Briquettes is a classic charcoal briquette blend designed for grilling.
It’s made from wood char, mineral char, binding starch, limestone, and other ingredients, pressed into uniform briquettes.
Strengths:
-
Burns steadily and reliably for many hours, ideal for long grilling sessions.
-
Easy to light and manage on most charcoal grills.
-
Produces consistent heat and a predictable cooking environment.
-
Widely available and relatively affordable compared to premium lump charcoals.
Weaknesses / Trade‑offs:
-
Leaves more ash and filler residue compared to pure lump hardwood charcoals.
-
Contains binders and additives, so it’s not “pure hardwood.”
-
Slower to reach full cooking temperature compared to some premium lump charcoals.
-
Produces less wood-smoke flavor, giving a more neutral charcoal taste.
Best for: General grilling use on standard charcoal grills, where consistency, affordability, and ease of use matter more than premium wood flavor.
Tips:
-
Let briquettes fully ash over (turn gray) before placing food on them.
-
Arrange briquettes evenly under the cooking area to avoid hot/cold spots.
-
Clean out ash before each use to maintain airflow.
-
Use a chimney starter or other ignition method for even lightin
Comparing Lump Charcoal and Briquettes
| Feature | Lump Charcoal | Charcoal Briquettes |
|---|---|---|
| Burn Time | Shorter, burns faster | Longer, steady burn |
| Temperature | Higher heat output | Moderate, consistent heat |
| Lighting Speed | Ignites quickly | Takes longer to light |
| Ash Production | Less ash | More ash residue |
| Cost | More expensive | Budget-friendly |
| Shape | Irregular pieces | Uniform pillows |
Choose lump charcoal when:
- Grilling steaks or burgers at high heat
- Wanting maximum smoky flavor
- Cooking for shorter periods
- Preferring natural products
Select briquettes for:
- Long cooking sessions
- Consistent temperature needs
- Budget-conscious grilling
- Beginner-friendly heat control
Both types work well for different grilling styles.
Many experienced grillers keep both on hand for various cooking situations.
Essential Tools for Lighting a Charcoal Grill
 The right tools make lighting charcoal faster and safer.
Chimney starters use newspaper instead of chemicals, electric starters provide consistent heat, and various firestarter products offer different ways to get coals burning.
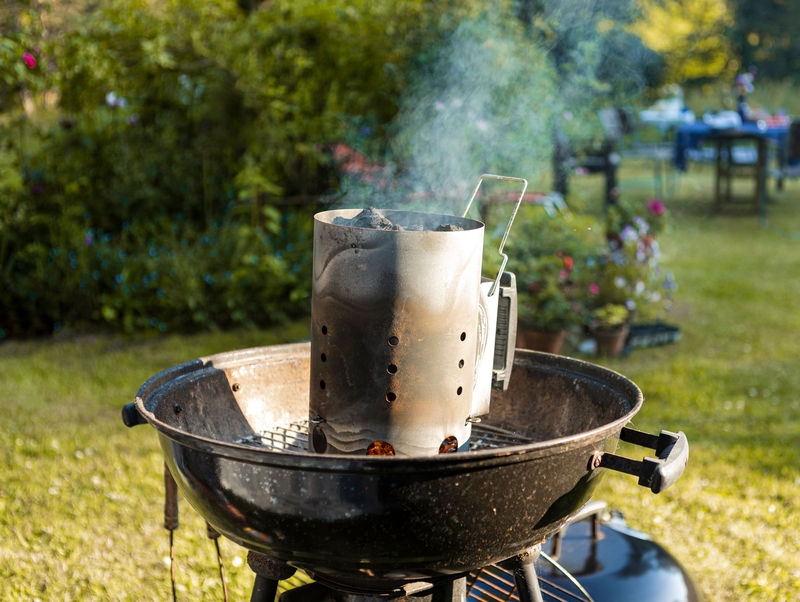
Chimney Starter Basics
A chimney starter is a metal cylinder that lights charcoal without lighter fluid.
The device has two sections separated by a grate.
Users place crumpled newspaper in the bottom section.
They fill the top with charcoal briquettes or lump charcoal.
When lit, the newspaper burns and heats the charcoal from below.
The chimney design creates airflow that spreads the fire upward.
Key benefits include:
- No chemical taste in food
- Even lighting across all coals
- Ready in 10-15 minutes
- Reusable for hundreds of uses
A charcoal chimney costs $15-30 and works with any grill size.
The tool eliminates the need for lighter fluid completely.
Most models hold 4-6 pounds of charcoal.
This amount works well for medium grills and standard cooking sessions.
 The Kingsford Heavy Duty Deluxe Charcoal Chimney Starter is a must-have tool for any backyard griller.
Its compact, silver design makes it easy to handle and store, while still holding enough charcoal for a full grilling session.
Simply fill it with briquettes or lump charcoal, light from the bottom, and in minutes you have evenly hot coals ready for cooking.
The heavy-duty construction ensures durability and long-term use, even with frequent grilling.
Perfect for anyone who wants a faster, cleaner, and more reliable way to start their BBQ without lighter fluid.
Electric Charcoal Starter Overview
An electric charcoal starter uses heating elements to ignite charcoal.
The device looks like a large metal loop with a handle and power cord.
Users place the electric starter directly on charcoal in the grill.
They plug it into an outlet and wait 8-10 minutes for coals to catch fire.
The heating element gets red hot and transfers heat to surrounding charcoal.
Once coals start glowing, users remove the electric starter.
Important features:
- 600-1000 watt heating elements
- Heat-resistant handles
- 6-foot power cords
- Works in windy conditions
Electric charcoal starters cost $20-40.
They need an electrical outlet within cord reach of the grill.
These tools work well for people who grill frequently.
The startup process requires no matches or newspaper.
 The 650W Electric Charcoal Starter is a fast and convenient way to ignite your BBQ, fireplace, or campfire coals.
Its durable stainless steel 304 heating element quickly gets briquettes or lump charcoal glowing without the need for lighter fluid.
The 25-inch power cord provides flexibility and safe distance from heat while starting your fire.
Compact and easy to use, it’s perfect for both backyard grills and outdoor adventures.
A reliable tool for anyone who wants quick, consistent heat every time.
Firestarter Products Explained
Firestarter products help ignite charcoal without lighter fluid.
These items come in different forms and burn at high temperatures.
Paraffin fire starters are small cubes made from wax and wood fibers.
Users place 2-3 cubes under charcoal and light them with a match.
They burn for 8-10 minutes.
 Superior Trading Fire Starter Pods come in a convenient plastic bucket with 50 extra-large pods.
They ignite quickly and burn 15–20 minutes, perfect for BBQs, campfires, grills, or wood stoves.
Made in the USA, these pods are easy to use and mess-free.
A simple, reliable way to start fires every time.
Fatwood sticks come from pine tree resin.
The natural oils burn hot and catch charcoal quickly. Users need 3-4 sticks per lighting session.
") The 40lb Fatwood Fire Starter Sticks are 100% natural and perfect for grills, campfires, wood stoves, and bonfires.
The 40lb Fatwood Fire Starter Sticks are 100% natural and perfect for grills, campfires, wood stoves, and bonfires.
Just two sticks are enough to start a fire, even in all weather conditions.
Made for easy, reliable ignition, they’re ideal for outdoor and indoor use.
A natural, hassle-free fire-starting solution.
Compressed sawdust blocks light easily and burn for 15-20 minutes.
They work well for large amounts of charcoal.
All firestarter products avoid the chemical taste that lighter fluid can leave on food.
They cost $5-15 per package and store safely in dry areas.
 The Fire Starter Cubes, 160 pcs are natural, waterproof, and odorless squares that make lighting fires effortless.
Perfect for BBQs, campfires, wood stoves, fireplaces, and outdoor fire pits. Each cube ignites quickly and reliably, even in damp conditions.
Compact and easy to store, they’re ideal for camping and backyard use.
A convenient, mess-free fire-starting solution for any outdoor adventure.
How to Light a Charcoal Grill: Step-by-Step Methods
 There are four main ways to get charcoal burning: chimney starters, electric starters, lighter fluid, and natural methods.
Each technique has its own benefits and works best in different situations.
Lighting Charcoal with a Chimney Starter
A chimney starter is the most reliable way to light charcoal without chemicals.
This metal cylinder creates airflow that ignites coals evenly.
First, fill the chimney with charcoal.
Add about 75-100 briquettes or enough lump charcoal to fill the chamber.
Place crumpled newspaper or paper towels in the bottom compartment.
Set the chimney on the grill grate.
Light the paper through the holes at the bottom using matches or a lighter.
The flames will spread upward through the charcoal.
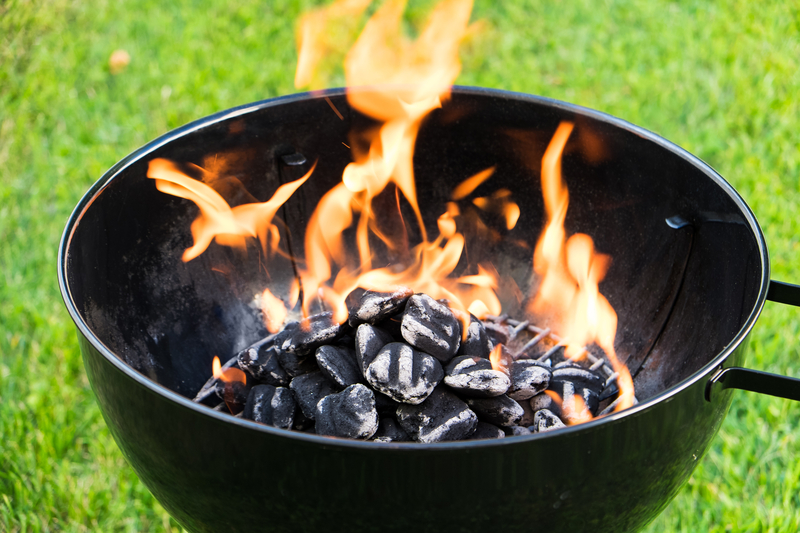
Wait 15-20 minutes for the coals to heat up.
The charcoal is ready when flames appear at the top and the pieces turn gray-white with ash.
Carefully pour the hot coals into the grill using heat-proof gloves.
Benefits:
- No chemical taste
- Even heating
- Safe and controlled
How to Use an Electric Starter
Electric starters heat charcoal using a heating element powered by electricity.
This method works well when an outlet is nearby.
Place the electric starter in the center of a charcoal pile.
Arrange briquettes or lump charcoal around the heating element in a small mound.
Make sure the coals touch the metal coil.
Plug the starter into an electrical outlet.
The heating element will glow red and begin heating the surrounding charcoal.
Keep the starter in place for 10-15 minutes.
Remove the electric starter once the charcoal starts glowing.
Use tongs or the starter’s handle to lift it out carefully.
The heated coals will spread the fire to nearby pieces.
Wait another 10-15 minutes for all coals to ash over.
Add more charcoal if needed and arrange for cooking zones.
Lighting Charcoal with Lighter Fluid
Lighter fluid is a common method, but it requires careful handling to avoid flare-ups and chemical flavors.
Arrange charcoal in a pyramid shape in the center of the grill.
This allows air to flow between pieces. Use enough coals to cover the cooking area plus extras.
Apply lighter fluid evenly over the charcoal.
Use about 1/4 cup for a standard load.
Never add more fluid after lighting – this causes dangerous flare-ups.
Wait 2-3 minutes before lighting.
This lets the fluid soak into the charcoal properly.
Light the pile in several spots using long matches or a long lighter.
Let the flames burn for 10-15 minutes.
The charcoal is ready when covered with white ash and no flames remain.
This ensures the chemical taste burns off completely.
Natural and Alternative Lighting Techniques
Several chemical-free methods can start charcoal fires using common materials.
Fire starters made from wax and wood shavings work like small logs.
Place 2-3 cubes under a charcoal pile and light them with matches.
They burn for 8-10 minutes and ignite the coals above.
Newspaper method uses tightly rolled paper as kindling.
Roll newspaper into tight logs and place under charcoal.
Light the paper and add small wood pieces if needed.
Wood shavings from untreated lumber create good kindling.
Pile shavings under charcoal and light with matches.
Add small twigs or wood chips to keep flames going.
These methods take longer than other techniques but avoid chemicals completely.
They work best with dry charcoal and good airflow.
Preparing and Arranging the Charcoal
 Getting the charcoal ready and arranged properly sets the foundation for successful grilling.
The right setup determines heat zones, cooking time, and how evenly food will cook.
Arranging Charcoal for Direct and Indirect Heat
Direct heat cooking places food right over the coals.
This method works best for foods that cook quickly like burgers, steaks, and vegetables.
For direct heat, arrange the charcoal in a single, even layer across the bottom of the grill.
The coals should be spread out uniformly with small gaps between pieces.
Indirect heat creates zones with different temperatures.
This setup allows for slow cooking and prevents burning of thicker cuts of meat.
To create indirect heat zones, push all the charcoal to one side of the grill.
This creates a hot zone and a cooler zone for different cooking needs.
Two-Zone Setup:
- Hot zone: All charcoal piled on one side
- Cool zone: Empty side with no charcoal underneath
Three-Zone Setup:
- Hot zone: Dense charcoal pile on one side
- Medium zone: Thinner layer of charcoal in middle
- Cool zone: No charcoal on the opposite side
The two-zone method works for most grilling needs.
The three-zone setup gives more control for complex cooking sessions.
How Much Charcoal to Use
The amount of charcoal depends on grill size, cooking time, and food type.
Too little charcoal creates weak heat that fades quickly.
For a standard 22-inch charcoal grill, use about 30 briquettes for quick cooking jobs.
This amount provides medium heat for 30-45 minutes.
For longer cooking sessions, start with 50-60 briquettes.
This creates higher initial heat that lasts 60-90 minutes.
Charcoal Guidelines by Cooking Method:
| Cooking Method | Briquettes Needed | Heat Level | Cooking Time |
|---|---|---|---|
| Quick grilling | 25-30 | Medium | 30-45 minutes |
| Standard grilling | 40-50 | Medium-high | 45-75 minutes |
| Long cooking | 60+ | High | 90+ minutes |
Lump charcoal burns hotter and faster than briquettes.
Use about 25% less lump charcoal than the amounts listed above.
Weather affects charcoal needs too.
Cold or windy conditions require 10-15 extra briquettes to maintain proper heat.
Positioning Firestarters Efficiently
Firestarters help charcoal catch fire evenly and quickly.
Proper placement determines how well the fire spreads through the charcoal pile.
For pyramid arrangements, place 2-3 firestarter cubes at the base of the pile.
The cubes should touch several pieces of charcoal directly.
When using lighter fluid, apply it to the outer edges of the charcoal first.
Then add fluid to the center areas, creating multiple ignition points.
Natural firestarters like newspaper work best when crumpled loosely.
Tight balls of paper burn too quickly before igniting the charcoal.
Firestarter Placement Tips:
- Space firestarters 4-6 inches apart
- Ensure each starter touches multiple charcoal pieces
- Place starters where air can flow around them
- Avoid putting starters in the center of dense piles
Electric starters need direct contact with several charcoal pieces.
Nestle the heating element between briquettes rather than placing it on top.
The goal is creating multiple ignition points that spread fire evenly.
This prevents hot spots and ensures consistent heat across the cooking surface.
Managing Temperature and Grill Safety
 Temperature control and safety go hand in hand when using charcoal grills.
Proper airflow management helps maintain steady heat while recognizing when coals are ready prevents accidents and ensures even cooking.
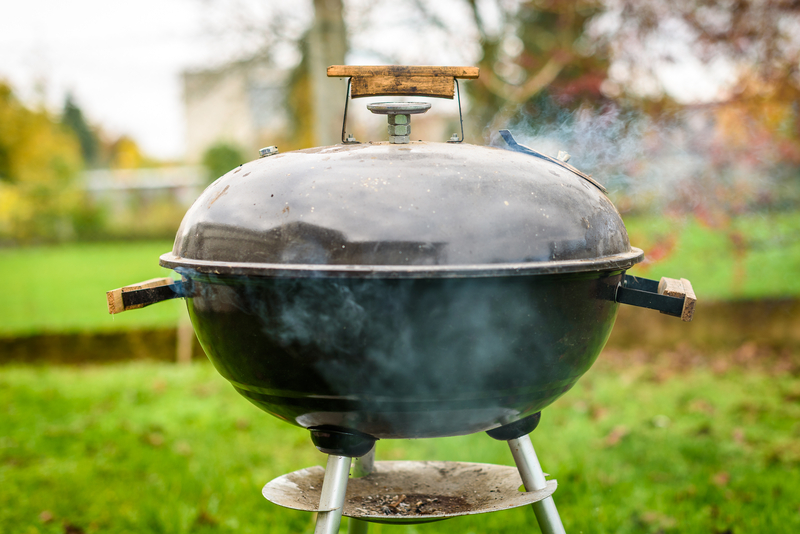
Ventilation and Airflow Control
The bottom and top vents on charcoal grills control oxygen flow to the coals.
More oxygen creates hotter fires, while less oxygen reduces heat.
Open the bottom vents completely when lighting charcoal.
This allows maximum airflow to help coals catch fire quickly.
For high heat cooking:
- Keep bottom vents fully open
- Open top vents halfway to three-quarters
For medium heat:
- Close bottom vents to half open
- Keep top vents half open
For low heat:
- Close bottom vents to quarter open
- Keep top vents quarter to half open
The top vents also control how much heat stays in the grill.
Closing them traps more heat inside.
Never close both vents completely while cooking, as this will put out the fire.
Adjust vents gradually and wait 5-10 minutes to see temperature changes.
Quick adjustments can cause temperature swings that are hard to control.
Signs Your Charcoal Is Ready
Charcoal needs time to burn properly before cooking begins.
Using coals too early can create uneven heat and add bitter flavors to food.
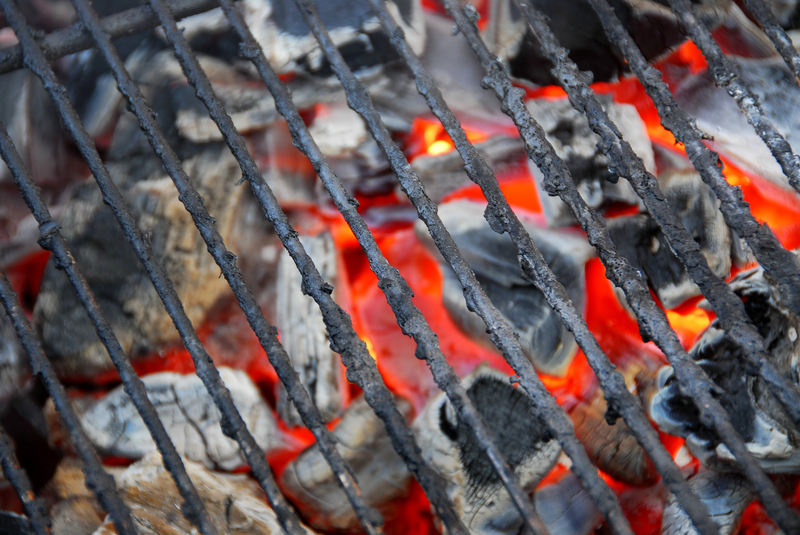
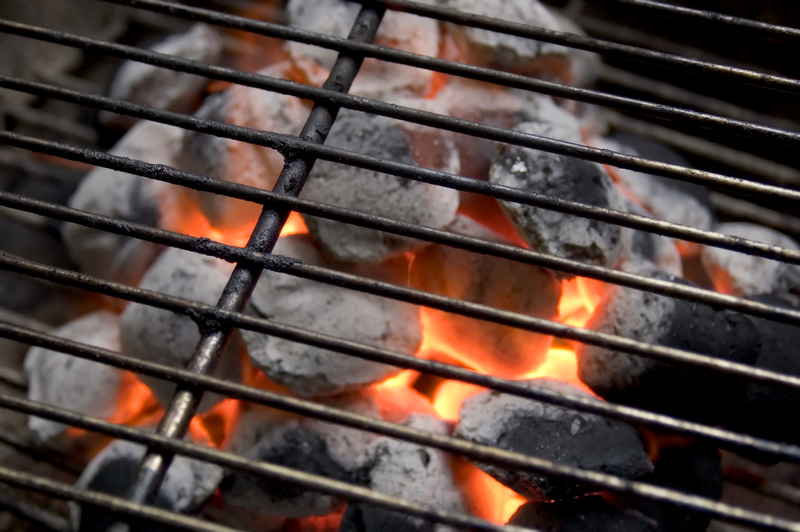
Ready coals show these signs:
- Gray-white ash covers the surface
- No black spots remain visible
- Coals glow red-orange underneath the ash
- Heat feels steady when holding a hand 5 inches above
This process takes 15-20 minutes after lighting.
Rushing this step leads to hot and cold spots on the grill.
Hold a hand 5 inches above the grill grate to test heat levels.
High heat allows only 2-3 seconds before pulling away.
Medium heat allows 4-5 seconds. Low heat allows 6-8 seconds.
Safe Handling and Accident Prevention
Never add lighter fluid to hot or burning coals.
The fluid will create dangerous flare-ups that can cause serious burns.
Keep a spray bottle of water nearby for small flare-ups.
Use baking soda for grease fires, as water can spread burning grease.
Essential safety practices:
- Use long-handled tools only
- Wear heat-resistant gloves
- Keep the grill on level ground
- Position away from buildings and trees
- Never leave burning coals unattended
Hot coals stay dangerous for hours after cooking.
Always dispose of ashes in a metal container with a tight lid.
Store the container away from anything that can burn.
Check that coals are completely cold before disposal.
Pour water over ashes and stir to ensure no hot spots remain.
Grilling and Smoking on a Charcoal Grill
 Once the coals are ready, cooks can start grilling food or set up their grill for smoking.
Both methods require different coal arrangements and temperature control to get the best results.
Starting to Cook After Lighting
Cooks should wait until coals turn white on the surface before adding food.
This takes about 20 minutes after lighting the charcoal.
The cook needs to spread the coals based on what they plan to make.
Direct heat works best for burgers, steaks, and hot dogs.
They should spread coals evenly across the bottom of the grill.
Indirect heat works better for larger items like whole chickens or roasts.
The cook should push coals to one side of the grill and place food on the other side.
Temperature matters for good results.
Hot coals work for searing meat quickly.
Medium heat cooks chicken and pork safely.
Lower heat prevents burning on thicker cuts.
The cook should replace the cooking grate and close the lid for 5 minutes before adding food.
This heats up the grate and makes food less likely to stick.
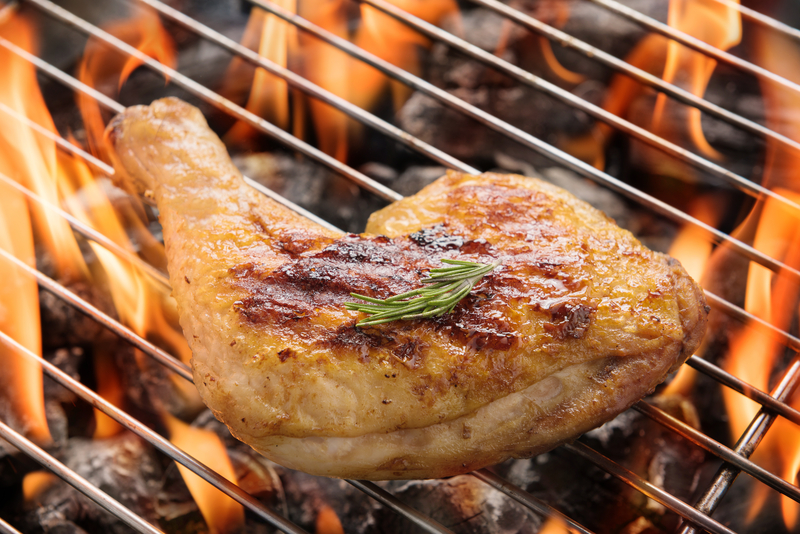
Smoking Chicken and Other Foods
Smoking requires lower temperatures and longer cooking times than regular grilling.
The cook needs to set up a two-zone fire with coals on one side only.
Smoked chicken takes 2-4 hours at 225-250°F.
The cook should place chicken on the side without coals.
They need to add wood chips to create smoke flavor.
Popular wood chips include:
- Apple for mild, sweet flavor
- Hickory for strong, bacon-like taste
- Cherry for mild flavor and red color
The cook should soak wood chips in water for 30 minutes before adding them to hot coals.
They need to add fresh chips every hour to keep smoke going.
Maintaining steady temperature is key for smoking.
The cook can control heat by opening or closing air vents.
More air makes coals burn hotter. Less air cools them down.