

This content has been archived. It may no longer be relevant

Charcoal grilling doesn’t have to be a slow, time-consuming process that keeps you waiting around for hours.
Many home cooks assume that choosing charcoal means sacrificing speed and convenience, but this simply isn’t true when you know the right techniques and tools.
The key to faster charcoal grilling lies in proper preparation, efficient lighting methods, and strategic heat management that can cut cooking times significantly while still delivering that authentic smoky flavor.
Modern charcoal grilling techniques allow cooks to achieve restaurant-quality results without the lengthy setup and cooking times traditionally associated with charcoal.
This approach combines the best aspects of charcoal cooking with practical strategies that work for busy schedules.
From selecting the right equipment and lighting techniques to mastering temperature zones and streamlining cleanup, these methods transform charcoal grilling into a quick and efficient cooking option that rivals gas grills in convenience while maintaining superior flavor.
Essential Tools and Charcoal Selection

Successful charcoal grilling requires specific tools and the right fuel to achieve consistent results.
Lump charcoal typically outperforms briquettes for heat output and flavor, while core tools like chimney starters, long tongs, and reliable thermometers make the grilling process safer and more efficient.
Choosing the Right Charcoal
Lump charcoal burns hotter and cleaner than briquettes, producing less ash and no chemical additives.
It lights faster and reaches cooking temperature within 15-20 minutes using a chimney starter.
 When it comes to grilling and smoking, fuel is just as important as the food you’re cooking.
That’s why so many pitmasters and backyard grillers swear by Jealous Devil Lump Charcoal.
Unlike standard briquettes, Jealous Devil is made from 100% natural South American hardwoods with absolutely no chemicals, fillers, or scrap wood.
This means you get a pure, clean burn every time — and a flavor that enhances your food rather than overpowering it.
Briquettes offer more consistent burn time and uniform heat distribution.
They cost less than lump charcoal but may contain binding agents that can affect flavor.
Most experienced grillers prefer lump charcoal made from hardwoods like oak or hickory.
The irregular shapes create better airflow, allowing for more precise temperature control.
While lump charcoal gets a lot of attention for its purity and high heat, charcoal briquettes remain the go-to choice for many backyard grillers — and for good reason.
 A great example is the Kingsford Original Charcoal Briquettes.
This long-trusted brand is widely available and loved for its reliability. Each briquette is designed to burn evenly, making temperature control much easier.
Charcoal selection criteria:
- No additives or lighter fluid pre-treatment
- Moderate variation in piece size (not all dust or all large chunks)
- Hardwood species for clean burning
- Proper storage in dry conditions
One bag of quality lump charcoal typically provides enough fuel for 2-3 grilling sessions on a standard kettle grill.
Must-Have Grilling Tools
Chimney starter eliminates the need for lighter fluid and ignites charcoal faster than traditional methods.
A 6-quart capacity model holds enough charcoal to cover most grill surfaces completely.
") This stainless steel chimney starter by Rösle allows you to light briquettes or charcoal evenly and quickly, thanks to its open–vent design.
This stainless steel chimney starter by Rösle allows you to light briquettes or charcoal evenly and quickly, thanks to its open–vent design.
It features a spark guard, a heat-shielded handle, and a secondary grip to safely pour glowing coals into your grill.
Long-handled tongs (16+ inches) keep hands away from heat while providing precise control.
Heavy-duty stainless steel construction prevents bending and overheating.
 These stainless steel grill tongs are rated to resist heat up to 600 °F, giving you safe, confident grip even near hot coals or searing meats.
The set includes both 17″ and 12″ long tongs with locking handles — perfect for everything from precise plating to flipping on the barbecue.
Instant-read thermometer ensures proper cooking temperatures without guesswork.
Digital models provide readings within 2-3 seconds for quick temperature checks.
 This digital thermometer delivers ultra-fast readings in just 0.5 seconds with NIST-certified accuracy of ±0.5°F, ensuring precise cooking results.
Its IP67 waterproof rating and auto-rotating backlit display make it ideal for both indoor and outdoor cooking, including BBQs and candy making.
Essential tool checklist:
- Weber chimney starter or equivalent
- 16-inch locking tongs with scalloped grips
- Flexible fish spatula for delicate foods
- Digital probe thermometer for monitoring
- Grill brush with sturdy bristles
- Heat-resistant gloves rated to 900°F+
Quarter sheet pans work perfectly for transporting seasoned meat to the grill and back.
Safety Equipment and Setup
Heat-resistant gloves protect hands when handling hot grates or moving charcoal.
Look for models rated to at least 900°F with flexible fingers for dexterity.
Proper ventilation prevents carbon monoxide buildup.
Never use charcoal grills indoors or in enclosed spaces like garages or covered patios.
Fire safety tools include a spray bottle for flare-ups and a metal bucket for ash disposal.
Keep a fire extinguisher nearby when grilling.
Setup requirements:
- Level, stable surface away from structures
- Clear 10-foot radius from flammable materials
- Water source or hose within reach
- Adequate lighting for evening grilling
Position the grill where prevailing winds won’t blow smoke toward seating areas.
Check local fire restrictions before lighting charcoal during dry conditions.
Store charcoal in waterproof containers to prevent moisture absorption, which makes lighting difficult.
Fast and Efficient Charcoal Lighting Techniques

A chimney starter offers the most reliable method for quick ignition, while strategic arrangements and alternative tools can further reduce lighting time.
Proper technique eliminates the need for lighter fluid and creates consistent heat distribution.
Using a Chimney Starter
A chimney starter delivers hot coals in 15-20 minutes without chemicals.
The cylindrical metal design creates a natural draft that accelerates burning.
Fill the chimney with charcoal, leaving about an inch of space at the top.
Place crumpled newspaper or fire starter cubes in the bottom chamber.
Set the loaded chimney on the lower grate of the grill.
Light the newspaper or cubes from multiple spots underneath.
The flames will ignite the bottom coals first.
Wait until the top coals develop white ash and glow red.
This indicates even heating throughout the chimney.
Pour the hot coals carefully into the grill base.
Chimney Starter Benefits:
- No chemical taste
- Even heat distribution
- Consistent results
- Wind-resistant design
Lump charcoal lights faster than briquettes in a chimney.
Store charcoal in a dry location to prevent moisture absorption, which slows ignition.
The Minion Method
The Minion Method creates long-burning heat by arranging unlit coals around a small pile of hot coals.
This technique works especially well for extended cooking sessions.
Place unlit charcoal around the perimeter of the grill.
Create a small depression in the center.
Add 15-20 hot coals from a chimney starter to the center depression.
The lit coals gradually ignite surrounding unlit charcoal.
This creates steady temperatures for 6-8 hours without adding more fuel.
Temperature Control Tips:
- More lit coals = higher initial heat
- Closer arrangement = faster spread
- Open vents for higher temperatures
- Close vents to reduce airflow
This method works best with briquettes due to their uniform size and burn rate.
Snake arrangements along the grill perimeter extend burn time further.
Quick Lighting Alternatives
Electric starters heat coals directly through metal heating elements.
Plug the device into a power outlet and bury it under a pile of charcoal for 8-10 minutes.
Remove the electric starter once coals begin glowing.
The heated coals will ignite surrounding charcoal within minutes.
This method works well in windy conditions.
Alternative Methods:
- Wax fire starters: Burn cleanly for 10-12 minutes
- Alcohol-soaked paper: Quick ignition without chemical residue
- Vegetable oil: Light newspaper soaked in cooking oil
- Fatwood: Natural resin-rich wood strips
Avoid using gasoline, kerosene, or other petroleum products.
These create dangerous flare-ups and contaminate food with toxic residues.
Hair dryers or leaf blowers can accelerate ignition by increasing airflow.
Use short bursts to avoid scattering hot coals or ash.
Avoiding Common Mistakes
Overcrowding charcoal restricts airflow and slows ignition.
Leave gaps between coals for oxygen circulation.
Stack coals loosely rather than packing them tightly.
Wet charcoal refuses to light properly and produces excessive smoke.
Check storage containers for moisture and replace compromised charcoal.
Common Lighting Errors:
- Using lighter fluid (creates chemical taste)
- Cooking over unlit coals (uneven heat)
- Insufficient ventilation (poor oxygen flow)
- Impatient coal arrangement (interrupts heating process)
Wait for coals to ash over completely before cooking.
Gray ash indicates proper temperature and even heat distribution.
Red-hot coals without ash create hot spots that burn food.
Close the grill lid after arranging coals to build heat quickly.
Open bottom vents fully during lighting to maximize airflow.
Heat Management and Temperature Control

Effective heat management transforms charcoal grilling from guesswork into precision cooking.
Strategic charcoal placement creates distinct temperature zones, while proper vent control maintains steady temperatures throughout the cooking process.
Arranging Charcoal for Direct and Indirect Heat
The two-zone setup forms the foundation of charcoal heat management.
Pile all lit coals on one side of the grill for direct heat, leaving the opposite side empty for indirect cooking.
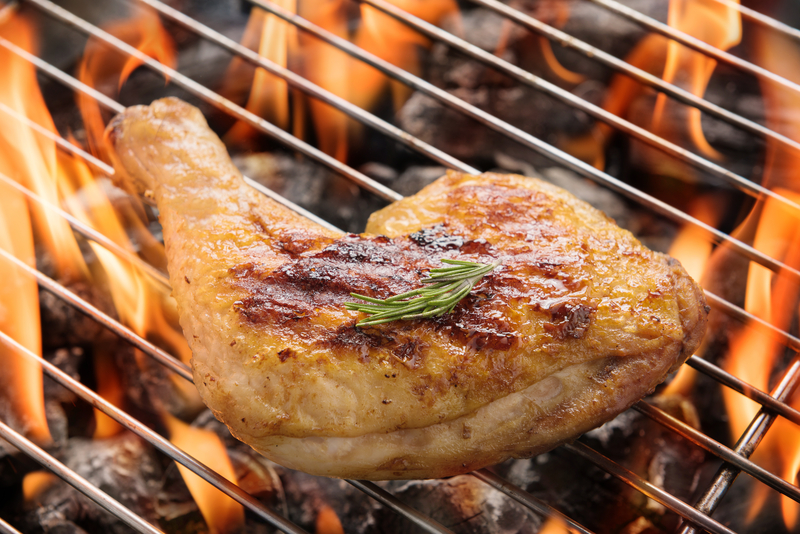
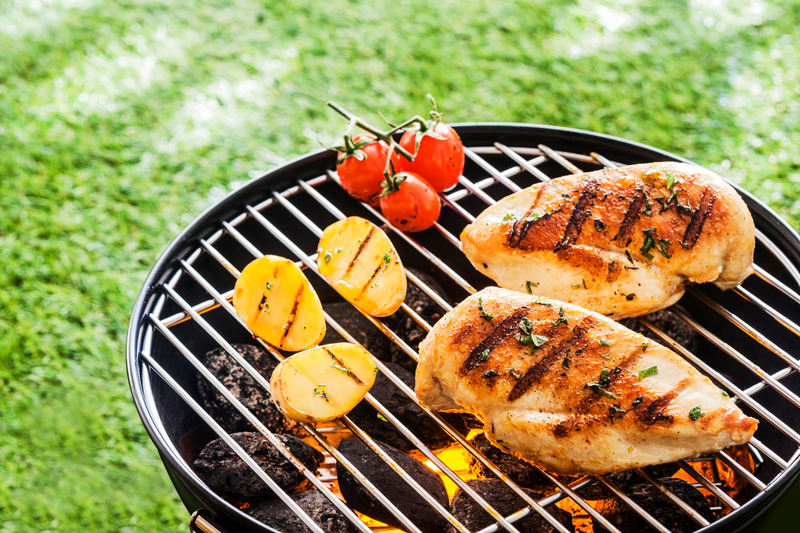
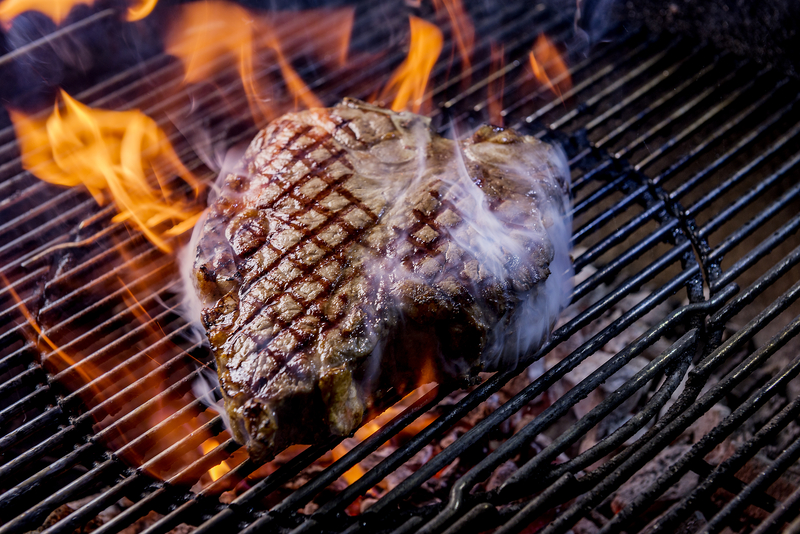
Direct heat zones reach 450-500°F and excel at searing steaks, burgers, and vegetables.
This concentrated heat creates the Maillard reaction that produces appealing grill marks and enhanced flavors.
The indirect zone maintains temperatures between 250-350°F.
This cooler area allows thick cuts like chicken breasts, pork chops, and roasts to cook through without burning the exterior.
Advanced arrangement techniques:
- Three-zone setup: Place coals on both sides with an empty center for maximum flexibility
- Sloped arrangement: Create a temperature gradient by spreading coals from thick to thin
- Ring method: Form a coal ring around the perimeter for even indirect heat distribution
Food can move between zones as needed.
Start proteins in the direct zone for searing, then transfer to indirect heat to finish cooking safely.
Using Vents for Precise Temperature
Bottom and top vents control airflow, which directly regulates charcoal temperature.
More oxygen feeds the fire and increases heat, while restricted airflow lowers temperatures.
The bottom vent acts as the primary temperature control.
Open it fully for maximum heat output above 400°F.
Close it halfway for medium temperatures around 300-350°F.
Nearly closed positions maintain low temperatures for smoking applications.
Top vents should remain mostly open during cooking.
They allow hot air and smoke to escape while preventing dangerous pressure buildup inside the grill.
Vent adjustment guidelines:
| Temperature Target | Bottom Vent | Top Vent |
|---|---|---|
| High (450°F+) | Fully open | Fully open |
| Medium (300-400°F) | Half open | 3/4 open |
| Low (225-275°F) | 1/4 open | Half open |
Make small adjustments and wait 10-15 minutes before checking results.
Vents respond gradually, and overcorrection leads to temperature swings that affect cooking quality.
Monitoring and Adjusting the Fire
Temperature monitoring prevents guesswork and ensures consistent results.
Built-in grill thermometers measure dome temperature, but probe thermometers provide more accurate readings at grate level.
Place the thermometer probe at cooking surface height for true cooking temperature.
Dome temperatures often read 50-75°F higher than actual cooking zones.
Signs the fire needs attention:
- Temperature drops below target range
- Flames die down significantly
- Ash buildup restricts airflow
- Cooking takes longer than expected
Add fresh charcoal before temperatures drop too low.
Light new coals in a chimney starter, then add them to maintain heat levels during extended cooking sessions.
Clean ash from vents periodically during long cooks.
Accumulated ash blocks airflow and reduces temperature control effectiveness.
Cooking with the lid closed creates oven-like conditions and maintains steady temperatures.
Frequent lid opening releases heat and extends cooking times unnecessarily.
Optimizing Cooking Methods for Speed and Quality
Achieving both speed and quality in charcoal grilling requires strategic temperature management, proper preheating techniques, and advanced searing methods.
Mastering these core elements allows cooks to reduce cooking time while maintaining exceptional flavor and texture.
Preheating the Grill Properly
Proper preheating forms the foundation of efficient charcoal grilling.
Most grillers rush this step, leading to longer cooking times and uneven results.
The ideal preheating period ranges from 15-20 minutes for most charcoal grills.
During this time, the grates reach optimal searing temperature and the charcoal develops a consistent heat bed.
Temperature zones should be established during preheating.
Cooks should pile coals on one side for direct heat (450-500°F) while leaving the opposite side with fewer coals for indirect cooking (350-375°F).
Lump charcoal heats faster than briquettes, reducing preheating time by approximately 5 minutes.
However, briquettes provide more consistent temperatures throughout the cooking process.
Opening both top and bottom vents during preheating maximizes airflow and accelerates the heating process.
Once target temperatures are reached, vents can be adjusted to maintain desired heat levels.
Searing and Finishing Techniques
The reverse sear method combines speed with superior results by cooking the interior and exterior separately.
This technique works particularly well for thick steaks and chops.
Cooks should start proteins on the indirect heat zone, bringing them to within 10-15°F of the target internal temperature.
This gentle cooking prevents moisture loss and ensures even doneness throughout.
The finishing sear occurs over direct high heat for 2-3 minutes per side.
This creates the desired crust while minimizing overcooking of the interior.
Two-zone cooking eliminates the need to wait between different cooking phases.
While one item sears over direct heat, another can finish cooking in the indirect zone.
| Protein | Indirect Temp | Sear Time |
|---|---|---|
| Thick Steak | 325°F | 2-3 min/side |
| Chicken Breast | 350°F | 3-4 min/side |
| Pork Chops | 325°F | 2-3 min/side |
Maintaining Juiciness and Flavor
Temperature control prevents moisture loss while reducing overall cooking time.
Excessive heat causes proteins to contract rapidly, forcing out natural juices.
Probe thermometers eliminate guesswork and prevent overcooking.
They allow continuous monitoring without opening the grill lid, which maintains consistent temperatures and reduces cooking time.
Resting meat for 5-10 minutes after cooking allows juices to redistribute throughout the protein.
This step enhances flavor and texture without extending active cooking time.
Heat shields protect food from direct flame exposure during the finishing phase.
They prevent charring while allowing proper browning and flavor development.
Keeping the grill lid closed during most of the cooking process creates an oven-like environment.
This retains heat and moisture while promoting faster, more even cooking throughout the protein.
Time-Saving Preparation and Clean-up Strategies
Smart preparation cuts grilling time in half while proper clean-up techniques keep maintenance under 15 minutes.
Strategic charcoal disposal methods prevent safety hazards and reduce waste handling time.
Efficient Meal Prep Tips
Pre-portioning ingredients eliminates mid-cook delays and reduces active grilling time.
Grillers should measure seasonings, cut vegetables, and marinate proteins 2-4 hours before cooking.
Organizing tools in advance prevents searching for equipment during cooking.
Essential items include:
- Long-handled tongs and spatula
- Meat thermometer
- Oil-soaked paper towels for grate cleaning
- Aluminum foil for heat tents
Setting up cooking zones before lighting charcoal creates efficient workflow.
Direct heat areas handle searing while indirect zones finish thicker cuts without burning.
Pre-heating grates properly takes 10-15 minutes after coals ash over.
Clean grates with oil-dampened paper towels held by tongs to prevent food sticking.
Batch cooking similar items maximizes charcoal efficiency.
Grill all vegetables together, followed by proteins that require similar temperatures.
Quick Post-Grill Cleaning
Cleaning while grates stay hot removes debris effortlessly.
Scrub grates immediately after removing food using a wire brush or aluminum foil ball.
The vinegar method cuts through grease quickly.
Mix equal parts white vinegar and warm water, then scrub grates with this solution using steel wool.
Weekly ash removal prevents airflow blockage and maintains heating efficiency.
Use a small shovel to transfer cooled ashes into trash bags.
Wiping interior surfaces with damp paper towels removes soot buildup.
Clean the lid interior and firebox walls while they remain slightly warm for easier removal.
Soaking removable parts in soapy water for 20 minutes loosens stubborn residue.
Grill grates, ash catchers, and other components clean faster with minimal scrubbing.
Charcoal Disposal Best Practices
Complete ash cooling requires 48-72 hours in the grill with vents closed.
Never dispose of ashes until they feel completely cool to touch.
Metal container storage provides the safest disposal method.
Transfer cooled ashes to a metal bucket with tight-fitting lid, stored away from combustible materials.
Water dousing technique accelerates cooling for urgent disposal needs.
Pour water slowly over ashes, stir thoroughly, and wait 30 minutes before final disposal.
Garden application turns ash waste into soil amendment.
Wood charcoal ashes contain potassium and raise soil pH, benefiting most garden plants when applied sparingly.
Reusable charcoal recovery extends fuel value.
Partially burned lump charcoal pieces can restart fires when mixed with fresh fuel, reducing waste and costs.
Advanced Grilling Tips for Superior Results
Expert charcoal grillers enhance flavor through strategic wood chip placement and timing.
Essential accessories like digital thermometers and grill baskets improve cooking precision while common temperature and flare-up issues require specific techniques to resolve.
Infusing Smoky Flavors Quickly
Wood chips soaked for 15-30 minutes produce optimal smoke without over-dampening.
Apple and cherry chips complement poultry and pork, while hickory and oak work best with beef and lamb.
Direct chip placement on hot coals creates immediate smoke bursts.
Wrap chips in aluminum foil with holes poked through for controlled smoke release.
This method prevents chips from burning too quickly.
Timing considerations matter significantly. Add chips when food goes on the grill for maximum flavor penetration.
Meat absorbs smoke most effectively during the first 30 minutes of cooking.
Create flavor combinations by mixing different wood types.
Combine cherry with hickory for sweet and robust flavors.
Apple mixed with pecan delivers mild, nutty notes perfect for fish and vegetables.
Temperature control affects smoke production.
Maintain grill temperatures between 225-250°F for steady smoke output.
Higher temperatures burn chips too rapidly, reducing flavor impact.
Accessory Recommendations
Digital probe thermometers eliminate guesswork in cooking times.
Models with dual probes monitor both grill and food temperatures simultaneously.
Set target temperatures and receive alerts when food reaches doneness.
Grill baskets prevent small items from falling through grates.
Perforated steel baskets work best for vegetables and seafood.
Non-stick coated versions require less oil and clean easier.
Chimney starters light charcoal faster than chemical accelerants.
Fill with charcoal, place crumpled newspaper underneath, and light.
Coals ready in 15-20 minutes with even heat distribution.
| Essential Tool | Primary Use | Temperature Range |
|---|---|---|
| Probe Thermometer | Internal temps | 32-572°F |
| Grill Basket | Small foods | All ranges |
| Chimney Starter | Lighting coals | N/A |
Heat-resistant gloves protect hands when adjusting coals or moving food.
Silicone-coated versions provide better grip than traditional leather.
Look for gloves rated to 500°F minimum.
 The Grill Heat Aid BBQ Gloves are designed to withstand extreme heat up to 1472°F, making them ideal for grilling, smoking, or handling open flames.
Their five-finger design with silicone grip gives you more control than traditional mitts.
Perfect for outdoor BBQs, campfires, fire pits, or even indoor baking and pizza ovens.
Troubleshooting Common Issues
Uneven heating occurs when coals cluster together.
Spread coals evenly using long-handled tongs.
Create distinct hot and cool zones for better temperature management across the grill surface.
Flare-ups happen when fat drips onto coals.
Move food to cooler areas immediately.
Keep a spray bottle with water nearby for emergency flame control, but avoid overusing as it lowers temperatures.
Temperature drops result from insufficient airflow or depleted fuel.
Open bottom vents fully to increase oxygen flow.
Add fresh coals around edges of existing fire rather than on top.
Food sticking indicates insufficient preheating or dirty grates.
Preheat grill for 10-15 minutes before cooking.
Clean grates with wire brush and oil lightly with high-heat cooking oil.
Bitter smoke flavors come from wet wood or poor ventilation.
Use properly dried wood chips and maintain adequate airflow.
White smoke indicates clean burning while thick gray smoke creates bitter tastes.
Ash buildup restricts airflow and reduces heat output.
Remove excess ash every 3-4 cooking sessions. Most grills include ash catchers that slide out for easy cleaning.