

A clean BBQ isn’t just about appearance—it directly impacts food safety, flavor, and the longevity of grilling equipment.
Many grill owners make critical mistakes that can damage their barbecues or create health hazards, while others simply don’t know where to start with proper maintenance.
The key to effective BBQ cleaning lies in understanding the right tools, techniques, and timing for different types of grills and their components.
Gas grills require different approaches than charcoal models, and various parts need specialized attention to avoid damage while achieving thorough cleaning.
This comprehensive guide covers everything from essential cleaning supplies and safety protocols to deep cleaning methods for specific grill types.
Readers will discover proven techniques for tackling stubborn grease buildup, maintaining different materials like stainless steel, and avoiding common pitfalls that can shorten a grill’s lifespan or compromise cooking performance.
Why Cleaning Your Barbecue Matters

Regular barbecue maintenance directly impacts three critical areas: protecting your health through proper food safety, improving the taste and quality of grilled food, and maximizing your grill’s operational lifespan.
Health and Food Safety Benefits
A clean grill prevents harmful bacteria growth that accumulates from leftover food particles and grease buildup.
These residues create breeding grounds for pathogens that can cause foodborne illnesses.
Grease fires pose serious safety risks when old fat ignites unexpectedly.
Clean grills reduce flare-up incidents by removing combustible materials that collect over time.
Cross-contamination occurs when previous cooking residues mix with fresh food.
This becomes particularly dangerous when raw meat juices from earlier sessions contact new ingredients.
Key Safety Risks of Dirty Grills:
- Bacterial contamination from decomposing food particles
- Unpredictable grease fires and flare-ups
- Chemical buildup from cleaning product residues
- Pest attraction from accumulated organic matter
Regular cleaning your barbecue eliminates these health hazards.
Food-safe cleaning products remove dangerous buildup without leaving harmful chemical residues on cooking surfaces.
Impact on Taste and Cooking Results
Old grease and charred food particles create bitter, rancid flavors that transfer to fresh meals.
These accumulated residues mask the natural taste of ingredients and seasonings.
Heat distribution becomes uneven when debris blocks burner ports or clogs ventilation systems.
This leads to inconsistent cooking temperatures and poorly prepared food.
Flavor Problems from Dirty Grills:
- Bitter tastes from rancid grease
- Unwanted smoky flavors from burnt residue
- Chemical tastes from old cleaning products
- Reduced seasoning effectiveness
A clean grill delivers consistent heat patterns and allows natural food flavors to shine.
Properly maintained cooking surfaces provide better searing and more predictable results.
Fresh grill grates create attractive grill marks and prevent food from sticking.
Clean surfaces also make it easier to control cooking times and achieve desired doneness levels.
Extending Grill Lifespan
Grease buildup accelerates corrosion on metal components, leading to rust formation and structural damage.
This deterioration significantly reduces equipment lifespan and performance quality.
Clogged burner tubes cause uneven gas flow and inefficient fuel consumption.
These blockages force the grill to work harder, increasing wear on internal components.
Components Protected by Regular Cleaning:
- Cooking grates and warming racks
- Burner tubes and gas connections
- Heat deflectors and drip pans
- Exterior surfaces and control knobs
BBQ cleaning removes corrosive substances before they cause permanent damage.
Protective coatings applied during maintenance create barriers against weather and chemical deterioration.
Well-maintained grills retain their resale value and continue operating efficiently for years.
Regular maintenance costs significantly less than premature equipment replacement due to neglect.
Essential Tools and Cleaning Supplies

The right tools make BBQ cleaning safer and more effective.
Quality brushes, appropriate cleaning agents, and protective gear form the foundation of proper grill maintenance.
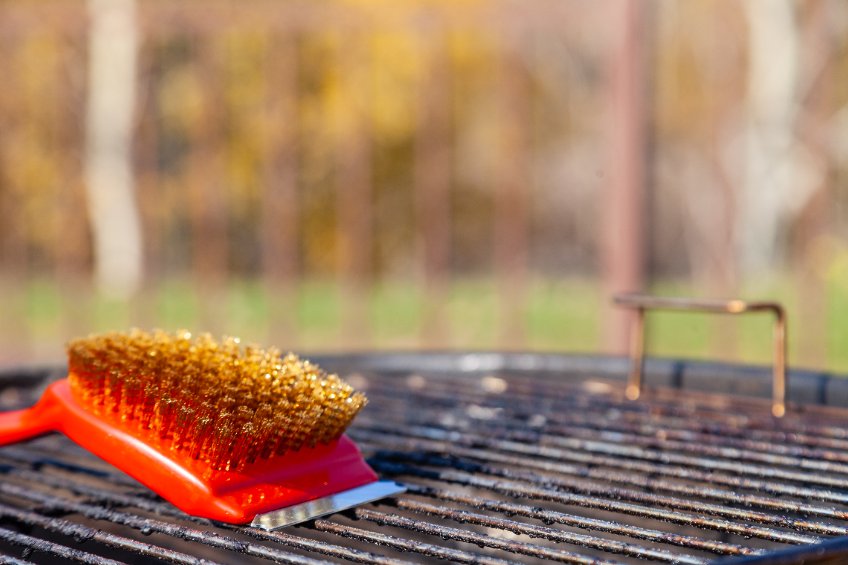
Grill Brushes and Scrapers
Wire grill brushes remain the most popular choice for removing stuck-on food and grease from grates.
Stainless steel bristles work effectively on cast iron and steel grates.
Brass bristles offer a gentler option for porcelain-coated surfaces.
Wooden scrapers provide a safer alternative to wire brushes.
They eliminate the risk of loose bristles contaminating food.
Cedar and oak scrapers conform to grate patterns over time, creating custom cleaning tools.
Weber grill brushes feature triangular heads that clean between grate wires effectively.
The angled design reaches difficult spots around the firebox edges.
Key Features to Consider:
- Handle length – Longer handles keep hands away from heat
- Bristle material – Match to grate type
- Head shape – Triangular heads clean more thoroughly
- Durability – Quality construction prevents bristle loss
Plastic scrapers work well for delicate surfaces but require more effort.
They’re ideal for ceramic or non-stick coatings that wire brushes might damage.
Cleaning Agents: Natural and Commercial
Natural cleaning solutions offer safe, effective alternatives to harsh chemicals.
White vinegar cuts through grease buildup without damaging metal surfaces.
Baking soda acts as a gentle abrasive for stubborn stains.
Lemon juice combined with salt removes rust spots naturally.
The citric acid dissolves oxidation while salt provides scrubbing action.
This mixture works particularly well on vintage grills.
Commercial degreasers tackle heavy buildup more aggressively.
They contain surfactants that break down grease molecules.
Most require thorough rinsing before the next cooking session.
Cleaning Agent Comparison:
| Type | Best For | Safety Level | Cost |
|---|---|---|---|
| White vinegar | Grease removal | High | Low |
| Baking soda | Scrubbing | High | Low |
| Commercial degreasers | Heavy buildup | Moderate | Medium |
| Mild dish soap | General cleaning | High | Low |
Dawn dish soap mixed with warm water creates an effective general cleaner.
It removes light grease and food residue without harsh chemicals.
Protective Gear and Accessories
Heat-resistant gloves protect hands during cleaning sessions.
Grills retain heat long after cooking ends. Silicone or leather gloves withstand temperatures up to 500°F.
Safety glasses prevent cleaning solution splashes from reaching eyes.
Wire brush bristles occasionally break free during scrubbing.
Eye protection becomes essential when using aggressive cleaning methods.
Aprons shield clothing from grease splatters and cleaning chemicals.
Heavy-duty materials resist staining and wash easily.
Long aprons provide better coverage than short versions.
Essential Accessories:
- Bucket or basin – Holds cleaning solutions
- Microfiber cloths – Lint-free wiping
- Plastic bags – Cover electronics during cleaning
- Garden hose – Rinses large surfaces
Drop cloths protect deck or patio surfaces from dripping grease.
Plastic sheeting works better than fabric for easy cleanup.
Proper preparation prevents permanent stains on outdoor surfaces.
Step-By-Step BBQ Cleaning Process

Effective BBQ cleaning requires a systematic approach starting with proper heat treatment and cooling, followed by thorough grate scrubbing and interior component maintenance.
Each step builds upon the previous one to ensure complete removal of grease, food residue, and built-up debris.
Initial Burn-Off and Cool Down
The burn-off process eliminates stubborn food particles and grease through controlled high-heat treatment.
Turn all burners to high heat and close the lid completely.
Allow the grill to run for 15-20 minutes to burn off remaining food bits and debris.
This high-temperature treatment loosens stuck-on materials and makes subsequent scrubbing significantly easier.
The intense heat carbonizes food residue, transforming it into ash that brushes away effortlessly.
Safety Protocol:
- Ensure proper ventilation during burn-off
- Keep the grill lid closed to maintain temperature
- Turn off gas supply after completion
- Allow complete cooling for 30-45 minutes before handling
Gas grills require turning off the propane tank or gas line connection.
Charcoal grills need complete ash cooling before removal.
Never attempt to clean hot surfaces as this creates dangerous steam and burn risks.
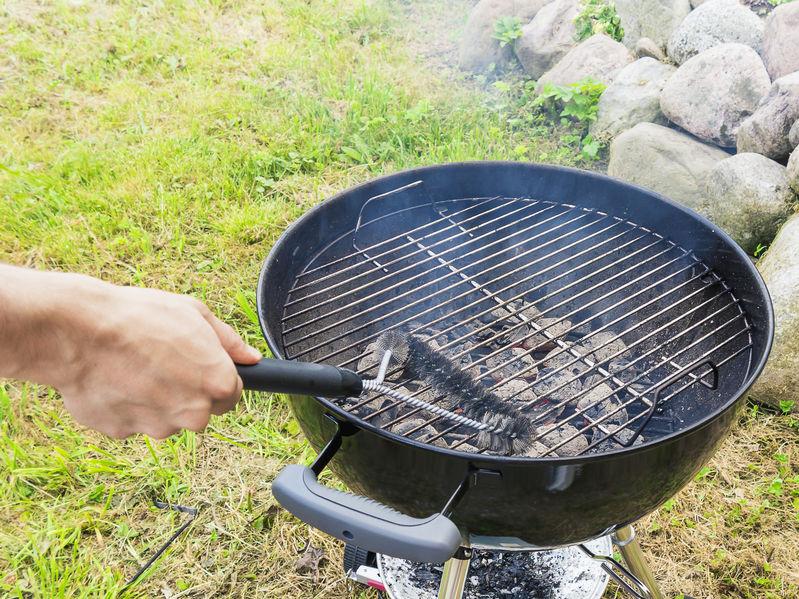
Scrubbing the Cooking Grates
Grate cleaning techniques vary based on material composition and require specific approaches for optimal results.
Remove cooled grates and identify whether they are stainless steel, porcelain-coated, or cast iron construction.
Stainless steel grates handle aggressive cleaning methods well.
Use a stiff-wire grill brush or steel scrubber with warm soapy water.
Scrub both sides thoroughly to remove all carbonized debris.
Porcelain-coated grates require gentler treatment to prevent coating damage.
Use nylon brushes or heavy-duty synthetic scrubbing pads instead of metal tools.
Avoid wire brushes that can chip the porcelain surface.
Cast iron grates need minimal water exposure to prevent rust formation.
Use a damp nylon brush for stubborn spots only.
Apply a light coating of vegetable oil after cleaning to seal out moisture.
For deep cleaning, soak grates in a vinegar and baking soda mixture.
This combination breaks down grease and food residue without harsh chemicals.
Always wipe cleaned surfaces thoroughly to remove any loose brush bristles.
Cleaning Interior Components
Interior cleaning addresses the firebox, heat deflectors, and burner components that accumulate grease and debris.
Remove all removable parts including heat tents, flavorizer bars, and drip pans for separate washing.
Clean the firebox using warm soapy water and a steel brush for stubborn buildup.
Scrub all interior surfaces including the lid interior where smoke residue accumulates heavily.
Gas grill burners require special attention to gas port maintenance.
Remove burners from gas supply lines and use a dry wire brush to clear blockages.
Brush side-to-side rather than vertically to avoid pushing debris into ports.
Clean burner valves with soapy water and run clean water through the valve interior.
Ensure complete drying before reinstallation to prevent corrosion.
Charcoal grills need ash removal from the bottom bowl area.
Built-up ash blocks ventilation and creates fire hazards.
Use a brush to clear all ash and debris from vent areas.
Rinse all components thoroughly and towel dry completely.
Reinstall parts only after ensuring complete moisture removal to prevent rust formation.
Must-Have BBQ Cleaning Tools (That Make Life Easier)
 When it’s time to clean your grill, having the right tools makes all the difference.
These top-rated picks can help you scrub, polish, and protect your BBQ so it’s always ready for the next cookout.
(Tip: Always confirm the cleaner and brush type suit your grill’s material.)
| Image | Purpose | Recommended Product | Why It’s Worth a Look |
|---|---|---|---|
 |
Bristle brush + scraper all-in-one | Grillart Grill Brush and Scraper | A durable 3-in-1 brush with triple wire scrubbers and an integrated scraper to handle stubborn residue. Cuts cleaning time and works on most grill grates. |
 |
All-in cleaning kit for grill & griddle | Grill General 26-Piece Griddle & Grill Cleaning Kit | A complete cleaning set with scrapers, scour pads, pumice blocks, and brushes — everything you need to deep-clean both griddles and grill surfaces. |
, Scrubber 3 Pack, Nylon Brush, Cookbox Scraper and Microfiber Cleaning Towel - Tools to Clean BBQ Grill Grates, Smokers, Ovens") |
Citrus-powered cleaner with tools | Citrusafe Complete Grill Cleaning Kit | Uses a gentle citrus-based formula that breaks down grease without damaging surfaces. Includes scrub pads, a cook box scraper, and a nylon brush. |
Deep Cleaning Different BBQ Types
 Each BBQ type requires specific cleaning techniques due to their unique components and fuel systems.
Charcoal grills need ash removal and grate maintenance, gas grills require burner and flame tamer attention, while pellet grills demand hopper cleaning and ash pan care.
Charcoal Grills: Handling Ash and Grates
Charcoal grills accumulate substantial ash and grease that requires careful removal.
Users should wait until the grill cools completely before beginning the cleaning process.
Ash Removal Process:
- Remove cooking grates and place them in warm soapy water
- Empty all ash from the firebox using a metal scoop or vacuum designed for ash
- Clean the ash pan thoroughly with degreasing spray
The firebox walls often collect grease and food residue.
Scrape these surfaces with a plastic scraper, working from top to bottom.
Apply a commercial degreaser for stubborn buildup and let it sit for 10-15 minutes.
Charcoal grates need aggressive scrubbing due to direct heat exposure.
Use a wire brush or scrubbing pad to remove carbonized food particles.
For cast iron grates, avoid soap and use coarse salt as an abrasive instead.
Key Components to Address:
- Ash catcher or removable ash pan
- Air vents (both top and bottom)
- Charcoal grate supports
- Interior firebox walls
Reassemble only when all components are completely dry to prevent rust formation.
Gas Grills: Burners and Flame Tamer Care
Gas grills require attention to burners, flame tamers, and the grease management system.
These components directly affect cooking performance and safety.
Disconnect the propane tank before starting any cleaning.
Remove cooking grates, warming racks, and flame tamers for separate cleaning in warm soapy water with baking soda added for degreasing.
Burner Maintenance:
- Remove burner tubes according to manufacturer instructions
- Use a small bottle brush to clear gas ports of debris and spider webs
- Inspect for corrosion or damage that affects gas flow
- Clean with mild soap solution and rinse thoroughly
Flame tamers distribute heat evenly and collect drippings.
These metal or ceramic pieces need thorough scrubbing to remove grease buildup.
Replace damaged or warped flame tamers to maintain proper heat distribution.
The grease management system requires complete cleaning.
Empty and wash the grease tray with hot soapy water.
Clean grease channels to ensure proper drainage and prevent flare-ups.
Critical Safety Check:
- Perform leak test on gas connections after reassembly
- Run grill on high for 10-15 minutes to burn off cleaning residue
Pellet Grills: Hopper, Ash Pan, and Maintenance
Pellet grills combine smoking and grilling functions, creating unique cleaning requirements.
The hopper, ash pan, and auger system need regular attention for optimal performance.
Empty the hopper completely before deep cleaning.
Remove any remaining pellets and vacuum out sawdust or debris.
Wipe interior surfaces with a damp cloth, ensuring complete drying before refilling.
Ash Pan Management:
- Remove and empty the ash pan after every few cooking sessions
- Wash with warm soapy water and dry completely
- Check for warping or damage that affects proper fit
The firepot requires careful cleaning to maintain consistent temperatures.
Remove ash buildup and check for damage to the ignition system.
Clean the heat deflector and drip pan thoroughly.
Essential Maintenance Tasks:
- Clean temperature probe with alcohol wipes
- Check auger tube for pellet jams or debris
- Inspect door seals for damage
- Clean digital controller exterior with appropriate cleaners
Internal fans and ventilation systems collect grease over time.
Use compressed air to blow out accumulated debris from hard-to-reach areas.
Replace any worn gaskets or seals to maintain proper temperature control.
Cleaning Specific BBQ Parts

Different BBQ components require targeted cleaning approaches to maintain optimal performance and safety.
Regular maintenance of drip trays prevents grease buildup, proper burner cleaning ensures even heat distribution, and exterior care protects your investment from weather damage.
Drip Tray and Drip Pan Maintenance
The drip tray collects grease and food particles during cooking, making it one of the most critical components to clean regularly.
A dirty drip pan can cause flare-ups and create fire hazards.
Remove the drip tray after each use once it has cooled completely.
Empty any accumulated grease into a disposable container rather than pouring it down the drain.
Cleaning Steps:
- Scrape off solid debris with a plastic scraper
- Wash with hot soapy water and a non-abrasive sponge
- For stubborn grease, create a paste with baking soda and water
- Let the paste sit for 10-15 minutes before scrubbing
Line the drip pan with aluminum foil for easier cleanup.
Replace the foil liner after every few uses to prevent grease accumulation.
Check the grease channels leading to the drip tray during deep cleaning sessions.
Use a bottle brush or pipe cleaner to remove any blockages that could cause grease overflow.
Cleaning Burners Safely
Burners require careful attention to maintain proper gas flow and prevent uneven heating.
Always disconnect the propane tank and allow the grill to cool completely before cleaning burners.
Remove the cooking grates and heat deflectors to access the burners.
Most burners lift out easily, but consult your owner’s manual for specific instructions.
Burner Cleaning Process:
- Use a small bottle brush to clean inside the burner tubes
- Clear each gas port hole with a toothpick or thin wire
- Wipe the exterior with a damp cloth
- Check for spider webs or insect nests in the tubes
Never use water to clean burners directly, as moisture can cause rust and damage.
Instead, use a dry brush or compressed air to remove debris.
Inspect burner tubes for cracks or corrosion during cleaning.
Replace damaged burners immediately to prevent gas leaks and ensure safe operation.
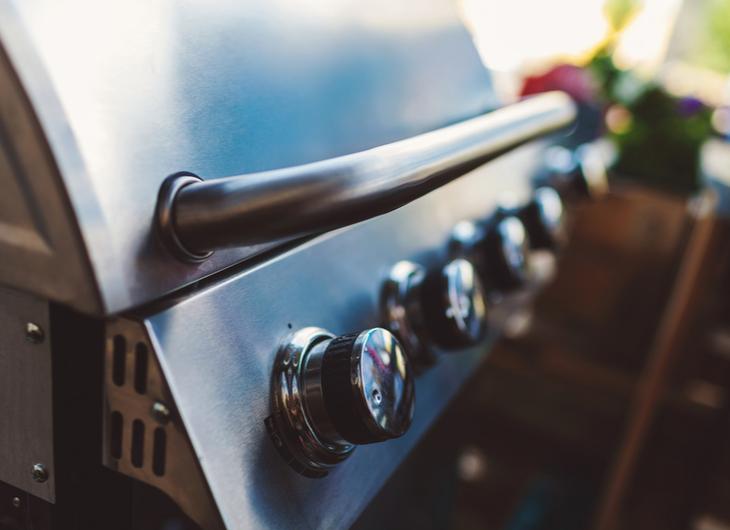
Tidying Up Exterior Surfaces
The exterior finish determines the appropriate cleaning method for your BBQ.
Stainless steel surfaces require different care than painted or porcelain-coated exteriors.
For stainless steel exteriors:
- Use specialized stainless steel cleaner or a mixture of white vinegar and water
- Wipe in the direction of the grain to avoid scratching
- Buff with a microfiber cloth for a streak-free shine
For painted surfaces:
- Clean with mild soap and warm water
- Avoid abrasive cleaners that can damage the finish
- Rinse thoroughly and dry completely to prevent rust
Clean control knobs and handles with disinfecting wipes to remove grease and bacteria.
Pay special attention to areas that hands touch frequently during cooking.
Remove any rust spots immediately using aluminum foil or fine steel wool.
Apply touch-up paint to scratched areas on painted surfaces to prevent further corrosion.
Best Practices and Common Mistakes to Avoid
Proper BBQ cleaning requires specific timing, appropriate tools, and seasonal maintenance to prevent damage and ensure food safety.
Using the wrong cleaning methods or materials can cause costly repairs and health hazards.
Frequency and Timing of Cleaning
Clean grill grates after every use while they remain warm but not hot.
Food debris removes more easily when temperatures stay above 250°F, making the cleaning process faster and more effective.
Wait for the grill to cool from its peak cooking temperature before starting.
Never attempt to clean a piping hot grill as this poses burn risks. Heat-safe gloves provide protection during warm grate cleaning.
Weekly cleaning tasks include:
- Emptying and washing the drip tray
- Wiping down exterior surfaces
- Checking for grease buildup
Monthly deep cleaning involves removing internal parts for thorough washing.
This prevents grease fires and maintains proper airflow for temperature control.
What Not to Use on Your BBQ
Wire brushes pose serious health risks when bristles break off and stick to grates.
These metal fragments can transfer to food and cause injuries to the mouth, throat, or digestive system when swallowed.
Avoid these cleaning materials:
- Wire brushes and steel wool
- Harsh chemical degreasers
- Oven cleaners
- Abrasive scouring pads
Use nylon brushes, natural fiber scrubbers, or bristle-free scrapers instead.
Aluminum foil balled up and used with tongs provides a safe alternative for stubborn residue.
Skip commercial degreasers that damage stainless steel and porcelain coatings.
Vinegar and baking soda create an effective, food-safe cleaning solution without harsh chemicals or aftertastes.
Never pour water on hot grill surfaces.
This causes warping and cracking in ceramic or cast iron components while creating dangerous steam clouds.
Seasonal Cleaning and Storage Tips
Perform deep cleaning at the end of grilling season before storage.
Remove all grease, food particles, and ash to prevent corrosion during inactive months.
Pre-storage checklist:
- Clean all removable parts thoroughly
- Dry components completely
- Apply light oil coating to grates
- Empty propane tanks or remove charcoal
Charcoal grills require special attention to ash removal.
Leftover ash retains moisture and causes metal corrosion while blocking airflow vents.
Use a metal container designed for hot ash disposal.
Cover stored grills with breathable materials that allow air circulation.
Plastic covers trap moisture and accelerate rust formation on metal surfaces.
Inspect gas lines and connections before seasonal storage.
Check for leaks using soapy water and replace damaged components before the next grilling season begins.