
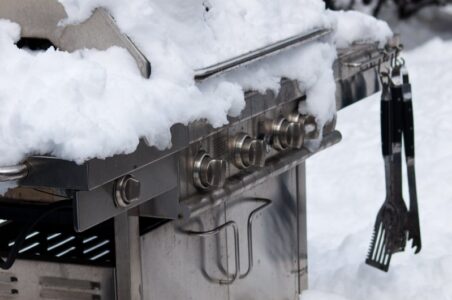
 After months of winter weather, a BBQ grill often accumulates dirt, grease, and debris that can affect both its performance and the taste of food.
Properly cleaning a BBQ after winter involves removing old grease, scrubbing grill grates, inspecting components for damage, and ensuring all parts function correctly before the first cookout.
This process requires specific tools and a systematic approach to restore the grill to optimal condition.
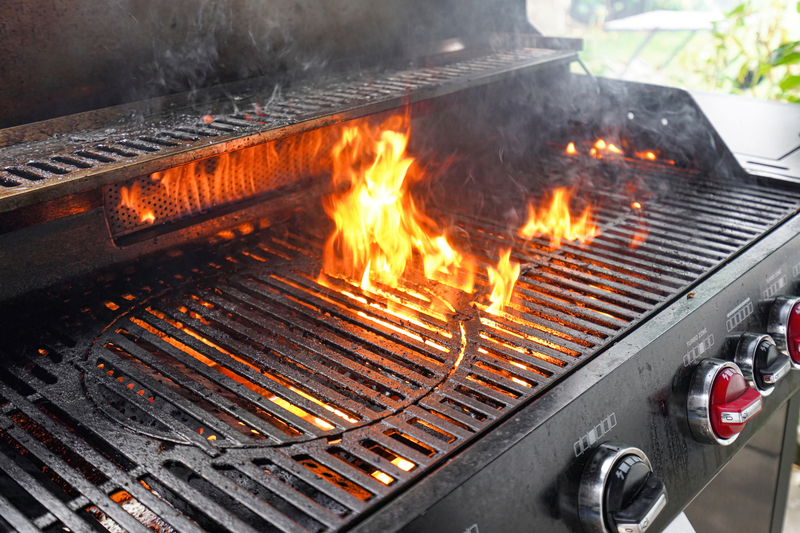
Winter storage can leave grills with rust spots, clogged burners, and built-up residue that creates uneven heating and potential safety hazards.
A thorough cleaning eliminates bacteria growth and prevents flare-ups that occur when old grease ignites during cooking.
The cleaning process also provides an opportunity to inspect parts for wear and damage that may have occurred during storage.
This comprehensive guide covers everything from initial assessment and tool selection to deep cleaning techniques and preventive maintenance.
Following these steps ensures the BBQ operates efficiently throughout the grilling season while extending its overall lifespan.
Assessing Your BBQ After Winter

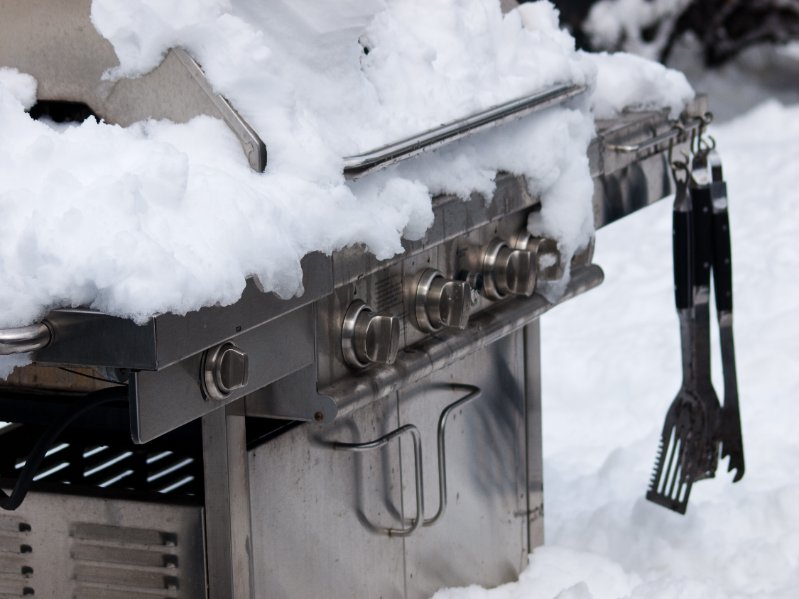
Winter weather can cause serious damage to outdoor grills through rain, snow, freezing temperatures, and unwanted visitors.
A thorough inspection helps identify problems before they become safety hazards or costly repairs.
Inspecting for Damage and Wear
The grill’s exterior should be checked first for visible cracks, dents, or broken parts.
Winter storms can cause tree branches to fall or strong winds to knock over covers and accessories.
Key areas to examine:
- Grill lid hinges and handles
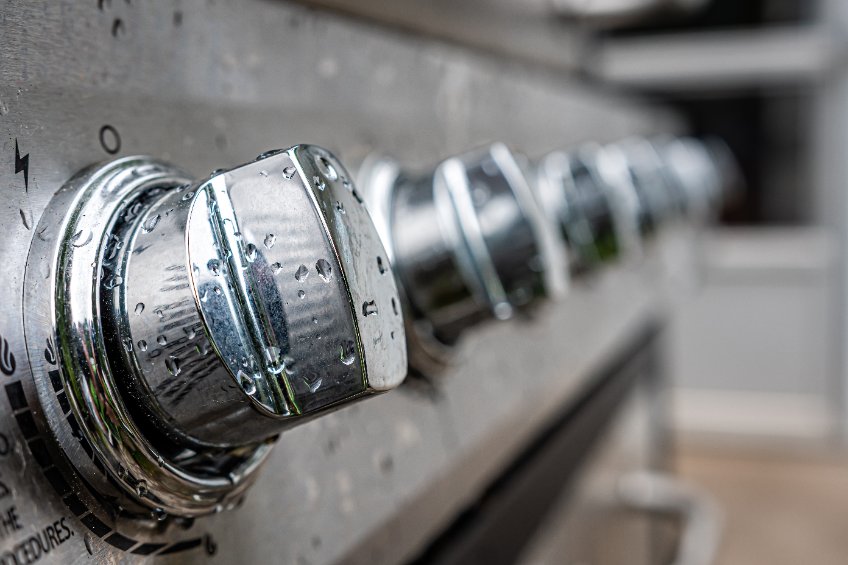
- Control knobs and temperature gauges
- Wheels and leg stability
- Side tables and storage compartments
The cooking grates need careful inspection for warping or cracking.
Metal expands and contracts during temperature changes, which can cause stress fractures.
Bent or damaged grates create uneven cooking surfaces.
Check all connections where parts join together.
Loose bolts or screws should be tightened before use.
Look for any missing hardware that may have fallen out during winter months.
The grease tray and drip pan often show the most wear.
These parts collect moisture and food residue, making them prone to damage.
Replace cracked or heavily corroded trays immediately.
Checking for Rust and Corrosion
Rust forms when metal stays wet for long periods.
Even covered grills can trap moisture inside, creating perfect conditions for corrosion to develop.
Common rust locations:
- Cooking grates and warming racks
- Interior firebox walls
- Burner tubes and gas lines
- Exterior painted surfaces
Surface rust appears as orange or brown spots on metal parts.
This type can often be removed with steel wool or wire brushes.
Deep rust creates holes or flaky areas that weaken the metal structure.
Stainless steel grills resist rust better than other materials.
However, they can still develop corrosion around welds or scratched areas.
Salt from winter road treatments makes rust problems worse in many regions.
Gas burner tubes require special attention.
Rust or corrosion can block gas flow or create dangerous leaks.
Remove burner covers and inspect each tube for holes or blockages.
Identifying Pest or Animal Activity
Small animals often seek shelter in grills during cold months.
Mice, rats, and insects can cause significant damage while building nests or searching for food.
Signs of animal activity:
- Droppings or urine stains
- Chewed wires or gas lines
- Nesting materials like leaves or paper
- Strong odors from inside the grill
Spider webs frequently block gas ports in burner tubes.
These blockages can cause uneven flames or prevent the grill from lighting properly.
Remove all visible webs with a small wire or toothpick.
Birds sometimes build nests in chimney areas or under grill covers.
Check these spaces thoroughly before attempting to light the grill.
Remove any nesting materials and clean the area completely.
Rodent damage to gas lines creates serious safety risks.
Look for teeth marks on rubber hoses or plastic components.
Any damaged gas parts must be replaced before using the grill.
Clean out all debris and animal waste before proceeding with regular cleaning steps.
Gathering Essential Cleaning Tools and Products
Having the right tools and cleaning products makes the difference between a quick, effective cleaning session and hours of frustrating scrubbing.
The proper brushes, safe cleaning agents, and protective gear will help restore any grill to excellent condition after months of winter storage.
Choosing the Right Cleaning Brushes
The grill brush is the most important cleaning tool for any BBQ restoration project.
Wire brushes work best for cast iron and steel grates because they remove stubborn grease and food particles effectively.
Nylon brushes are safer for porcelain-coated grates since wire brushes can chip the coating.
These brushes clean well without causing damage to delicate surfaces.
Long-handled brushes provide better reach and keep hands away from hot surfaces.
The handle should be at least 16 inches long for safety and comfort.
Scrub pads and steel wool help clean other grill parts.
Use fine steel wool for metal surfaces and non-abrasive pads for painted areas.
These tools work well on grease trays and exterior surfaces.
Replace grill brushes every season or when bristles become loose.
Loose bristles can fall onto food and create safety hazards.
Selecting Safe Cleaning Agents for BBQ Grills
Dish soap and warm water handle most cleaning jobs safely and effectively.
This combination removes grease without leaving harmful residues that could affect food taste.
Commercial grill cleaners work faster on tough buildup but require careful selection.
Choose cleaners labeled as food-safe and designed specifically for grills.
Baking soda mixed with water creates a natural cleaning paste that cuts through grease without harsh chemicals.
This mixture works especially well on grates and interior surfaces.
White vinegar removes mineral deposits and cuts through grease naturally.
Mix equal parts vinegar and water in a spray bottle for easy application.
Avoid using oven cleaner or other harsh chemicals on grill surfaces.
These products can leave dangerous residues and damage grill components over time.
Using Protective Gear
Rubber gloves protect hands from cleaning chemicals and sharp edges.
Choose thick, chemical-resistant gloves that extend past the wrists for maximum protection.
Safety glasses prevent cleaning solution splashes from reaching the eyes.
This protection becomes especially important when using commercial cleaners or scrubbing vigorously.
Old clothes or aprons protect clothing from grease stains and cleaning chemicals.
Grill cleaning creates messy situations that can ruin good clothing permanently.
Knee pads make cleaning more comfortable when working on lower grill components.
Many cleaning tasks require kneeling or crouching for extended periods.
Keep a first aid kit nearby in case of minor cuts or chemical contact.
Clean water for rinsing should also be easily accessible during the entire cleaning process.
Preparing the BBQ for Cleaning
Before starting any cleaning process, properly preparing the grill ensures safety and makes the job easier.
This involves safely disconnecting all fuel sources, removing key components for thorough access, and clearing out accumulated debris from winter storage.
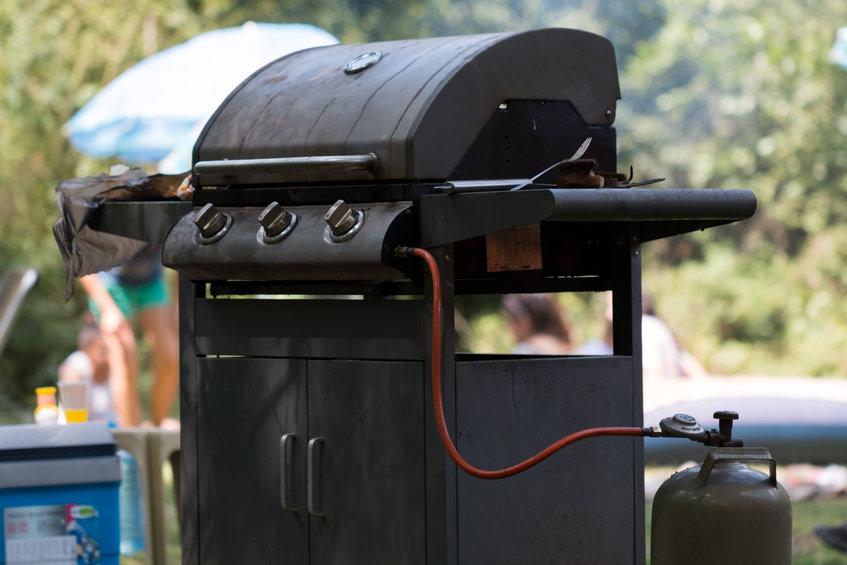
Disconnecting Fuel Sources
Safety comes first when preparing any grill for cleaning.
The person must completely disconnect all fuel sources before beginning any maintenance work.
For gas grills, they should turn off the main gas valve on the propane tank by rotating it clockwise.
Next, they need to disconnect the propane tank from the grill by unscrewing the coupling nut.
The tank should be stored in a safe, well-ventilated area away from the cleaning zone.
Electric grills require unplugging from the power source.
The person should ensure the cord is completely removed and stored away from any water or cleaning solutions.
Charcoal grill owners must verify that no hot coals remain in the firebox.
Even cold-looking ashes can contain live embers that stayed hot for hours.
They should wait at least 12 hours after the last use before cleaning.
Never skip this step.
Fuel connections and electrical sources pose serious safety risks when exposed to water and cleaning chemicals.
Removing Grates and Burner Covers
Taking apart removable components gives access to all surfaces that need cleaning.
Most grill parts lift out easily once the person knows the right approach.
Cooking grates usually lift straight up and out of the grill.
Some models have clips or brackets holding them in place.
The person should check for any securing mechanisms before pulling on the grates.
Burner covers, also called flavorizer bars or heat tents, sit above the burners in gas grills.
These metal pieces typically slide out from their brackets.
They may need to be lifted slightly while sliding to clear the support tabs.
Drip pans and grease trays pull out from the front or back of most grills.
These often slide on rails or rest in simple brackets.
The person should empty any accumulated grease before removing them completely.
Important: Take a photo before removing parts.
This helps remember how everything fits back together later.
Clearing Ashes and Debris
Winter storage allows debris to build up inside the grill.
Removing this buildup prevents it from mixing with cleaning solutions and creating a messy paste.
For charcoal grills, the person should scoop out all old ashes and unburned charcoal pieces.
A metal scoop or old spoon works well for this task.
They should dispose of ashes in a metal container, never in plastic bags or regular trash.
Gas grills collect leaves, spider webs, and other debris in the firebox.
The person can use a plastic scraper or old spatula to loosen stuck-on material.
A shop vacuum helps remove loose debris without spreading it around.
Check the grease management system for blockages.
Old grease can harden over winter and block drainage holes.
The person should clear these openings with a small wire or pipe cleaner.
Bird nests sometimes appear in unused grills.
Remove any nesting material completely, as it creates a fire hazard during cooking.
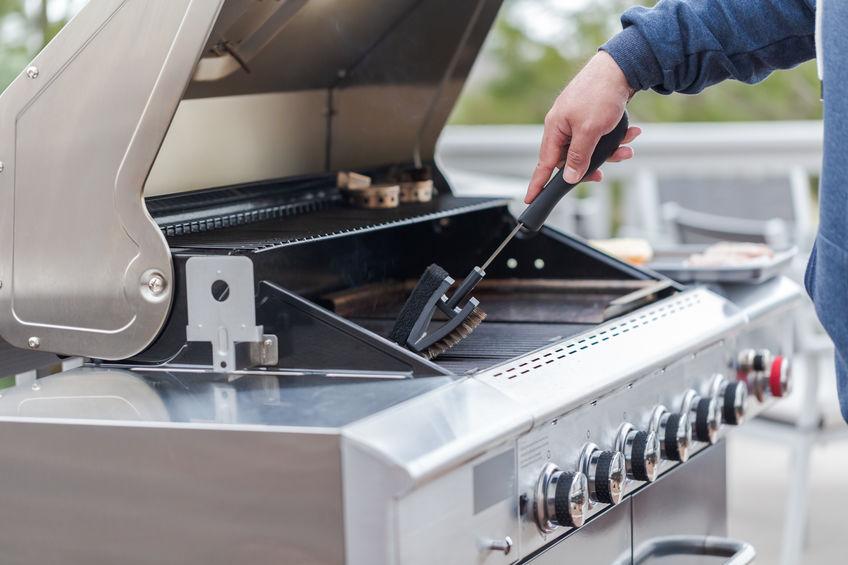
Deep Cleaning the Grill Grates
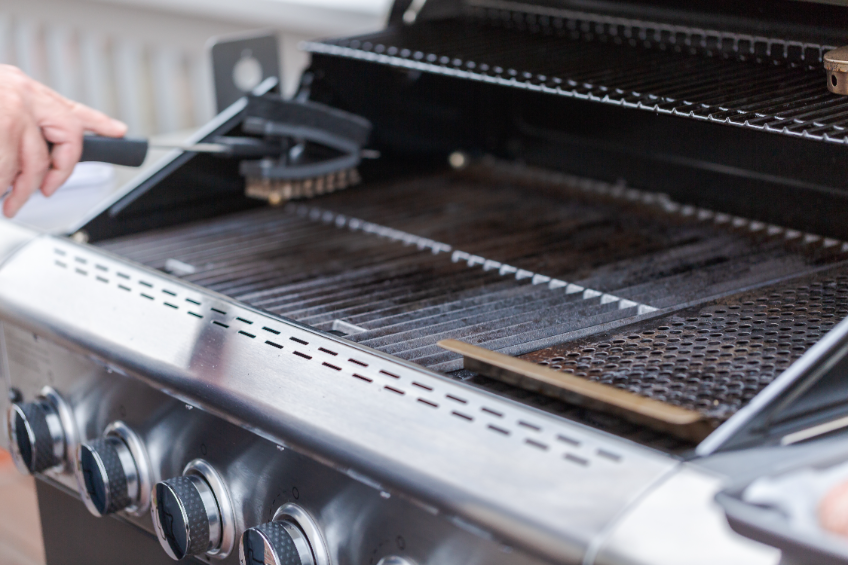
Winter weather leaves grates covered in stubborn grease and built-up residue that requires soaking and scrubbing to remove.
The most effective approach combines hot soapy water with proper scrubbing tools to break down months of accumulated grime.
Soaking and Scrubbing Grates
Remove the grates from the grill completely.
This makes cleaning much easier and more thorough.
Fill a large container or bathtub with hot water and dish soap.
The water should be hot enough to help dissolve grease but safe to work with.
Submerge the grates in the soapy water for 30-60 minutes.
This soaking time softens the built-up grease and food particles.
Use a grill brush with stiff bristles to scrub the grates while they remain in the water.
 One highly recommended option is the Grillart Grill Brush and Scraper.
This brush features a 3-in-1 triple helix design, allowing you to clean three times the surface area with each stroke.
Its stainless steel bristles are durable and effective at removing grime, while the integrated scraper helps tackle tough, stuck-on residues.
Work along the length of each grate bar, not across them.
For cast iron grates, avoid soap and use hot water only.
Soap can strip the seasoning layer that prevents rust.
Steel wool pads work well for stainless steel grates with heavy buildup.
Scrub gently to avoid scratching the surface.
Rinse the grates thoroughly with clean water after scrubbing.
Removing Stubborn Grease and Buildup
Mix baking soda and water into a thick paste for areas with stubborn grease spots.
Apply the paste directly to problem areas.
Let the baking soda paste sit for 15-20 minutes before scrubbing.
This helps break down tough grease deposits.
White vinegar cuts through grease effectively.
Spray it on stubborn areas and let it sit for 10 minutes before scrubbing.
Use a plastic scraper to remove thick, hardened grease without damaging the grate surface.
Work carefully to avoid gouging the metal.
For extremely stubborn buildup, create a mixture of equal parts vinegar and baking soda.
This combination creates a foaming action that helps lift tough residue.
Ammonia-based cleaners work well for heavy grease but require good ventilation.
Always wear gloves when using these products.
Rinse all cleaning products completely before drying the grates.
Cleaning the Interior Components

The interior components collect grease, food debris, and carbon buildup during use and storage.
Burners need special attention to maintain proper gas flow, while grease trays require complete cleaning to prevent fires and odors.
Cleaning Burners and Flame Tamers
Remove the burners from the grill by lifting them out or unscrewing them.
Check each burner for clogs in the gas ports.
Use a thin wire or paper clip to clear blocked holes.
Push the wire gently through each port opening.
This ensures proper gas flow and even heating.
Soak burners in warm soapy water for 15-20 minutes.
Scrub with a soft brush to remove grease and debris.
Rinse thoroughly and dry completely.
Flame tamers sit above the burners and catch drippings.
Remove them and soak in hot soapy water.
Use a grill brush to scrub off stuck-on food and grease.
Check for rust or damage on both components.
Replace any parts that show significant wear or corrosion.
Emptying and Cleaning the Grease Tray
Pull out the grease tray from under the grill.
Dispose of old grease properly – never pour it down drains.
Scrape out solid debris with a plastic scraper.
Soak the tray in hot soapy water for easier cleaning.
Use dish soap and a scrub brush to remove stuck grease.
For tough buildup, make a paste with baking soda and water.
Let it sit for 10 minutes before scrubbing.
Rinse the tray completely and dry it before putting it back.
Check that the tray slides in properly and sits level.
Wiping Down Interior Surfaces
Remove cooking grates and any remaining removable parts.
This gives full access to interior walls and bottom.
Scrape loose debris from the firebox bottom with a plastic scraper.
Use a shop vacuum to remove ash and small particles.
Mix a cleaning solution:
- 2 cups warm water
- 2 tablespoons dish soap
- 1 tablespoon white vinegar
Wipe down all interior surfaces with the solution using a microfiber cloth.
Pay attention to corners where grease collects.
For stubborn spots, use a non-abrasive scrub pad.
Avoid harsh chemicals that can damage the metal coating.
Rinse with clean water and dry thoroughly before reassembling.
Cleaning the Exterior Surfaces

Winter weather leaves dirt, grease, and grime on grill surfaces that need proper cleaning techniques.
Different materials like stainless steel and painted surfaces require specific care to avoid damage and maintain appearance.
Washing and Polishing the Lid and Body
Start by removing any loose debris from the exterior with a dry cloth or soft brush.
This prevents scratching during the washing process.
Mix warm water with mild dish soap in a bucket.
Use a microfiber cloth or soft sponge to clean the entire exterior surface.
Work from top to bottom to avoid spreading dirt to already-cleaned areas.
For stubborn grease spots:
- Apply a paste of baking soda and water
- Let it sit for 10 minutes
- Scrub gently with a soft brush
- Rinse thoroughly with clean water
Rinse all surfaces with clean water to remove soap residue.
Dry immediately with a clean towel to prevent water spots from forming.
Polish painted surfaces with a automotive wax or specialized grill polish.
Apply thin coats and buff to a shine with a clean cloth.
Maintaining Stainless Steel Finishes
Clean stainless steel surfaces with a non-abrasive stainless steel cleaner or white vinegar solution.
Never use bleach or chlorine-based cleaners as they cause permanent damage.
Cleaning steps for stainless steel:
- Wipe with grain direction, not against it
- Use a microfiber cloth dampened with cleaner
- Remove cleaner residue with clean water
- Dry completely with a soft towel
For tough stains, make a paste with baking soda and water.
Apply gently and wipe away following the grain pattern.
Apply stainless steel polish monthly to maintain shine and create a protective barrier.
Use products specifically designed for outdoor grills that can withstand weather exposure.
Inspecting and Maintaining BBQ Parts
After months of winter storage, critical BBQ components need careful inspection to ensure safe operation.
Gas lines, ignition systems, and hoses require specific checks to identify wear, damage, or safety hazards before the first cook of the season.
Checking Gas Lines and Connections
Gas lines need thorough inspection for cracks, wear, or damage that could cause dangerous leaks.
Users should examine the entire length of gas lines for any visible deterioration, especially at connection points where stress occurs most often.
Visual Inspection Steps:
- Check for cracks, cuts, or worn areas along the gas line
- Look for loose or corroded connection fittings
- Examine areas where the line bends or connects to the tank
The soap bubble test helps identify gas leaks that aren’t visible.
Mix dish soap with water and apply it to all connections and joints.
Bubbles will form if gas is escaping from any connection point.
Turn on the gas supply briefly during this test.
If bubbles appear, turn off the gas immediately and tighten the connection.
Replace the gas line if tightening doesn’t stop the leak.
Check the propane tank connection and regulator for damage.
The regulator should show no cracks or corrosion.
Replace any damaged components before using the grill.
Inspecting Ignition Systems
Ignition systems often fail after winter storage due to moisture, debris, or battery corrosion.
The ignition electrode should be clean and positioned correctly near the burner for proper sparking.
Remove the battery from battery-powered ignition systems.
Check for corrosion on battery terminals and clean with a wire brush if needed.
Replace old batteries with fresh ones before testing.
Clean the ignition electrode with a small brush or cloth.
Remove any grease, debris, or corrosion that could prevent proper sparking.
The electrode should be about 1/8 inch from the burner port.
Testing the Ignition:
- Press the ignition button and listen for clicking sounds
- Look for a strong blue spark jumping to the burner
- Test each burner’s ignition separately
If no spark occurs, check wire connections leading to the electrode.
Replace the ignition module if cleaning and new batteries don’t solve the problem.
Assessing Hoses and Valves
Rubber and plastic hoses deteriorate over time, especially when exposed to temperature changes during winter storage.
Inspect all hoses for flexibility, cracks, or hardened areas that indicate replacement is needed.
Bend hoses gently to check for flexibility.
Stiff or brittle hoses should be replaced immediately.
Look for small cracks that could worsen during use.
Check valve operation by turning gas control knobs through their full range.
Valves should turn smoothly without sticking or binding.
Sticky valves can prevent proper gas flow control.
Valve Inspection Points:
- Smooth operation from off to high settings
- No gas smell when valves are in off position
- Proper alignment with control markings
- No damage to valve stems or handles
Clean valve stems with a damp cloth to remove debris.
Apply a small amount of food-safe lubricant if valves feel stiff.
Replace valves that don’t operate smoothly after cleaning.
Test each burner by turning on one valve at a time.
Flames should light evenly and burn blue.
Yellow flames or uneven burning indicates blocked burner ports or gas flow problems that need attention.
Reassembling and Testing the BBQ
After cleaning all parts, putting the grill back together correctly ensures safe operation.
A proper safety test confirms everything works before the first cook.
Reattaching Cleaned Components
Start by placing the firebox or main body in its final position.
Make sure all surfaces are completely dry before assembly.
Install the heat plates or flavorizer bars first.
These pieces sit directly above the burners.
Check that they align properly with the burner tubes.
Replace the cooking grates next.
Clean grates should slide into their designated slots easily.
Ensure they sit level and stable.
Reconnect the propane tank for gas grills.
Hand-tighten the connection until snug.
Never use tools to overtighten gas connections.
Reattach any side shelves, warming racks, or drip pans.
These accessories should click or slide into place securely.
Check that all screws and bolts are properly tightened.
Loose hardware can cause parts to shift during cooking.
Conducting a Safety Test Before Use
Open the propane tank valve slowly for gas grills.
Listen for any hissing sounds that might indicate gas leaks.
Apply soapy water to all gas connections.
Bubbles forming around connections show gas leaks that need immediate attention.
Test each burner individually.
Turn one burner to high and ignite according to manufacturer instructions.
Check for even flame distribution.
Flames should be blue with yellow tips.
Orange or yellow flames indicate clogged burner ports.
Run the grill on medium heat for 10-15 minutes.
This burns off any cleaning residue and ensures proper operation.
Verify that temperature controls work correctly.
The grill should heat up and cool down as expected when adjusting settings.
Preventive Measures for Future Winters

Proper winter protection prevents rust, pest damage, and expensive repairs.
Quality covers and correct storage techniques keep grills ready for spring use.
Choosing Appropriate BBQ Covers
The right cover protects against snow, rain, and freezing temperatures.
Heavy-duty vinyl or polyester covers work best for winter protection.
Look for covers with waterproof coating and reinforced seams.
These features prevent moisture from reaching metal parts.
Breathable materials stop condensation buildup under the cover.
Trapped moisture causes rust and mold problems.
Measure the grill before buying a cover.
The cover should fit snugly without being too tight.
Elastic hems and drawstrings keep covers secure during winter storms.
Wind can tear loose covers and damage the grill.
UV-resistant materials prevent the cover from breaking down in sunlight.
This matters for grills stored in sunny areas.
 For those looking for a reliable winter grill cover, one standout option is the Samhe Heavy-Duty 75-Inch BBQ Grill Cover.
Made from 300D Oxford fabric with a PVC and silver UV coating, it’s designed to withstand rain, snow, and harsh winter sun.
The reinforced seams and Velcro straps help keep it securely in place, even during gusty winds.
Its breathable fabric minimizes condensation, preventing rust and mold, while the durable material resists tearing and fading.
Before purchasing, always double-check your grill’s dimensions to ensure a snug fit.
This cover comes in multiple sizes, making it suitable for most large grills, from gas barbecues to smokers.
Investing in a high-quality cover like this not only protects your grill through the winter but also reduces maintenance, keeping your equipment ready for the first spring cookout.
Tips for Off-Season Storage
Clean the grill completely before winter storage.
Remove all grease and food particles that attract pests.
Disconnect propane tanks and store them upright in a dry place.
Never store tanks in basements or garages.
Apply a thin coat of cooking oil to grates after cleaning.
This prevents rust during storage months.
Store grills in covered areas when possible.
Garages, sheds, or covered patios offer better protection than outdoor storage.
Remove batteries from electronic ignition systems.
Cold temperatures can cause batteries to leak and damage parts.
Check covers monthly for tears or loose areas.
Fix small problems before they become big ones.
Environmental Considerations for Cleaning

Cleaning a BBQ after winter doesn’t have to harm the environment.
Natural cleaning methods work just as well as chemical products and protect both your family and the planet from toxic substances.
Eco-Friendly Cleaning Solutions
White vinegar cuts through grease and removes rust naturally.
Mix equal parts white vinegar and water in a spray bottle.
Spray this solution on grill grates and let it sit for 15 minutes before scrubbing.
Baking soda works well for stubborn stains and burnt-on food.
Make a paste with three parts baking soda and one part water.
Apply the paste to problem areas and scrub with a wire brush.
Lemon juice dissolves grease and leaves a fresh scent.
Cut a lemon in half and rub it directly on the grill grates.
The acid breaks down buildup without chemicals.
Aluminum foil cleans grill grates without any cleaning products.
Crumple foil into a ball and scrub the grates while they’re still warm.
This method removes debris and creates a smooth cooking surface.
These natural options cost less than commercial cleaners.
They also won’t leave chemical residues that could transfer to food during cooking.
Proper Disposal of Waste
Grease disposal requires special care to protect water systems.
Never pour grease down drains or toilets.
Let grease cool and solidify, then scrape it into the trash.
Many communities have grease recycling programs at local waste centers.
Check with your city or county for drop-off locations that turn used cooking oil into biodiesel fuel.
Wire brush bristles and metal debris should go in regular trash, not recycling.
These small pieces can damage recycling equipment and contaminate other materials.
Cleaning rags soaked with grease become fire hazards.
Store used rags in a metal container with a tight lid until disposal.
Some auto parts stores accept oily rags for proper disposal.