
Gas grilling combines convenience with exceptional flavor, making it the preferred cooking method for millions of home cooks.
To grill on a gas grill, one must clean the grates, preheat the grill for about 30 minutes, then cook food using either direct heat for quick-cooking items or indirect heat for thicker cuts that need slower cooking.
The process involves understanding key components like burner controls and heat zones, along with proper preparation techniques that prevent sticking and ensure even cooking.
Temperature management plays a crucial role, as does knowing when to keep the lid open versus closed depending on what foods are being prepared.
Mastering gas grill fundamentals opens up endless possibilities for outdoor cooking, from perfectly seared steaks to tender vegetables and delicate seafood.
This guide covers everything from initial setup and essential techniques to proper cleanup methods that extend the grill’s lifespan.
Understanding Your Gas Grill
 Gas grills operate using either propane tanks or natural gas connections, with propane being the most common choice for home grilling.
Essential components include burner tubes, cooking grates, and ignition systems that work together to create controlled heat zones.
Types of Gas Grills and Fuel Sources
Propane is the most popular fuel choice for gas grills.
Most hardware stores and grocery stores offer propane tank exchange stations outside their buildings.
The initial propane tank purchase costs more because buyers pay for both the tank and fuel.
Subsequent refills cost less through tank exchange programs at retail locations.
Natural gas grills connect directly to home gas lines.
This option costs less over time but requires expensive installation of gas lines to the grilling area.
Natural gas burns cleaner than propane but produces less heat output.
Propane generates higher temperatures and works better for most home grilling needs.
Portable gas grills use small propane canisters.
Built-in models typically connect to natural gas lines for permanent outdoor kitchen installations.
Key Components and Accessories
Burner tubes distribute gas evenly across the cooking surface.
Most gas grills feature 2-4 burners that operate independently for temperature control.
Cooking grates sit directly above the burners.
Clean grates prevent food from sticking and create better grill marks on meat.
Ignition systems include auto-light buttons or manual lighting holes.
Some grills include match holders attached to the side for manual lighting when auto-ignition fails.
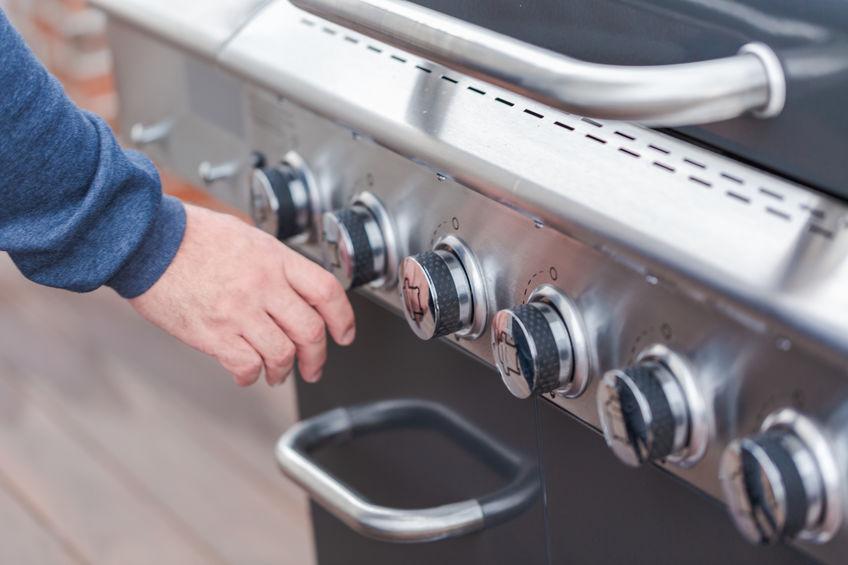
Control knobs adjust gas flow to each burner.
Settings typically range from off to high heat with multiple temperature levels between.
Top racks provide additional cooking space.
These upper shelves work well for warming buns or melting cheese on burgers.
Safety Precautions and Setup
Propane tanks must stay outside at all times.
Tanks can remain under covered grills when disconnected but never inside garages or sheds.
Connect the propane tank by turning the valve counterclockwise until completely open.
Always check connections for gas leaks before lighting the grill.
Clean the grill regularly using a grill brush on grates and interior surfaces.
Annual deep cleaning maintains performance and prevents buildup in burner tubes.
Keep the grill lid open when lighting to prevent gas buildup.
Turn off all burners and close the propane tank valve after each grilling session.
Store grilling tools and accessories in dry locations.
Replace worn ignition systems and damaged grates to maintain safe operation.
Preparing the Grill for Cooking

Proper preparation ensures safe operation and optimal grilling results.
The process involves securing the gas connection, cleaning the cooking surface, and bringing the grill to the correct temperature.
Connecting and Checking the Propane Tank
The propane tank connection requires careful attention to safety and proper alignment.
Most gas grills use portable propane tanks with a standard threading system.
Locate the gas supply hose and regulator attached to the grill.
The regulator appears as a round metal piece connected to the hose end.
Thread the regulator onto the propane tank valve by turning it clockwise until snug.
Connection Steps:
- Ensure proper thread alignment before tightening
- Hand-tighten only – avoid using tools
- Check for secure connection without over-tightening
- Open the propane tank valve completely
Test the connection by applying soapy water to all joints.
Bubbles indicate a gas leak that requires immediate attention.
Keep a spare propane tank available to avoid interruptions during cooking sessions.
Always position the grill in a well-ventilated outdoor area.
Never operate a gas grill indoors or in enclosed spaces.
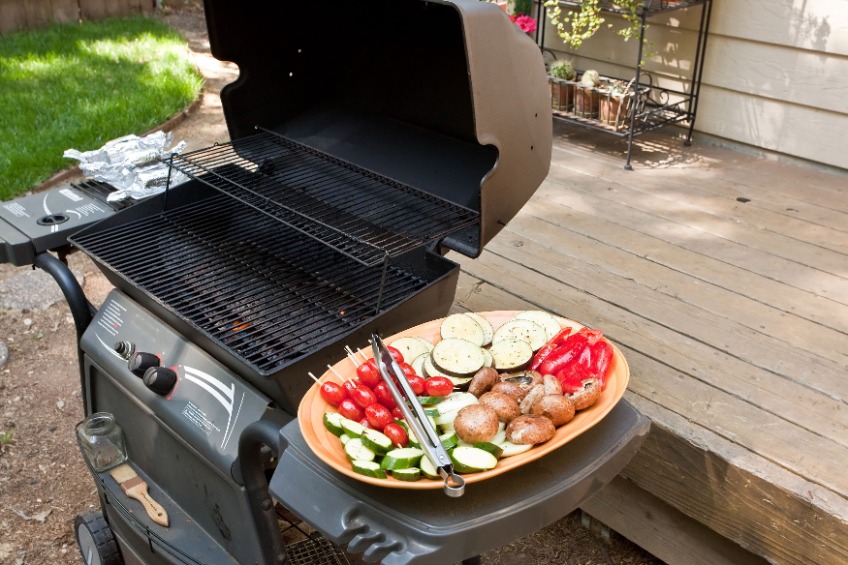
Cleaning and Seasoning the Grates
Clean grates prevent food contamination and ensure proper heat transfer.
Remove any packaging materials, manufacturing oils, or debris from previous cooking sessions.
Use a grill brush with stiff bristles to scrub the grates thoroughly.
For new grills, wash the grates with warm soapy water and rinse completely.
Dry the grates with a clean towel.
Cleaning Process:
- Remove grates from the grill
- Scrub with grill brush or steel wool
- Wash with dish soap and warm water
- Rinse and dry completely
- Apply thin layer of cooking oil
Season the clean grates by coating them lightly with high-heat cooking oil.
This creates a non-stick surface and prevents rust formation.
Vegetable oil or canola oil work well for this purpose.
Preheating Procedures for Optimal Grilling
Preheating creates the ideal cooking environment and helps clean any remaining residue from the grates.
This step is essential for achieving proper sear marks and preventing food from sticking.
Turn all burners to maximum heat and close the lid.
Most grills require 10 to 15 minutes to reach the target temperature of 400°F.
Built-in thermometers provide accurate temperature readings.
Preheating Steps:
- Light all burners using the igniter button
- Set burners to high heat
- Close the lid completely
- Wait for temperature to reach 400°F
- Reduce to desired cooking temperature
Once preheated, use the grill brush again to remove any loosened debris from the hot grates.
The high temperature makes cleaning more effective as residue becomes easier to remove.
Adjust burner settings based on cooking requirements.
Medium heat works well for most grilling tasks and provides better temperature control for beginners.
Essential Grilling Techniques

Gas grills excel at two fundamental cooking methods that give you complete control over heat distribution.
Direct heat delivers intense, concentrated cooking for quick-searing foods, while indirect heat creates an oven-like environment for slower, more gentle cooking.
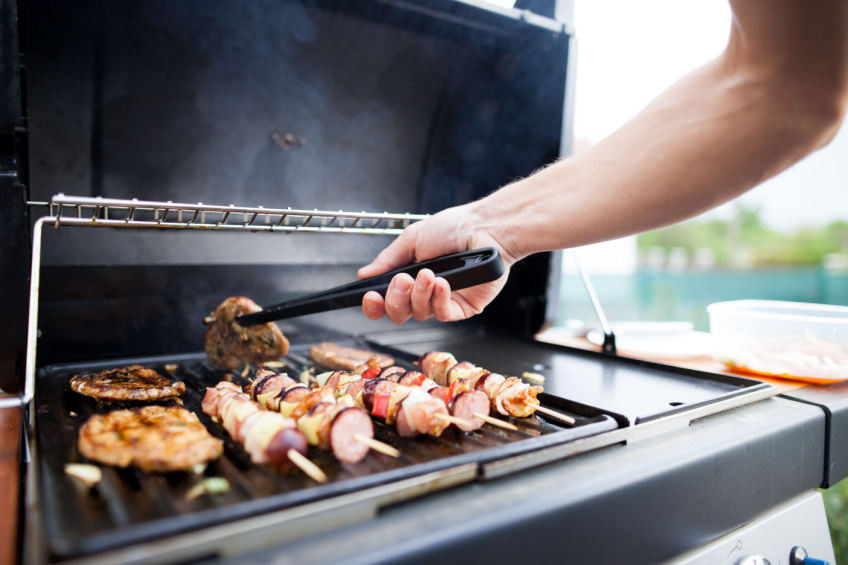
Direct Grilling Method
Direct grilling places food directly over the heat source for high-temperature cooking.
This technique works best for foods that cook quickly, typically under 20 minutes.
Best foods for direct grilling:
- Steaks and chops
- Burgers and hot dogs
- Fish fillets
- Vegetables
- Chicken breasts
Set all burners to medium-high or high heat, typically 400-500°F.
Preheat the grill for 10-15 minutes with the lid closed.
Place food directly over the lit burners.
Keep the lid open for thinner cuts to maintain direct heat contact.
For thicker items, close the lid but monitor carefully to prevent overcooking.
Grilling temperature control is crucial.
Adjust burner knobs to maintain consistent heat. Move food to cooler areas if flare-ups occur.
Turn food only once, halfway through cooking time.
This creates better searing and grill marks.
Use tongs rather than forks to avoid piercing and losing juices.
Indirect Grilling Method
Indirect grilling transforms your gas grill into an outdoor oven by cooking food away from direct flame.
This method suits larger cuts that need longer cooking times.
Turn on burners on one side only, leaving the other side unlit.
Place food on the unlit side.
The heated air circulates around the food, cooking it evenly.
Ideal for indirect grilling:
- Whole chickens or turkeys
- Large roasts
- Ribs
- Thick steaks over 1.5 inches
Maintain grilling temperature between 225-350°F depending on the recipe.
Keep the lid closed to maintain heat circulation and prevent temperature loss.
Add a smoker box filled with soaked wood chips over the lit burners for enhanced flavor.
This creates smoke that infuses the food during the longer cooking process.
Position a drip pan under the food on the unlit side to catch drippings and prevent flare-ups.
Check internal temperature with a meat thermometer rather than opening the lid frequently.
Cooking Different Foods on a Gas Grill
 Different cuts of meat require specific techniques and temperatures to achieve optimal results.
Wood chips can enhance flavors across all protein types when used properly.
Steaks, Chops, and Burgers
Steaks perform best with high direct heat for searing.
Preheat the grill to 450-500°F before placing steaks directly over the flames.
For 1-inch thick steaks, cook 4-5 minutes per side for medium-rare.
Thicker cuts benefit from searing first, then moving to indirect heat to finish cooking.
Pork and lamb chops require similar treatment but cook to 145°F internal temperature.
Season chops 30 minutes before grilling for better flavor penetration.
Burgers need medium-high heat around 375-400°F.
Form patties slightly larger than buns since they shrink during cooking.
Cook burgers 4-5 minutes per side without pressing down.
This pressing releases juices and creates dry meat.
Ground beef should reach 160°F internal temperature for safety.
Chicken, Ribs, and Roasts
Whole chickens and large cuts require indirect cooking methods.
Set up the grill with burners on one side only, creating a cooler zone.
Place whole chickens breast-side up on the cooler side.
Cook at 350-375°F for 60-75 minutes until internal temperature reaches 165°F.
Ribs need low and slow cooking at 250-275°F for 3-4 hours.
Use the indirect method and keep the lid closed to maintain consistent temperature.
Wrap ribs in foil during the last hour to prevent drying.
Apply sauce only in the final 15-20 minutes to prevent burning.
Roasts like beef tenderloin or pork loin benefit from searing over direct heat first.
Then move to indirect heat to finish cooking slowly and evenly.
Using Wood Chips for Added Flavor
Wood chips add smoky flavor to gas-grilled foods.
Soak chips in water for 30 minutes before use to create more smoke and prevent burning.
Place soaked chips in a smoker box or aluminum foil packet with holes.
Position the packet directly over a lit burner for consistent smoke production.
Apple and cherry wood complement pork and chicken.
Hickory and oak pair well with beef and ribs.
Add wood chips at the beginning of longer cooks.
For quick-cooking items like burgers, add chips 10 minutes before placing food on the grill.
Replace wood chips every 45-60 minutes during extended cooking sessions.
Fresh chips maintain steady smoke output throughout the cooking process.
Managing Grilling Temperatures and Checking Doneness
Successful gas grilling depends on controlling heat across the cooking surface and accurately measuring when food reaches safe internal temperatures.
These two skills work together to produce perfectly cooked meals every time.
Controlling Heat Zones and Burners
Gas grills offer precise temperature control through individual burner adjustments and zone creation.
Each burner can be set independently to create different heat levels across the cooking surface.
Temperature ranges for gas grilling:
| Heat Level | Temperature Range | Best For |
|---|---|---|
| Low | 200°F – 250°F | Slow-cooked ribs, brisket |
| Medium-Low | 250°F – 300°F | Whole chicken, pork |
| Medium | 300°F – 375°F | Burgers, poultry, vegetables |
| Medium-High | 375°F – 450°F | Fish steaks, thick beef cuts |
| High | 450°F – 600°F | Searing steaks, kebabs |
Zone grilling creates different temperature areas on the same grill.
For two-zone cooking, light one burner on high and leave the other on low or off.
Three-zone setups use high, medium, and low settings across multiple burners.
The built-in hood thermometer measures air temperature, not surface temperature.
Use a grill surface thermometer or infrared gun for accurate readings at grate level.
Keep the lid closed during cooking to maintain consistent temperatures.
Opening the lid causes heat loss and temperature fluctuations that lead to uneven cooking.
Measuring Internal Temperature Accurately
Internal temperature determines food safety and doneness better than cooking time alone.
A reliable instant-read thermometer provides the most accurate measurements.
Insert the thermometer into the thickest part of the meat, avoiding bones and fat.
For whole poultry, check the thigh meat near the bone.
For steaks and chops, insert from the side into the center.
Key internal temperatures:
- Beef steaks: 125°F (rare), 135°F (medium-rare), 145°F (medium)
- Ground beef: 160°F minimum
- Pork: 145°F with 3-minute rest
- Chicken: 165°F in thickest part
- Fish: 145°F or until flesh flakes easily
Check temperature toward the end of estimated cooking time.
Remove meat from the grill just before it reaches target temperature, as it continues cooking from residual heat.
Wireless probe thermometers monitor both food temperature and grill surface temperature simultaneously.
These tools eliminate guesswork and prevent overcooking.
Cleanup and Maintenance After Grilling
 Proper cleanup and maintenance after each grilling session involves safely shutting down the equipment, thoroughly cleaning all cooking surfaces, and performing regular upkeep tasks.
These practices extend the grill’s lifespan and ensure optimal performance for future cooking sessions.
Turning Off and Disconnecting the Grill
The grilling process should end with a systematic shutdown procedure that prioritizes safety.
Turn off all burner control knobs by rotating them to the “OFF” position first.
Close the propane tank valve by turning it clockwise until tight.
This step prevents gas from continuing to flow through the system when the grill is not in use.
Allow the grill to cool completely before attempting any cleaning or maintenance tasks.
Hot surfaces can cause burns and make cleaning solutions less effective.
Disconnect the propane tank if the grill will not be used for an extended period.
Store the tank upright in a well-ventilated outdoor area away from heat sources.
Check that all control knobs remain in the off position before closing the grill lid.
This prevents accidental gas flow if someone bumps the controls while the grill is stored.
Cleaning Grates and Burner Components
Heat the grill for 15 minutes after cooking to burn off food residue before cleaning begins.
This makes debris removal much easier and more effective.
Use a grill brush with stiff bristles to scrub the grates while they remain warm.
The brush removes stuck-on food particles and grease buildup that can affect future cooking performance.
Remove the cooking grates completely for thorough cleaning with warm soapy water.
Clean grates provide better heat transfer and prevent food from sticking during the next grilling session.
Wipe down the burner covers or flavorizer bars with a damp cloth to remove grease and food particles.
These components distribute heat evenly and need regular attention.
Clean the interior cook box with a plastic scraper to remove built-up grease and debris.
Empty and clean the grease tray after each use to prevent flare-ups and unwanted odors.
Apply a light coating of vegetable oil to the grates before storing to prevent rust formation.
Routine Maintenance for Longevity
Inspect the propane connections monthly for leaks using soapy water around all joints and fittings.
Bubbles indicate gas leaks that require immediate attention from a professional.
Clean the exterior surfaces with appropriate cleaners based on the grill’s material.
Stainless steel requires specific cleaners while painted surfaces need gentle soap solutions.
Check burner tubes for spider webs or debris that can block gas flow and create uneven heating patterns.
Use a small brush or compressed air to clear any obstructions.
Perform a deep cleaning at least once annually by disassembling major components.
This includes removing burners, heat shields, and cooking grates for thorough cleaning.
Replace worn parts such as cooking grates, burner covers, or ignition components as needed.
Quality replacement parts maintain optimal grilling performance and safety standards.
Store the grill with a protective cover to shield it from weather elements when not in regular use.
Ninja FlexFlame PG301 – A New 5-in-1 Outdoor Cooking System

 The Ninja FlexFlame Grill and Smoker (Model PG301) is one of the newest and most versatile grills to hit the market.
Designed as a 5-in-1 cooking system, it combines propane grilling with electric precision and adds the ability to smoke, roast, griddle, and even bake pizza.
With three burners, digital temperature control ranging from 200°F to 600°F, and a built-in CyclonicHeat-iQ fan for even cooking, it delivers consistent results across every style of outdoor cooking.
What makes the Ninja FlexFlame stand out is how approachable it is for first-time grillers.
The digital controls take the guesswork out of managing heat, while its multi-function versatility means you can experiment with different cooking methods without needing separate equipment.
Add to that the sleek stainless steel design and the convenience of a premium cart setup, and it’s clear why this grill is gaining so much attention.
For anyone wondering how do you grill on a gas grill? the Ninja FlexFlame offers one of the easiest introductions, making outdoor cooking more accessible while still packing the performance and flexibility that seasoned grillers appreciate.
It’s a successful new entry in the grilling world, and one that’s shaping up to be a favorite for backyard cooking in 2025/6.