

 Turning on a propane grill involves opening the grill lid, ensuring all burner knobs are off, connecting the propane tank securely, checking for gas leaks, opening the tank valve, and lighting the burners one at a time starting with the one farthest from the tank.
The key to safe operation lies in maintaining proper ventilation by keeping the lid open during ignition and following a systematic approach that prioritizes safety checks before lighting any burners.
Many grill owners skip essential safety steps or feel uncertain about the proper sequence, which can lead to dangerous situations or frustrating experiences.
Understanding the components of a propane system and knowing how to troubleshoot common problems transforms grilling from a potentially stressful activity into an enjoyable outdoor cooking method.
This comprehensive guide covers everything from initial preparation and tank operation to temperature control and maintenance practices.
Whether someone owns their first propane grill or needs to refresh their knowledge, these detailed instructions provide the confidence needed to operate any propane grill safely and effectively.
Preparation and Safety Precautions

Proper preparation involves selecting an appropriate location, thoroughly inspecting equipment, testing connections for leaks, and understanding the manufacturer’s guidelines.
These steps prevent accidents and ensure reliable grill operation.
Choosing a Clean and Ventilated Location
The grilling area must provide adequate ventilation to prevent propane gas accumulation.
Open outdoor spaces allow gas to dissipate safely if minor leaks occur.
Position the grill on a stable, level surface away from structures.
Maintain at least 10 feet of clearance from buildings, overhangs, and combustible materials.
Avoid these locations:
- Enclosed patios or gazebos
- Garages or carports
- Areas with low-hanging branches
- Windy spots that affect flame control
Clear the surrounding area of debris, dry leaves, and flammable objects.
Ensure the propane tank has adequate space and won’t be knocked over during cooking.
Keep a clear path to the propane tank valve for quick access during emergencies.
The cooking area should have sufficient lighting for safe operation during evening grilling sessions.
Inspecting the Propane Tank and Gas Connections
Examine the propane tank for visible damage before each use.
Look for dents, rust, or corrosion that could compromise tank integrity.
Check the tank’s expiration date printed on the collar.
Most propane tanks require recertification every 12 years from the manufacture date.
Inspect the gas supply hose for cracks, cuts, or wear.
Replace damaged hoses immediately as they pose significant safety risks.
Key inspection points:
- Tank valve threads for damage
- Regulator connection for proper fit
- Hose flexibility and condition
- Tank base for stability
Verify the propane tank valve moves freely between open and closed positions.
A stuck valve requires professional attention before use.
Ensure all connection points are clean and free from debris.
Dirt or grime can prevent proper sealing and cause gas leaks.
Checking for Gas Leaks
Test all gas connections using soapy water before igniting the grill.
Mix one part liquid dish soap with one part water in a spray bottle.
Apply the solution to all connection points while the propane tank valve is open and burner knobs are closed.
Focus on the regulator, hose connections, and tank valve threads.
Watch for bubble formation which indicates escaping gas.
Even small bubbles signal a leak that requires immediate attention.
If gas leaks are detected:
- Close the propane tank valve immediately
- Do not operate the grill
- Tighten loose connections or replace faulty parts
- Retest before proceeding
Perform leak tests when connecting a new propane tank or after any maintenance.
Regular testing prevents dangerous gas accumulation during operation.
Never use matches or lighters to check for leaks.
The soapy water method provides safe and reliable leak detection.
Reviewing the Grill Manual
The grill manual contains manufacturer-specific safety procedures and operating instructions.
Each grill model has unique features that require proper understanding.
Locate the lighting instructions for your specific ignition system.
Some grills use piezo igniters while others require manual lighting procedures.
Review the recommended maintenance schedule and cleaning procedures.
Proper maintenance prevents performance issues and extends grill lifespan.
Essential manual sections:
- Safety warnings and precautions
- Initial setup and assembly verification
- Operating procedures and controls
- Troubleshooting common problems
Keep the manual accessible during grilling sessions for quick reference.
Many manufacturers provide digital versions that can be stored on mobile devices.
Contact the manufacturer if the manual is missing or unclear instructions need clarification.
Proper understanding prevents operational mistakes and safety hazards.
Understanding Your Propane Grill Components

A propane grill contains several essential components that work together to provide safe and effective grilling.
The control knobs regulate gas flow to individual burners, while the ignition system creates the spark needed to light the gas.
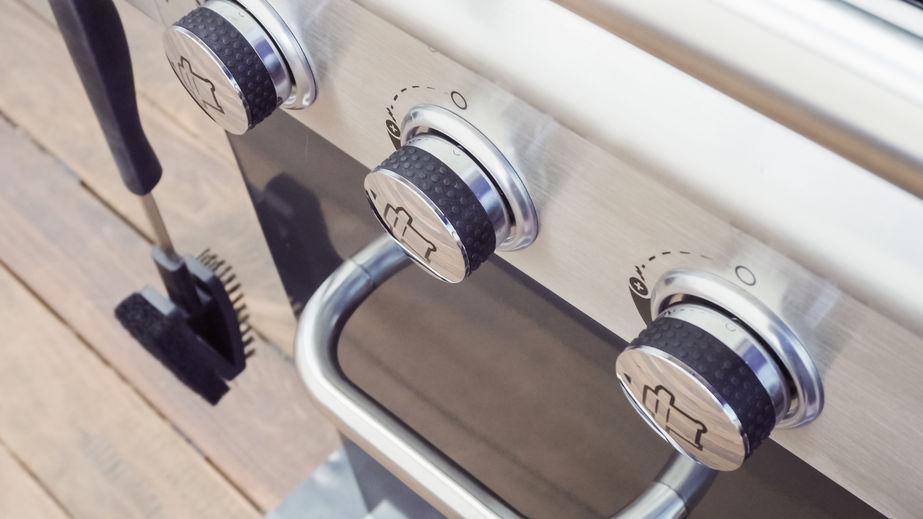
Control Knobs and Burner Knob Functions
The control knobs serve as the primary interface between the user and the propane grill’s gas flow system.
Each burner knob corresponds to a specific burner and controls the amount of gas flowing to that particular heating element.
Gas Flow Control:
- OFF position: Completely stops gas flow to the burner
- LITE/HIGH position: Provides maximum gas flow for ignition and high-heat cooking
- Medium settings: Reduce gas flow for moderate cooking temperatures
- LOW position: Minimal gas flow for gentle cooking or warming
Most propane grills feature individual control knobs for each burner.
This allows users to create different temperature zones across the cooking surface.
The knobs typically turn counterclockwise to increase gas flow and clockwise to decrease it.
Some advanced models include additional control knobs for side burners, rotisserie motors, or infrared heating elements.
These specialized knobs operate similarly to main burner controls but may have different temperature ranges.
Ignition System Types and Features
Modern propane grills utilize two main types of ignition systems to light the burners safely and reliably.
The ignition system eliminates the need for matches or separate lighters during the startup process.
Piezo Ignition System:
- Generates spark through mechanical pressure
- No batteries required
- Push-button or twist-start activation
- Creates audible clicking sound when engaged
Electronic Ignition System:
- Battery-powered spark generation
- Typically uses AA batteries
- Push-button activation with indicator lights
- Quieter operation than piezo systems
The ignition system works by creating a spark near the burner when the control knob is in the LITE position.
Users should hear the gas flowing and see the spark before the flame ignites.
Most systems feature multiple ignition points to ensure reliable lighting across all burners.
If the ignition system fails, users can light the grill manually with a long-reach lighter while following proper safety procedures.
Grill Grates and Flavorizer Bars
Grill grates provide the cooking surface and create the distinctive sear marks associated with grilled food.
The material and design of these grates significantly impact cooking performance and maintenance requirements.
Grate Materials:
- Stainless steel: Durable, rust-resistant, easy to clean
- Cast iron: Excellent heat retention, requires seasoning
- Porcelain-coated steel: Non-stick surface, moderate durability
Flavorizer bars sit between the burners and grill grates in many propane grill designs.
These angled metal pieces serve multiple functions that enhance the grilling experience.
Flavorizer Bar Functions:
- Vaporize drippings to create flavor-enhancing smoke
- Protect burners from grease and food debris
- Distribute heat more evenly across the cooking surface
- Reduce flare-ups by managing grease flow
The bars require regular cleaning to prevent grease buildup.
Most are removable for easy maintenance and replacement when necessary.
Drip Tray and Built-in Thermometer Overview

The drip tray collects grease and food particles that fall through the grill grates during cooking.
This component prevents grease from accumulating on the ground and reduces fire hazards.
Most drip trays slide out from the front or side of the grill for easy removal and cleaning.
Disposable aluminum drip pans fit inside permanent trays to simplify cleanup.
Drip Tray Maintenance:
- Empty after every 2-3 cooking sessions
- Clean with warm soapy water
- Check for damage or warping regularly
- Replace disposable liners as needed
Built-in thermometers mount on the grill lid and display the internal cooking temperature.
These thermometers help users monitor heat levels without opening the lid frequently.
The thermometer probe typically sits at grate level to provide accurate cooking temperature readings.
Most display temperatures in both Fahrenheit and Celsius with color-coded zones indicating low, medium, and high heat ranges.
Digital thermometers offer more precise readings than analog models.
Some advanced versions include wireless connectivity for remote monitoring through smartphone apps.
Connecting and Operating the Propane Tank

Proper connection and operation of the propane tank requires securing the tank to the grill, opening the valve correctly, and maintaining steady gas flow throughout cooking.
Properly Attaching the Propane Tank
The propane tank connects to the grill through a threaded coupling system.
Users should first ensure the tank valve remains closed before beginning the connection process.
The regulator attaches directly to the propane tank valve by threading it clockwise.
Hand-tightening provides sufficient security for most connections.
Over-tightening with tools can damage the threads or gasket.
Key connection steps:
- Align the regulator with the tank valve threads
- Turn clockwise until snug
- Check that the gasket sits properly in the coupling
- Avoid using excessive force during tightening
The gasket creates a seal between the regulator and tank valve.
A damaged or missing gasket will cause gas leaks.
Users should inspect this rubber component before each connection and replace it when cracked or worn.
After attachment, the connection should feel secure without wobbling.
The regulator hose extends from the tank to the grill’s gas inlet without kinks or sharp bends.
Opening the Propane Tank Valve
The propane tank valve requires slow, deliberate operation to prevent pressure surges.
The valve handle turns counterclockwise to open and clockwise to close.
Opening the valve too quickly can trigger the tank’s safety mechanism, which restricts gas flow.
This safety feature prevents dangerous pressure buildup but can interrupt cooking if activated.
Proper valve operation technique:
- Turn the valve handle counterclockwise slowly
- Open approximately one full turn
- Listen for the gentle hiss of gas flow
- Stop turning when resistance increases
The valve should open smoothly without excessive force.
Difficulty turning the valve may indicate corrosion or damage that requires professional attention.
Users should never force a stuck valve or use tools like pliers on the handle.
The plastic handle can crack under pressure, making future operation difficult or impossible.
Ensuring Reliable Gas Supply
A reliable gas supply depends on adequate tank pressure and leak-free connections.
The pressure gauge on the regulator indicates whether the system maintains proper pressure levels.
Signs of proper gas supply:
- Steady blue flames on all burners
- Consistent flame height across the cooking surface
- No yellow or orange flame coloration
- Minimal flame flickering during operation
Gas leaks compromise both safety and performance.
Users should test all connections with soapy water before lighting the grill.
Bubbles forming around connections indicate escaping gas that requires immediate attention.
The propane tank valve should remain fully open during cooking.
Partially opened valves reduce gas pressure and create uneven heating.
This restriction can also cause the safety mechanism to activate unexpectedly.
Low tank levels affect gas supply consistency.
Tanks nearing empty may provide adequate pressure initially but fail to maintain flow during extended cooking sessions.
Keeping a spare tank prevents interruptions during meal preparation.
Lighting the Propane Grill: Step-by-Step Process
Most propane grills offer two primary ignition methods: an automatic ignition system using the built-in igniter button, or manual lighting through the designated lighting hole.
Each method requires specific burner knob positions and timing to ensure safe, successful ignition.
Using the Automatic Ignition Button
The automatic ignition system provides the most convenient way to light a propane grill.
Before starting, the user should ensure the grill lid is open and all burner knobs are in the off position.
To begin the ignition process, the user turns one burner knob to the “ignite” or “start” position.
This allows propane to flow to the selected burner.
Next, they press and hold the ignition button while the burner knob remains in the start position.
The igniter button creates an electric spark that ignites the propane gas.
The user should see a blue flame appear within a few seconds.
If ignition doesn’t occur immediately, they should turn off the burner knob and wait 30 seconds before trying again.
Once the first burner lights successfully, additional burners can be lit by turning their knobs to the start position.
The flame from the already-lit burner will ignite the adjacent burners.
Starting the Grill Manually with the Lighting Hole
Manual lighting becomes necessary when the automatic ignition fails or malfunctions.
This method requires a long-handled lighter or extra-long matches designed for grilling.
The user locates the lighting hole, typically found on the left side or front of the grill near the control panel.
This small opening provides direct access to the burner area.
Before lighting, they insert the lit lighter or match through the lighting hole, positioning it near the burner.
Only then should they slowly turn the burner knob to the start position.
The propane will ignite immediately upon contact with the flame.
The user should keep the lighter in position until a steady blue flame establishes across the burner.
Safety requires keeping hands and face away from the grill opening during this process.
If ignition fails, they must turn off the gas and wait before attempting again.
Adjusting Burner Knobs for Ignition
Proper burner knob manipulation ensures safe and effective lighting regardless of the ignition method chosen.
Each knob controls gas flow to its corresponding burner section.
The standard lighting procedure involves turning the selected burner knob slowly to the “start” or “ignite” position.
This position allows maximum gas flow for initial ignition.
Most grill knobs feature clear markings indicating off, start, high, medium, and low settings.
The start position typically sits between off and high on the control dial.
After successful ignition, users can adjust the flame intensity by turning the knob to their desired heat level.
High heat works best for searing, while medium or low heat suits slower cooking methods.
Multiple burner grills allow zone cooking by lighting only specific burners.
Users can create different temperature areas by adjusting individual burner knobs to various settings.
Preheating and Temperature Control

Proper preheating typically takes 10-15 minutes with all burners on high, while temperature control relies on adjusting control knobs and monitoring built-in thermometer readings for consistent cooking results.
Preheating the Grill Effectively
Light all burners and set them to high heat to begin the preheating process.
This creates maximum heat distribution across the entire cooking surface.
Allow the grill to preheat for 10-15 minutes with the lid closed.
This timeframe ensures the grates reach optimal temperature for proper searing.
Essential preheating steps:
- Set all burners to maximum heat
- Close the lid to trap heat
- Wait 10-15 minutes minimum
- Check temperature before cooking
The grill is ready when it reaches 400-500°F for most cooking applications.
Higher temperatures work better for searing steaks and creating grill marks.
Keep the lid closed during preheating to maintain consistent heat buildup.
Opening the lid releases heat and extends preheating time significantly.
Setting and Monitoring Temperature
Turn control knobs clockwise to increase heat and counterclockwise to decrease temperature.
Most grills feature knobs labeled as High, Medium, and Low settings.
Adjust burners individually to create different heat zones across the cooking surface.
This allows simultaneous cooking of foods requiring different temperatures.
Temperature zones for different foods:
- High (450-550°F): Steaks, burgers, searing
- Medium (350-450°F): Chicken, pork chops, vegetables
- Low (250-350°F): Fish, delicate items, warming
Monitor temperature throughout cooking by checking the built-in thermometer regularly.
Propane flow can vary slightly, affecting consistent heat output.
Make gradual adjustments to control knobs rather than dramatic changes.
Small movements prevent temperature swings that affect cooking quality.
Utilizing the Built-in Thermometer
The built-in thermometer measures air temperature inside the grill rather than the exact surface temperature of the grates.
This reading provides a general temperature reference for cooking.
Position the thermometer at grill lid level for accurate readings.
Most built-in thermometers mount in the lid and measure the hottest air circulation area.
Built-in thermometer readings may not reflect precise grate temperature.
Consider using an infrared temperature gun for exact surface measurements when precision matters.
Thermometer reading guidelines:
- 250-300°F: Low heat cooking
- 300-400°F: Medium heat range
- 400-500°F: High heat cooking
- 500°F+: Maximum searing temperature
Check thermometer accuracy periodically by comparing readings with a separate grill thermometer.
Replace or calibrate if readings consistently vary by more than 25°F.
Troubleshooting Common Issues

Most propane grill problems stem from three main areas: failed ignition where the burner won’t light, gas flow issues preventing proper fuel delivery, and malfunctioning ignition systems including faulty igniter buttons or worn components.
Dealing with Failed Ignition
When a grill fails to ignite, the most common cause is an empty propane tank.
Users should check the tank weight by subtracting the tare weight stamped on the collar from the total weight.
Gas supply issues often trigger the regulator’s safety bypass mode.
This happens when someone opens the tank valve too quickly, causing restricted gas flow.
To reset the regulator:
- Turn off all burner controls
- Close the propane tank valve completely
- Wait 60 seconds
- Open the tank valve very slowly
- Attempt to light the grill normally
Gas leaks can also prevent proper ignition.
Users should mix equal parts dish soap and water, then apply the solution to all connections while the gas is on. Bubbling indicates a leak that requires immediate attention.
Identifying and Fixing Gas Flow Problems
Poor gas flow typically results from regulator problems or connection issues.
The safety bypass feature reduces gas pressure when it detects rapid pressure changes or potential leaks.
Signs of gas flow problems include:
- Weak yellow flames instead of strong blue flames
- Burners that light but won’t reach high temperatures
- Uneven flame patterns across burner tubes
Connection problems often occur at the tank valve or regulator coupling.
Users should ensure the regulator connects hand-tight without over-tightening.
Cross-threading can damage the connection and create gas leaks.
Debris in the gas line or burner tubes can also restrict flow.
Spider webs and insects commonly block venturi tubes, requiring cleaning with a small wire or compressed air.
Addressing Issues with Ignition Systems
Ignition system failures usually involve either the igniter button mechanism or the electrode placement.
Electronic igniters require fresh batteries, typically AA or AAA types located in the control panel.
Piezo igniters rely on mechanical pressure to create sparks.
These systems can wear out over time but don’t require batteries.
A firm, quick push should produce a loud clicking sound.
Electrode problems include:
- Misaligned tips that don’t spark near the burner
- Dirty electrodes covered in grease or debris
- Loose wiring connections behind the control panel
Users can clean electrodes with a small brush and realign them to sit approximately 1/8 inch from the burner tube.
Loose connections require tightening the wire nuts or replacing damaged wires.
When ignition systems fail completely, manual lighting with a long lighter provides a safe alternative while planning repairs.
Proper Shutdown and Ongoing Maintenance

Proper shutdown procedures protect both safety and equipment longevity, while regular maintenance prevents gas leaks and ensures consistent cooking performance.
Following systematic shutdown steps and maintaining key components keeps propane grills operating safely for years.
Turning Off Burners and Gas Supply
The shutdown sequence must follow a specific order to prevent gas buildup and safety hazards.
First, turn all control knobs to the OFF position while the grill is still hot.
This step stops gas flow to the burners immediately.
Wait for the flames to extinguish completely before proceeding to the next step.
Next, close the propane tank valve by turning it clockwise until tight.
This prevents gas from remaining in the lines between uses.
For portable models with disposable canisters, simply turn the control knob to OFF.
The tank valve closure is the most critical safety step.
Allow the grill to cool for at least 10 minutes before closing the lid.
Hot surfaces can cause burns during cleaning or storage preparations.
Never skip the tank valve closure, even for short breaks.
Gas can accumulate in lines and create ignition hazards when restarting.
Cleaning Grill Grates and Drip Tray
Clean grill grates after each use while they remain warm but not scorching hot.
Use a grill brush to remove food particles and grease buildup.
Warm grates release debris more easily than cold ones.
Apply firm pressure with the brush, working in parallel strokes across the grates.
Remove the drip tray and empty accumulated grease and food particles.
Wash the tray with warm soapy water after every few uses.
Grease buildup in drip trays creates fire hazards and attracts pests.
Replace disposable drip tray liners regularly for easier maintenance.
Scrape the firebox interior monthly to prevent grease accumulation.
Use a plastic scraper to avoid damaging the metal surfaces.
Deep clean grates monthly by soaking them in warm soapy water for 15 minutes.
This removes stubborn residue that brushing cannot eliminate.
Inspecting and Replacing Key Components
Check hoses and connections for cracks, wear, or gas leaks before each grilling season.
Apply soapy water to connections and watch for bubbles indicating leaks.
Replace damaged hoses immediately to prevent dangerous gas leaks.
Most manufacturers recommend hose replacement every 3-5 years regardless of visible wear.
Inspect control knobs for smooth operation and proper gas flow control.
Sticky or loose knobs indicate internal valve problems requiring professional service.
Test the ignition system monthly by attempting to light each burner.
Replace batteries in electronic ignition systems when clicking becomes weak or inconsistent.
Clean burner tubes seasonally by removing them and clearing spider webs or debris from gas ports.
Blocked ports cause uneven heating and yellow flames instead of blue.
Check the propane tank gauge regularly and keep a spare tank available.
Tanks should be recertified every 12 years or replaced if damaged.