

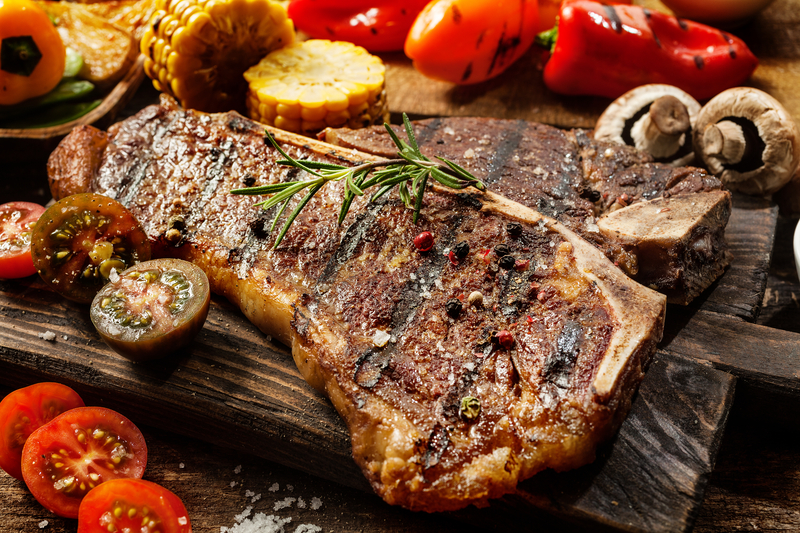
 Gas grills offer convenience and precise temperature control, but many grillers wonder if they can achieve the rich, smoky flavors traditionally associated with charcoal cooking.
The good news is that with the right techniques and tools, a gas grill can produce equally delicious and flavorful results.
A gas grill can deliver exceptional flavor through methods like using wood chips in smoker boxes, applying flavorful marinades and rubs, mastering indirect cooking techniques, and proper grill preparation.
These approaches transform the typical gas grilling experience by adding depth and complexity to food that rivals any charcoal setup.
The key lies in understanding how to work with a gas grill’s strengths while compensating for its natural limitations.
From selecting the right wood chips to perfecting temperature zones, these techniques require no special equipment and can be implemented by grillers of any skill level to create memorable outdoor cooking experiences.
Understanding Flavor Differences: Gas vs. Charcoal Grills
 Gas grills produce clean-burning heat through propane or natural gas combustion, while charcoal grills create complex flavors through smoke compounds and higher temperatures.
The fundamental difference lies in how each fuel source affects taste development and chemical reactions during cooking.
What Makes Charcoal Grilling Unique
Charcoal grills generate distinctive flavors through the combustion of carbon-based fuel.
When charcoal burns, it produces smoke containing hundreds of volatile compounds that penetrate food surfaces.
These compounds include guaiacol and syringol, which create the signature smoky aroma.
The burning process also releases phenolic compounds that contribute to the complex taste profile associated with charcoal grilling.
Charcoal reaches higher temperatures than gas grills, often exceeding 700°F.
This intense heat creates better searing conditions and promotes faster browning reactions.
The irregular heat distribution from charcoal creates hot spots and cooler zones.
This variation allows for different cooking techniques within the same grilling session.
Key flavor contributors from charcoal:
- Smoke compounds from carbon combustion
- Higher peak temperatures
- Radiant heat from glowing coals
- Ash particles that add mineral notes
Why Gas Grills Lack Smoky Flavor
Gas grills burn propane or natural gas cleanly, producing primarily carbon dioxide and water vapor.
This complete combustion eliminates the smoke-producing compounds that create charcoal flavor.
The controlled flame system prevents the organic matter breakdown that generates smoky taste compounds.
Gas burners maintain consistent temperatures without the chemical complexity of charcoal combustion.
Propane and natural gas burn at specific air-to-fuel ratios designed for efficiency.
This clean burning process removes the incomplete combustion that produces flavor-enhancing smoke.
Gas grills typically operate at lower maximum temperatures than charcoal grills.
Most gas grills reach 500-550°F, which limits the intensity of browning reactions.
The metal heat distributors and cooking grates in gas grills can create some flavor through fat drippings.
However, these flavors differ significantly from authentic charcoal-like flavor profiles.
Charcoal Grilling and the Maillard Reaction
The Maillard reaction occurs when proteins and sugars react under high heat, creating complex flavor compounds and browning.
Charcoal grills excel at promoting this reaction through superior temperature capabilities.
Charcoal’s ability to reach and maintain temperatures above 600°F accelerates Maillard reaction rates.
Higher temperatures create more pronounced browning and deeper flavor development in shorter cooking times.
The radiant heat from glowing charcoal provides direct energy transfer to food surfaces.
This heat source creates more intense surface temperatures than gas grill convection heating.
Maillard reaction benefits from charcoal:
- Higher surface temperatures for faster browning
- Direct radiant heat for even energy distribution
- Sustained high heat for complete reaction development
- Dry heat environment that concentrates flavors
Gas grills can achieve Maillard reactions but require longer preheating and careful temperature management.
The smoky flavor compounds from charcoal enhance the taste complexity beyond what Maillard reactions alone can provide.
Prepping Your Gas Grill for Maximum Flavor
 Proper preparation creates the foundation for flavorful gas grilling through thorough cleaning and correct preheating techniques.
Clean grill grates and properly maintained burners ensure even heat distribution and prevent unwanted flavors from contaminating food.
Cleaning and Maintenance Best Practices
A clean grill produces better-tasting food and prevents bitter flavors from old grease and food residue.
Dirty grates and accumulated debris create uneven heating and potential flare-ups that can burn food.
Essential cleaning steps include:
- Remove grill grates and heat tents or flavorizer bars after each use
- Scrub grates with a grill brush while still warm to remove stuck-on food
- Clean the drip pan regularly to prevent grease buildup and reduce flare-ups
- Wipe down burners and check for clogs in gas ports
Heat tents and flavorizer bars require monthly deep cleaning with warm soapy water.
These components distribute heat evenly and vaporize drippings for added flavor.
Regular maintenance prevents uneven heating problems.
Check burner tubes for spider webs or debris that can block gas flow.
Clean grease from the firebox to maintain proper airflow and temperature control.
Preheating the Grill Properly
Preheating the grill for 10-15 minutes ensures even cooking temperatures and creates the high heat needed for proper searing.
This step burns off any cleaning residue and prepares grates for optimal food release.
Set all burners to high during preheating to reach temperatures between 450-500°F.
The hot grates create attractive grill marks and prevent food from sticking.
Proper preheating also helps identify heating issues early.
Uneven heating patterns indicate clogged burners or damaged heat distribution components that need attention.
Close the lid during preheating to create an oven-like environment.
This technique reduces preheating time and ensures the entire cooking chamber reaches the desired temperature for consistent results.
Infusing Smoke: Methods to Add Smoky Flavor to Gas Grills
 Gas grills can produce authentic smoky flavors through strategic use of smoker boxes, foil packets, wood chunks, and charcoal additions.
Each method offers different levels of smoke intensity and duration for achieving that coveted charcoal-like flavor.
Using Smoker Boxes and Wood Chips
A smoker box provides the most controlled method for adding smoke flavor to gas grills.
These metal containers hold wood chips directly over a burner, creating consistent smoke production throughout the cooking process.
Stainless steel or cast iron smoker boxes work best for durability and heat retention.
Cast iron models maintain temperature longer, producing steadier smoke output.
If you’re shopping, here are some excellent options:
- Skyflame Wood Chip Smoker Box (stainless steel, double V-shape with hinged lid) — fits directly on burners and offers convenient refill access.
- BBQCuker Grill Smoker Box (stainless steel, flip-lid design) — food-safe stainless construction, designed for ease of use.
- Onlyfire Fan-Shape Smoker Box — specialized design for charcoal & kamado grills, but could serve well on gas grills in some layouts.
- Deluxe Smoker Box Kit (with wood chips included) — heavy-duty stainless steel box bundled with wood chip varieties (apple, cherry, hickory) for convenience.
- Pariplus 2-Pack Stainless Steel Smoker Boxes — great if you want redundancy or to smoke on two burners simultaneously.
How to Use (with Product Tips)
- Select a smoker box
 x 3.3\"(W) x 2.5\"(H), U.S. Design Patent") Choose one sized to your grill. The Skyflame model’s double V-shape lets it sit snugly between flame deflectors, maximizing contact with heat.
Choose one sized to your grill. The Skyflame model’s double V-shape lets it sit snugly between flame deflectors, maximizing contact with heat. - Soak wood chips for 30–60 minutes
Soaking ensures they smolder (not flame) and extend smoke production. Drain excess water before placing them in the smoker box. - Fill the smoker box
Load the soaked chips loosely to allow airflow. If using a hinged lid model (like Skyflame or BBQCuker), you can open and add chips mid-cook. - Position the smoker box over a lit burner (set to medium-low)
Place the box directly over one burner so it gets sufficient heat to generate smoke but not flare up. - Close the grill lid
Keep the lid shut to trap smoke and maintain consistent infusion.
Which Wood Chips to Use
- Hickory: Bold, bacon-like flavor (great for pork and beef)
- Mesquite: Intense, earthy taste (ideal for red meats)
- Applewood: Sweet, mild smoke (excellent for poultry and pork)
- Oak: Balanced, medium intensity (versatile across meats)
 Many sampler kits (like the Deluxe Smoker Box Kit) include multiple wood types so you can experiment.
Foil Packets and Pouches for Smoke
Foil packets offer a budget-friendly alternative to dedicated smoker boxes.
This method works well for occasional smoking or testing different wood types.
Create a foil packet using heavy-duty aluminum foil and soaked wood chips.
Fold the foil tightly around the chips, then poke 8-10 holes in the top surface for smoke release.
Foil pouches require monitoring since the aluminum can burn through at high temperatures.
Replace packets every 45-60 minutes for continuous smoke production.
Position the foil packet directly on grill grates over a lit burner.
Use medium-low heat to prevent the foil from burning too quickly.
This method produces lighter smoke flavor compared to smoker boxes.
Multiple packets may be needed for longer cooking sessions or stronger smoke infusion.
Introducing Wood Chunks and Types of Woods
Wood chunks provide longer-lasting smoke than chips, making them ideal for extended cooking sessions.
These larger pieces burn slowly and produce steady smoke for 2-3 hours.
Unlike wood chips, chunks don’t require soaking.
Dry wood chunks ignite more predictably and maintain consistent burning rates.
Different wood types create distinct flavor profiles:
| Wood Type | Flavor Profile | Best For |
|---|---|---|
| Hickory | Strong, smoky | Ribs, brisket |
| Mesquite | Intense, earthy | Steaks, burgers |
| Applewood | Sweet, fruity | Chicken, pork |
| Oak wood | Medium, balanced | All meats |
Place 2-3 chunks directly on flavorizer bars or heat tents above the burners.
They’ll ignite from radiant heat and produce consistent smoke flavor.
Wood chunks work best with indirect grilling setups where food cooks away from direct heat sources.
") The Mr. Bar-B-Q Wood Smoker Chips Bundle includes three 1.6 lb bags of 100% natural hardwood chips.
The Mr. Bar-B-Q Wood Smoker Chips Bundle includes three 1.6 lb bags of 100% natural hardwood chips.
Designed for use on gas, charcoal, or electric grills, these chips provide a rich, authentic smoke for all your grilling, smoking, and camping needs.
Soak before use for optimal smoke production.
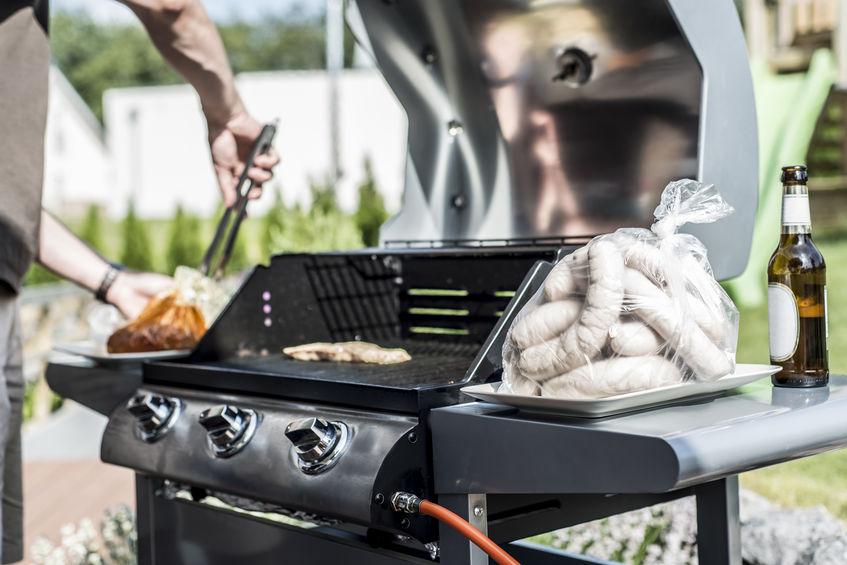
Adding Charcoal Briquettes or Lump Charcoal
Adding charcoal to gas grills creates authentic charcoal taste and enhances overall smoke flavor.
This method produces the closest approximation to traditional charcoal grilling.
Charcoal is another way to introduce heat and smoke into your grilling.
Here’s how the two main types compare — along with product ideas you can use — and how to combine them with wood chips for richer flavor.
Briquettes vs. Lump Charcoal + Product Ideas
Charcoal Briquettes burn consistently and provide steady heat output.
Place 15–20 briquettes in a cast iron pan or smoker box over a lit burner.
Lump Charcoal ignites faster and burns hotter than briquettes.
It creates a more intense, charcoal-like flavor but requires more frequent monitoring.
Here are some charcoal product suggestions you can check out:
- Weber Briquettes – Long lasting, consistent heat.
- Jealous Devil Premium Lump Charcoal – Made from pure, ultra-dense South American hardwoods with zero chemicals, fillers, or scrap materials.
- Kingsford Original Charcoal Briquettes – Ideal for backyard parties or tailgates, this charcoal brings authentic BBQ flavor and perfect smoky taste.
- FOGO Premium Oak Restaurant Grade – Lights fast and burns hot, getting you ready to grill in just 15 minutes.
How to Use Charcoal + Wood Chips
- Light the charcoal using the gas burner
Turn a gas burner on high (or medium-high) and ignite the charcoal in your cast iron pan or smoker box. - Reduce heat to maintain cooking temperature
Once the charcoal is well lit, adjust the burner down so that the charcoal glows steadily rather than flaring. - Charcoal produces both heat and smoky flavor at once
You’ll get simultaneous searing heat and smoke infusion, giving a more authentic “charcoal grill” effect. - Combine with wood chips for deeper smoke complexity
After the charcoal is glowing, add soaked wood chips on top or to the sides so they smolder — this mixes charcoal heat with aromatic wood smoke. - Best for steaks, burgers, and bold meats
This method shines with thicker cuts and meats that benefit from high heat and rich smoky flavor.
Marinades, Rubs, and Seasonings for Flavor Enhancement

Marinades use liquid bases with acids and oils to penetrate deep into meat fibers, while dry rubs create flavorful surface crusts that enhance the natural taste of grilled foods.
Crafting Flavorful Marinades and Brines
Marinades combine three essential components: acid, oil, and seasonings.
 Common acids include citrus juices, vinegar, and Worcestershire sauce, which tenderize meat while adding tangy depth.
Oil carries flavors into the food and prevents sticking.
Olive oil works well for most applications, while sesame oil adds distinctive flavor profiles.
Essential marinade ingredients:
- Fresh herbs (rosemary, thyme, cilantro)
- Spices (cumin, paprika, black pepper)
- Aromatics (garlic, onions, ginger)
- Sweeteners (honey, brown sugar, maple syrup)
Brines use salt water solutions to enhance moisture retention.
A basic brine contains 1 cup salt per gallon of water.
Adding brown sugar balances the saltiness while promoting caramelization.
Marinating times vary by protein thickness.
Thin cuts need 30 minutes to 2 hours, while thicker pieces benefit from overnight marinating.
Excessive marinating can create mushy textures.
Best Dry Rubs and Seasoning Combinations
Dry rubs create concentrated flavor layers on meat surfaces.
They contain salt, sugar, and various spices that form delicious crusts during grilling.
Basic dry rub formula:
- 2 parts brown sugar
- 1 part salt
- 1 part smoked paprika
- 1/2 part garlic powder
- 1/2 part onion powder
- 1/4 part chili powder
Seasonings can be applied before or after cooking.
Pre-cooking application allows flavors to penetrate, while post-cooking seasoning provides immediate taste impact.
Popular rub combinations:
| Rub Type | Key Ingredients | Best For |
|---|---|---|
| BBQ | Brown sugar, paprika, chili powder | Pork, beef |
| Mediterranean | Oregano, garlic powder, lemon zest | Chicken, fish |
| Cajun | Paprika, cayenne, onion powder | Seafood, poultry |
Apply dry rubs 15-30 minutes before grilling for optimal flavor penetration.
Store unused rub mixtures in airtight containers for up to six months.
Mastering Indirect Cooking and Advanced Grilling Techniques
Indirect grilling transforms how food absorbs smoke and develops complex flavors while creating perfect crusts through controlled heat zones.
This cooking technique allows grilling enthusiasts to achieve restaurant-quality results by separating heat sources from food placement.
Indirect Grilling for Smoke Absorption
Indirect cooking creates optimal conditions for smoke penetration by maintaining consistent temperatures between 225°F and 300°F.
The food sits away from direct flames, allowing smoke to circulate evenly around all surfaces.
Position food on the unlit side of the grill while keeping burners active on the opposite side.
This setup mimics oven cooking while incorporating smoky flavors that direct grilling cannot achieve.
Key Setup Requirements:
- Turn on burners on one side only
- Place drip pan under cooking area
- Monitor temperature with reliable thermometer
- Keep grill lid closed to trap smoke
Thick cuts like brisket, pork shoulder, and whole chickens benefit most from this grilling technique.
The extended cooking time allows smoke compounds to penetrate deep into the meat fibers.
Wood chips or chunks placed in smoker boxes enhance flavor absorption.
Soak chips for 30 minutes before adding to prevent rapid burning and ensure steady smoke production.
Locking in Juices and Achieving a Caramelized Crust
Combining indirect cooking with high-heat searing creates the perfect balance of moisture retention and surface browning.
Start with indirect heat to cook food evenly, then finish over direct flames for caramelization.
The reverse searing method involves cooking meat indirectly until it reaches 10-15 degrees below target temperature.
Move the meat to direct heat for 2-3 minutes per side to develop the crust.
Temperature Guidelines:
| Meat Type | Indirect Temp | Final Internal Temp |
|---|---|---|
| Beef Steak | 250°F | 135°F (medium-rare) |
| Chicken Breast | 275°F | 165°F |
| Pork Chops | 250°F | 145°F |
This grilling technique prevents moisture loss while creating appealing visual contrast.
The gentle indirect heat maintains cellular structure, while brief high-heat exposure triggers Maillard reactions for flavor development.
Pat meat dry before the final searing step to ensure optimal crust formation.
Oil the grates lightly to prevent sticking during the high-heat phase.
Troubleshooting and Expert Tips for Consistent Results
Achieving consistent grilling results requires mastering heat management and understanding how different flavors work together.
Proper burner maintenance and strategic flavor experimentation transform ordinary grilling into exceptional cooking.
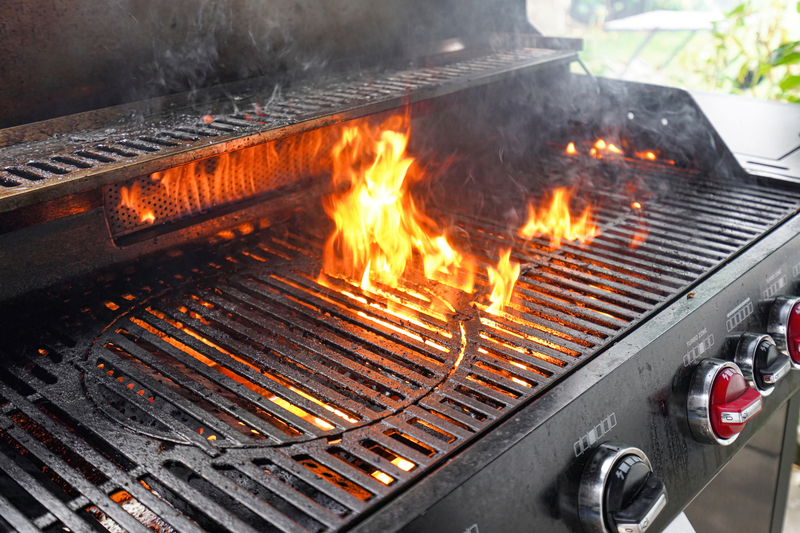
Managing Heat and Avoiding Flare-Ups
Uneven heating often stems from clogged burners or dirty grates.
Clean burner ports monthly using a thin wire or toothpick to remove grease buildup.
This ensures even gas flow across all burners.
Position the drip pan correctly to catch falling grease.
Empty it after each use to prevent overflow that causes dangerous flare-ups.
A clean drip pan maintains safer cooking conditions.
Heat Zone Management:
- High heat zone: 450-500°F for searing
- Medium heat zone: 350-400°F for regular cooking
- Low heat zone: 250-300°F for slow cooking
When flare-ups occur, move food to cooler zones immediately.
Never use water on grease fires. Instead, close the lid briefly to starve flames of oxygen.
Check gas connections regularly using soapy water.
Bubbles indicate leaks that affect consistent heat output.
Replace damaged hoses promptly for optimal performance.
Experimenting With Flavor Combinations
Start with proven pairings before creating custom blends.
Sweet and smoky combinations work well with pork, while herb-based rubs complement chicken and fish.
Effective Flavor Testing:
- Test new seasonings on small portions first
- Keep notes on successful combinations
- Adjust salt levels gradually
- Balance sweet, salty, and spicy elements
Layer flavors using marinades first, then dry rubs.
This creates depth without overwhelming the meat’s natural taste.
Allow 30 minutes minimum for flavors to penetrate.
Wood chip selection dramatically affects taste outcomes.
Apple and cherry provide mild sweetness, while hickory and mesquite deliver bold, smoky flavors.
Mix different woods in small ratios to discover unique profiles.
Document successful experiments with specific measurements.
This ensures repeatable results when grilling for guests or special occasions.