
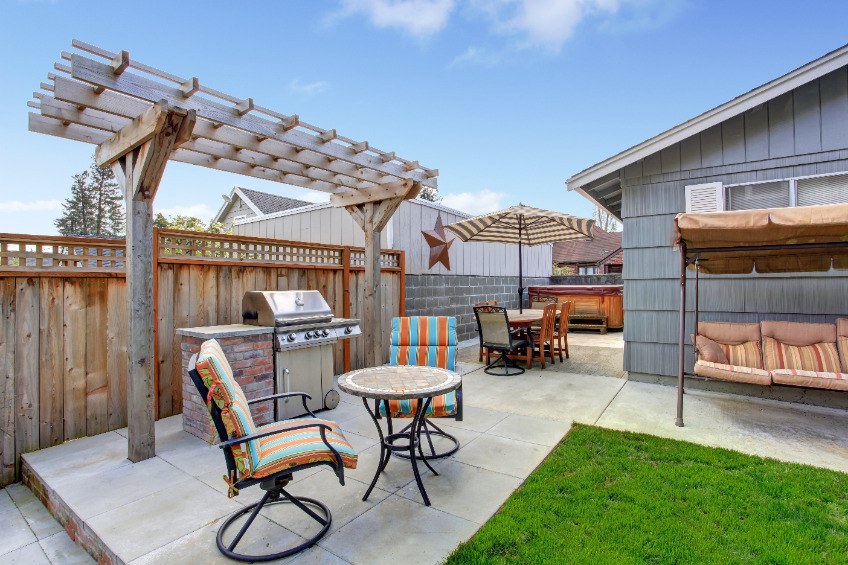
 Summer is not the only time to enjoy a backyard BBQ. Investing in backyard grilling and outdoor cooking lets you grill and cook outdoors all year long.
A good outdoor cooking area does not need to be large or expensive to work well. You can start with just a grill and a table, then add features over time. Simple additions such as a counter, sink, or storage can make the space easier to use.
Once your space is ready, you can focus on outdoor entertaining. A well-planned backyard BBQ setup gives you room to cook, serve food, and spend time with family and friends outdoors.
Thoughtful outdoor entertaining layouts keep guests close to the cook without getting underfoot. Transforming your patio into a comfortable outdoor bbq area brings everyone together for great meals.
Exploring practical outdoor grill station ideas can help you customize a setup that fits your yard and lifestyle. Upgrading your backyard with an organized grilling station turns casual weekend cookouts into seamless outdoor gatherings.
Plan a Safe, Functional Cooking Zone
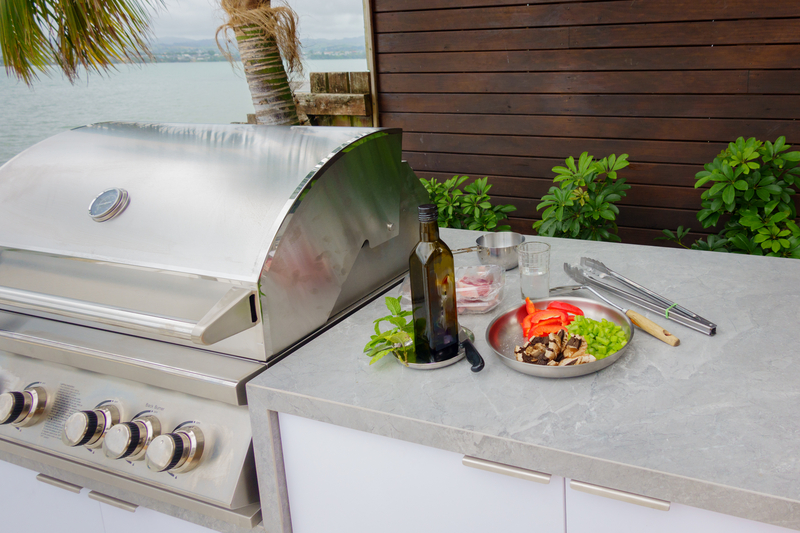 A functional outdoor cooking space starts before you buy your backyard grill. Designing an efficient outdoor bbq area requires considering the location, wind, utilities, and ground beneath your feet.
Choose the Right Location and Account for Wind
Pick a spot at least 10 feet from your house, fences, and wooden structures. This distance helps keep heat and sparks away from combustible materials.
Watch how wind moves through your yard before settling on a location. Wind can push smoke toward seating areas and make your grill burn unevenly. A gazebo can add weather protection, but you still need adequate airflow so smoke does not accumulate beneath the roof.
If wind is a constant problem, add a windscreen or privacy barrier near the grill. These can block gusts without trapping smoke overhead. Test the location on a windy day before committing to it.
Positioning a sturdy windscreen keeps flare-ups and temperature drops under control while you cook.
Map Utilities, Clearances, and Traffic Flow
Check local building codes before installing gas lines or electrical connections outdoors. Codes often require GFCI protection for outlets near your cooking area, because water and electricity in close proximity can be dangerous.
Plan sufficient clearance around the grill so people can walk past without brushing against hot surfaces. A basic outdoor kitchen layout should create a simple flow between the grill, prep space, and seating.
Some tips for mapping your zone:
- Keep gas lines away from walking paths
- Place outlets several feet from open flames
- Leave 3 feet of clear space around the grill for movement
- Add pathway lighting so guests can see the layout at night
Good planning prevents crowded traffic and reduces the risk of burns or trips.
Build a Durable Base With Proper Drainage
Your grill needs a stable, nonflammable surface. A concrete slab or pavers work well and can withstand heat and grease. Avoid grass, mulch, or wood decking unless it is specifically rated for grilling.
Grade the ground so water flows away from the outdoor cooking area. Installing an effective drainage system, such as a slight slope or trench drain, keeps puddles from forming near your feet or equipment. Standing water can also damage pavers over time.
Consider your long-term outdoor kitchen design when pouring concrete or laying pavers. A flat, well-drained base makes cleanup easier and helps keep your setup safe through rain and snow.
Choose the Best Grill for Your Cooking Style
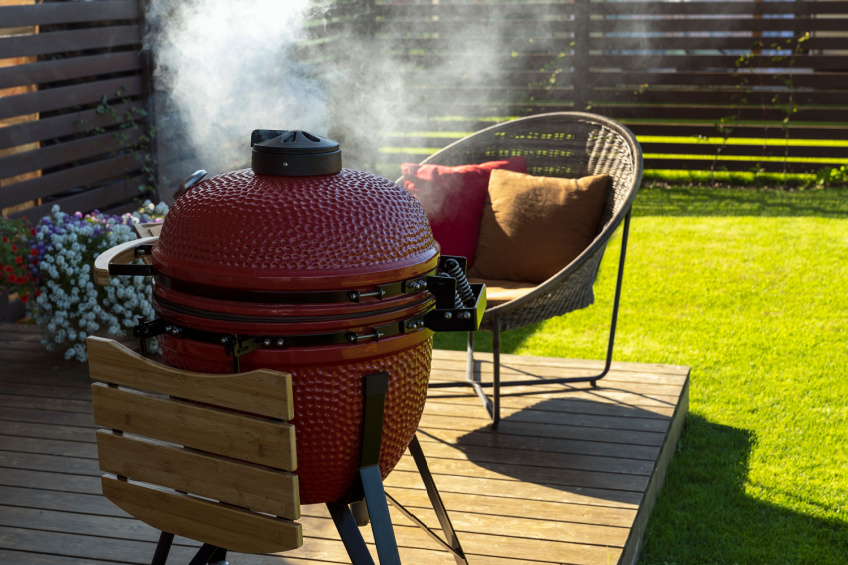 The type of grill you buy affects the flavor of your food, the time you spend cooking, and the amount of cleanup afterward. Choosing the right backyard grill alongside versatile tools makes your outdoor cooking space far more practical.
A well-equipped outdoor cooking area lets you prepare entire meals without running back and forth to the indoor kitchen.
Compare Gas, Charcoal, Pellet, and Portable Grills
Each fuel type offers a different cooking experience. A reliable propane grill lights quickly and heats up in minutes, making it a convenient choice for weeknight meals. While a gas grill commonly runs on portable tanks, a natural gas grill can connect directly to your home supply.
Many cooks prefer a gas grill because adjustable dials offer precise heat control for delicate foods. Cleanup is also simple, requiring only a quick brush across the grates after cooking.
A charcoal grill takes longer to light but gives food a smoky flavor that many people prefer for burgers and steaks. Cooking over a charcoal grill also provides searing heat for classic barbecue favorites.
A pellet grill uses wood pellets and works well for low-and-slow cooking, smoking, and convenient outdoor cooking, since it can maintain a steady temperature for hours.
If you have limited space or like to cook away from home, a portable grill is worth considering. These grills are smaller, often lighter, and easy to pack for camping trips or tailgates.
Investing in a high-performing BBQ grill ensures even heat distribution and consistent cooking results every time.
| Grill Type | Best For | Setup Time |
|---|---|---|
| Gas/Propane | Quick weeknight meals | Fast |
| Charcoal | Smoky flavor | Slow |
| Pellet | Smoking and slow cooking | Medium |
| Portable | Small spaces, travel | Fast |
Add Specialty Cooking Equipment
Once you have your main grill, you can add equipment to expand what you can cook. A smoker is a useful addition if you want to slow-cook ribs, brisket, or pulled pork over several hours. Some pellet grills already function as smokers, so you may not need a separate unit.
Dedicated barbecue enthusiasts often run a standalone smoker alongside their grill for deep wood flavor. Operating a smoker gives you precise heat management during all-day smoking sessions.
A pizza oven is another popular addition for backyard cooks. These ovens reach very high temperatures, allowing you to cook pizza in just a few minutes with a crisp crust.
Whether wood-fired or gas-fueled, a countertop pizza oven can also roast vegetables and sear meats quickly. Placing a compact pizza oven on a heat-safe table gives you an easy outdoor baking station.
If you are building a permanent outdoor kitchen, a built-in grill with a side burner or double burner gives you more cooking space at once. You can boil sauces, cook side dishes, or keep food warm while your main dish is on the grill.
Stock Essential Tools and Cleaning Gear
You need the right tools to cook safely and keep your grill in good condition. Basic grilling tools include tongs, a spatula, and a meat thermometer to check that food is cooked through. A grill brush helps remove leftover food and grease after each use, reducing buildup and helping prevent rust.
Scrubbing your grates with a quality grill brush before each session maintains hygiene and prevents unwanted flavors. Hanging durable grilling tools within arm’s reach also makes managing hot food much easier.
Storage also matters for keeping your gear organized. A BBQ cart gives you a flat surface for preparing food and holding tools while you cook. If you want to move your grill around the yard or store it during the off-season, a rolling grill cart makes repositioning easier without lifting the entire unit.
Design a Grill Station That Works
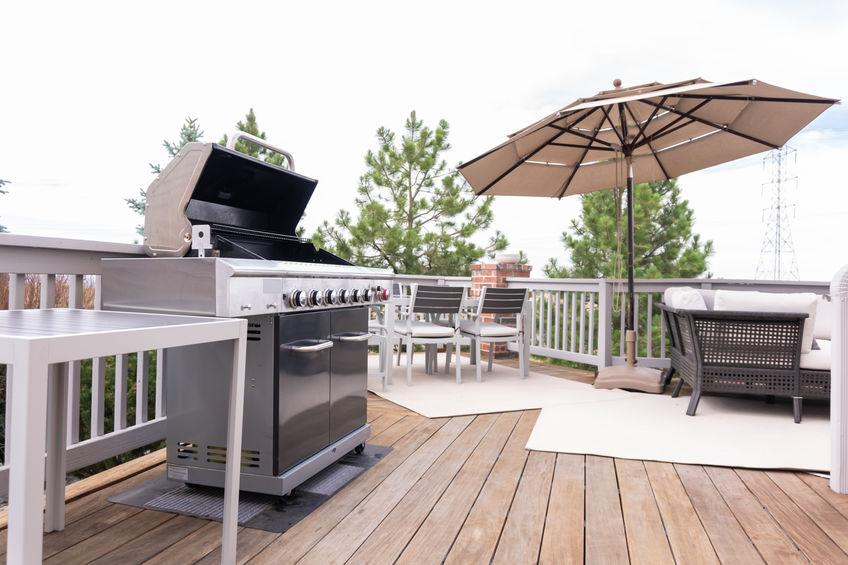 A functional outdoor grill station needs three basic zones, a layout that fits your yard, and enough storage to keep everything within reach. When these elements work together, your grilling station and outdoor kitchen island become easier and safer to use.
Create Prep, Cooking, and Serving Zones
Your grill island works best when you divide it into three areas: prep, cooking, and serving. Each zone needs its own space so you are not bumping into yourself while hosting.
The prep zone needs solid counter space near your grill, but not so close that heat becomes a problem. Setting up a dedicated prep counter gives you room to cut vegetables, season meat, and organize ingredients before cooking starts.
Positioning a prep counter near your outdoor refrigerator keeps ingredients close at hand. Having a dedicated prep counter also makes it easier to keep raw foods separated from cooked dishes.
Generous counter space on either side of the grill prevents clutter and lets you stage platters smoothly.
Your cooking zone centers on the grill itself, along with any side burners or power burners you have added. Keeping essential grilling tools within arm’s reach ensures quick control over cooking temperatures.
The serving zone can double as a bar counter, giving guests a place to grab food without crowding your cooking space. Designing this space as an outdoor bar allows visitors to chat and enjoy drinks without entering the cooking zone.
An outdoor bar also doubles as a convenient buffet line for sides and condiments. This setup keeps foot traffic away from an active grill, making things safer for everyone.
Select a Layout for Your Available Space
Exploring practical outdoor grill station ideas can help you determine what fits your patio. A cohesive outdoor kitchen design balances prep zones, cooking equipment, and traffic paths. Small yards often work better with a compact grill island, while larger spaces can support an L-shaped outdoor kitchen with room to spare.
An L-shaped outdoor kitchen wraps around a corner, giving you two separate work surfaces instead of one. This shape is a common choice for adding an outdoor sink or a power burner alongside your grill without cramping the cooking area.
Straight-line layouts fit narrow patios or decks and keep everything within one clean row. If your space is limited, a standalone BBQ island or small BBQ grill island can still accommodate a built-in grill, counter space, and a pull-out trash bin.
A well-planned bbq island brings your cooking surface, prep zones, and dry storage together in one compact unit.
For a DIY grill station, a modular outdoor kitchen offers flexibility. You can choose individual cabinet units and arrange them to match your yard’s shape and size.
Many modern outdoor grill station ideas incorporate rolling carts or modular cabinets to maximize flexibility. These options allow you to reconfigure your grilling station as your cooking needs change.
Add Convenient Storage and Refrigeration
Dedicated outdoor storage keeps your grilling station organized and reduces trips back into the house. Building storage units from weather-resistant materials protects dry goods, utensils, and grilling accessories from rain and pests.
Weatherproof cabinets made from marine-grade polymer withstand rain, sun, and temperature swings better than standard wood cabinets.
Because marine-grade polymer will not warp or delaminate when exposed to humidity, it protects stored items through every season. Installing weatherproof cabinets beneath counters also keeps extra grilling tools and towels shielded from grime.
An outdoor prep station needs drawers for utensils, plates, and serving tools. Keep them close to your cooking zone so you’re not searching for a spatula mid-grill.
Positioning a dedicated sink station right beside this counter makes washing produce and sanitizing hands quick and seamless.
Refrigeration adds real convenience to any outdoor kitchen island. An outdoor refrigerator keeps drinks and perishable foods cold without a trip inside, and an ice maker keeps ice ready for drinks or coolers.
Having a dedicated outdoor refrigerator also keeps marinating meat chilled and food-safe until it is time to cook.
A sink station rounds out the setup, giving you a place to rinse your hands, wash produce, or clean tools without leaving your outdoor kitchen. Together, these features turn a basic grill into a full outdoor cooking space that handles real gatherings.
Select Materials Built for Heat and Weather
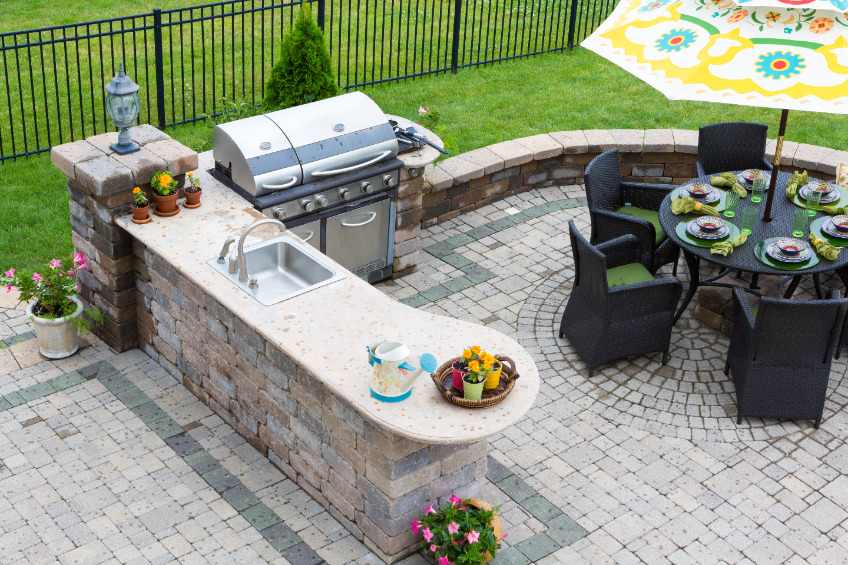 Outdoor kitchens face sun, rain, and grill heat every day, so choosing weather-resistant materials is essential. Selecting durable surfaces helps prevent cracks, rust, and warping over time.
Choose Countertops for Durability and Maintenance
Your countertop takes the most direct exposure to heat, spills, and weather, so choose a durable heat-resistant countertop made from heat-resistant materials that can handle all three.
A reliable heat-resistant countertop gives you peace of mind when transferring smoking pans or cast-iron skillets directly from the fire.
Granite countertops rank among the toughest options. This natural stone resists UV rays, helping colors stay bright after years in the sun. Lighter shades of granite also stay cooler to the touch during summer cookouts.
Installing granite countertops provides a scratch-resistant surface ready for heavy prep work. Properly sealed granite countertops also resist stains from cooking grease, barbecue sauce, and citrus juice.
Concrete countertops offer another durable choice. You can customize their shape, color, and texture, and properly sealed concrete resists moisture and temperature swings.
Because concrete countertops can be poured into custom dimensions, they fit easily around sinks and grills.
For upkeep, wipe granite with mild, pH-balanced soap and reseal it as recommended by the manufacturer, typically every one to two years. Concrete needs simple soap-and-water cleaning and periodic resealing to help prevent stains.
Build a Long-Lasting Frame and Finish
The frame supports your entire outdoor kitchen, so it needs to resist rot, rust, and cracking. Building structural framing from weather-resistant materials ensures your cooking island stays sturdy in every season.
Using heat-resistant materials around grill cutouts also protects structural framing from extreme temperatures. Cinder blocks provide a sturdy, budget-friendly base that stands up to heat and heavy use. Many builders cover cinder block frames with stone veneer or stone tiles for a finished look without the cost of solid stone.
Using stone veneer gives the island the authentic appearance of masonry while keeping the total weight manageable. High-quality stone veneer also resists outdoor weathering and requires very little maintenance over the years.
Cement board works well as a backer behind tile or stone because it resists moisture better than plain drywall. Fastening cement board over metal framing creates an ideal noncombustible surface for stone and tile finishes.
For appliances and hardware, stainless steel and stainless steel appliances resist rust and clean up easily with soap and water. Choose a higher-grade stainless steel if your yard is near the coast, since salt air accelerates corrosion on lower-grade metal.
Natural stone cladding also holds up well against weather, though it costs more than veneer panels.
Protect Wood and Other Combustible Details
Wood adds warmth to an outdoor kitchen, but it needs protection from heat and moisture.
Pressure-treated lumber resists rot and insect damage better than untreated wood, making it a solid choice for frames or trim located away from direct grill heat. Treated lumber should always remain a safe distance from flames and hot surfaces.
Using pressure-treated lumber for base framing protects the structure from ground moisture and prolongs its lifespan. Reclaimed wood can add character to your design, but seal it well and keep it away from grill heat and persistent moisture.
Check wood surfaces yearly for cracks, soft spots, or fading. Reseal or restain them as needed to maintain protection. Pairing wood accents with weather-resistant materials such as stone or metal nearby helps limit the wood’s exposure to heat and rain.
Add Shelter, Seating, and Evening Comfort
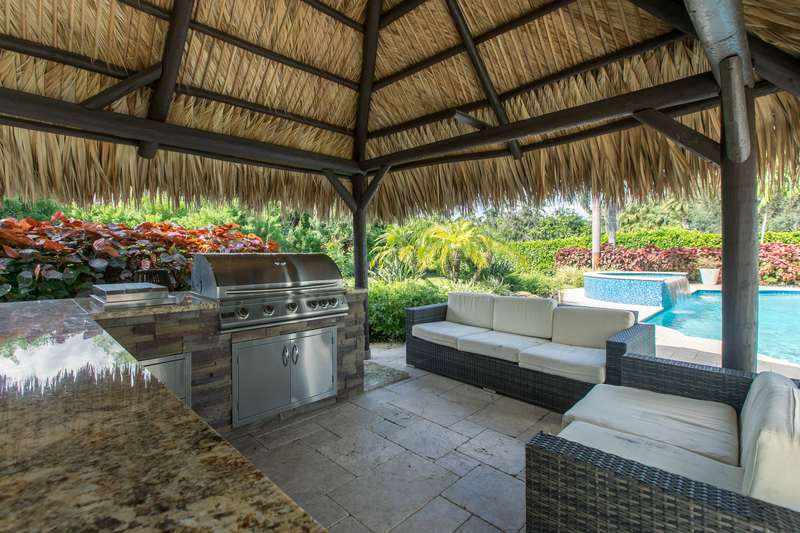 A grilling area works best when you can use it in almost any weather and at any time of day. Adding shelter, comfortable seating, and good lighting turns a simple grill spot into a functional outdoor room.
Cover the Space Without Trapping Smoke
You need cover that blocks sun and rain while still allowing smoke to escape. A pergola works well because its open slats allow airflow while providing shade. A freestanding pergola also establishes a defined cooking zone without trapping heat.
Adding climbing plants or louvered panels to a pergola offers adjustable shade on hot afternoons. A sturdy wood or metal pergola also creates an overhead framework for mounting outdoor fans or heaters.
If you want more weather protection, a gazebo provides a solid roof, but you should leave the sides open near the grill. Dependable weather protection keeps rain from stopping your meal and prevents sudden showers from damaging sensitive gear.
A retractable awning is a good choice if you want flexibility. You can extend it for shade or retract it when you need more airflow. Mounting a retractable awning over nearby patio doors also protects guests walking between the house and the yard.
A shade sail is another option for a modern look, and it works well over a dining spot away from direct smoke. Selecting the right shade structure shields cooks and guests from harsh afternoon sun.
Positioning a breathable shade sail over the seating area blocks intense UV rays without trapping heat.
Whatever shade structure you choose, keep the grill a few feet from the roofline. This helps smoke rise and disperse instead of collecting under the cover.
A fully covered outdoor kitchen needs a vent hood or open sides for safe ventilation.
Create Comfortable Dining and Bar Seating
Arranging comfortable outdoor seating keeps guests close to the action without crowding your cooking area. Bar stools work well next to an elevated bar counter or outdoor bar, giving people a place to sit while you grill.
A raised bar counter also provides a convenient spot to serve appetizers and refreshments while you finish cooking.
Quality outdoor seating also encourages friends and family to stay longer and relax after eating. Place outdoor seating slightly upwind so that smoke does not drift directly toward your guests.
Choose weather-ready bar stools with backrests and footrests so friends can relax comfortably during long cookouts.
Built-in benches save space and add a clean, finished look to a patio. They also provide extra seating without requiring chair storage.
For a more relaxed feel, add a fire pit a few steps away from your grill. It gives guests a place to gather once the food is on. Circling chairs around a fire pit creates a natural lounge zone where everyone can unwind after eating.
On cooler nights, an outdoor heater or patio heater keeps the seating area comfortable so you can host evening BBQs later into the year.
Preparing for a chilly evening BBQ becomes simple when radiant warmth is just a switch away.
Layer Practical and Inviting Outdoor Lighting
You need different types of light for different tasks. Task lighting, such as a mounted light above the grill, helps you see food clearly and cook safely after dark. Focused task lighting over prep surfaces also makes nighttime slicing and seasoning much easier.
Ambient lighting sets the mood for the rest of the space. String lights above a dining table add a warm glow, while LED strip lights under counters or benches provide a soft, modern touch. Blending these fixtures ensures your ambient lighting creates an inviting dining mood.
Hanging durable string lights along a fence or pergola rafters keeps the patio warmly illuminated long into the night. Installing dimmable outdoor string lights lets you easily adjust the brightness for dining or lounging.
Path lights help guide guests safely across your yard at night. Placing them along walkways or steps reduces the risk of trips or falls after sunset.
Installing low-voltage pathway lighting ensures clear visibility between the cooking station, dining table, and patio entrance.
Build Options for Every Budget and Space
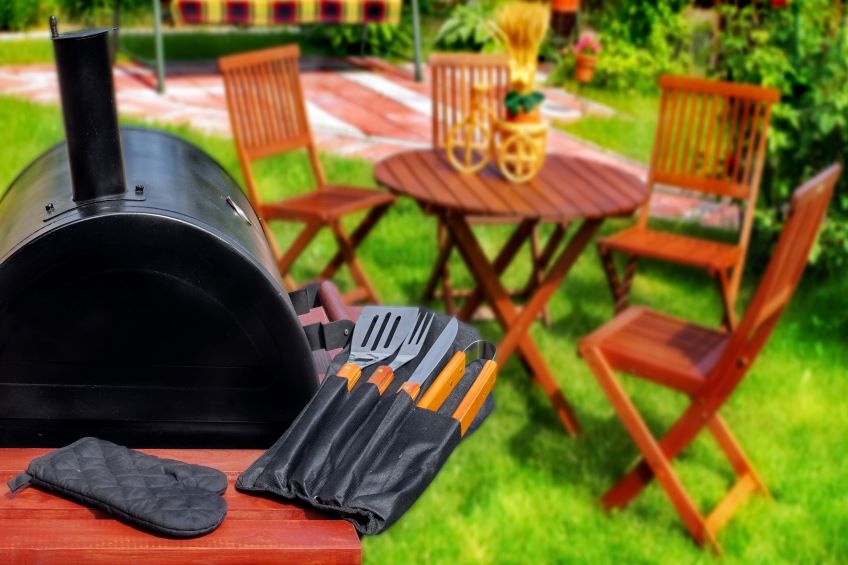 Your budget and yard size determine which build makes sense. You can start small with a cart, spend a weekend on a DIY project, or invest in a permanent island. Each option suits a different stage of backyard cooking.
Start With a Compact, Movable Setup
A rolling grill cart is the easiest way to begin outdoor cooking without a major investment. You can move it into a garage or shed during bad weather, protecting the grill from rust and sun damage.
Most BBQ carts have a small work surface, side shelves, and hooks for tools. Some models also include a sink or drop-leaf extensions for additional prep space, as noted in one grill master’s dream setup built around a stainless steel top.
This setup works well in small yards, patios, or rented homes where you can’t build anything permanent. You get a functional outdoor cooking station in one afternoon, with no construction skills required.
Tackle a DIY Weekend Station
Crafting a custom outdoor cooking area gives you full control over your layout while keeping overall expenses manageable.
If you want more counter space and a fixed grilling area, a DIY outdoor kitchen built from cinder blocks is a low-cost option. Cinder blocks stack easily and don’t require mortar for a basic frame, although you can add mortar for a more secure build.
Top the blocks with a concrete countertop for a durable heat-resistant countertop that handles hot pans and spills with ease. You can also add reclaimed wood shelves or a prep table on the side, keeping costs down while adding storage.
This type of BBQ area design usually takes one or two weekends. You’ll need basic tools such as a level, saw, and construction adhesive, and local building, electrical, or gas codes may require permits depending on the project.
Invest in a Permanent Outdoor Kitchen Island
An outdoor kitchen island is the biggest step up in cost and effort, but it provides a built-in backyard grill, storage drawers, and a full countertop in one structure. A thoughtful outdoor kitchen design can even accommodate an integrated pizza oven alongside the main grill.
Centering the island around a heavy-duty built-in grill creates a natural cooking hub for large parties. Many islands feature a concrete or masonry-block frame finished with tile, stone, or stucco, topped with durable granite countertops.
Designing this installation as a cohesive outdoor room bridges indoor living with fresh-air entertaining.
Pouring a dedicated concrete slab provides this heavy installation with the solid, level base it requires.
A modular outdoor kitchen offers a faster alternative. You buy prefabricated frame sections and drop-in appliances, then arrange them to fit your space instead of building each component from scratch.
This option works best if you plan to stay in your home long term and use the outdoor kitchen frequently. Before you begin, check local building codes, because a permanent structure with gas or electrical lines usually requires a permit.
FAQ: Backyard Grilling and Outdoor Cooking
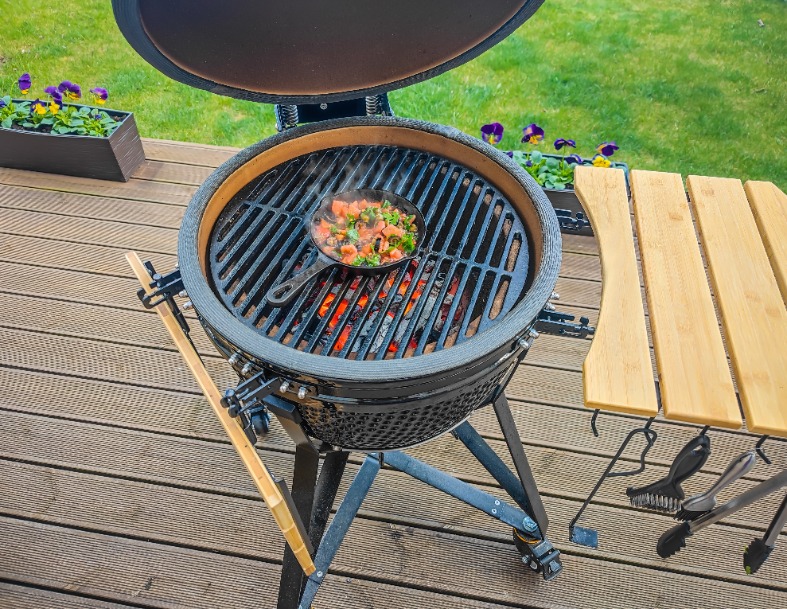 Backyard grilling is the practice of cooking food outdoors using a grill, barbecue, or similar cooking appliance. It can include cooking meat, fish, vegetables, burgers, sausages, and other foods over gas, charcoal, or other outdoor heat sources.
What Is the Best Location for a Backyard Grill?
Place the grill on a stable, level surface outdoors, away from the house, combustible structures, overhanging branches, and other materials that could catch fire. Always follow the clearance requirements provided by the grill manufacturer.
How Far Should a Grill Be from the House?
A common safety recommendation is to keep a grill at least 10 feet away from the house and other combustible structures. Greater clearance may be appropriate depending on the grill, surrounding materials, and manufacturer’s instructions.
Is It Better to Grill With the Lid Open or Closed?
For most cooking, keeping the lid closed helps maintain a more consistent temperature and allows the hot air to circulate around the food. Opening the lid is useful when checking, turning, or moving food and when controlling flare-ups.
What Temperature Is Best for Outdoor Grilling?
The appropriate temperature depends on the food. Medium heat is generally around 350–450°F (175–230°C), while higher temperatures are useful for quickly searing foods such as steaks.
Is Charcoal or Gas Better for Backyard Grilling?
Both have advantages. Gas grills offer convenient temperature control and quick startup, while charcoal grills can provide a stronger smoky flavor and intense direct heat. The better option depends on the type of cooking you prefer.
How Do You Make Backyard Grilling Safer?
Keep the grill outdoors, maintain adequate clearance from buildings and combustible materials, clean grease from the grill regularly, and never leave a lit grill unattended. Use a food thermometer to check that meat and poultry reach safe internal temperatures.
Can You Grill in Any Weather?
Grilling is possible in many weather conditions, but strong wind, heavy rain, and extreme weather can make cooking more difficult or unsafe. Always follow the grill manufacturer’s instructions and avoid using a grill in an enclosed area.
What Foods Are Good for Backyard Grilling?
Popular choices include steaks, burgers, chicken, sausages, fish, vegetables, corn, and kebabs. Foods can be cooked directly over the heat or indirectly when they require a slower, more controlled cooking temperature.