

 Managing charcoal grill temperature can feel like a constant battle against dropping heat and uneven cooking zones.
Many grillers struggle with maintaining consistent temperatures, especially during longer cooking sessions when the initial fire starts to die down.
Keeping a charcoal grill hot requires controlling airflow through proper damper adjustment, maintaining adequate fuel supply, and using two-zone cooking techniques to create stable temperature zones.
The key lies in understanding how oxygen feeds the fire and how strategic coal placement creates the ideal cooking environment.
Success with charcoal grilling comes from mastering a few essential techniques that work together.
From selecting quality charcoal and lighting it properly to monitoring temperatures and managing ventilation, each step builds toward consistent heat control.
Regular maintenance and smart fuel management ensure the grill stays hot throughout the entire cooking process.
Understanding the Basics of Charcoal Grilling

Charcoal grilling relies on three key elements that work together to create heat: the fuel source, airflow, and proper combustion.
The type of charcoal you choose and how well you manage oxygen flow will determine your success.
How Charcoal Grills Generate Heat
Charcoal grills create heat through a process called combustion.
When charcoal burns, it releases energy in the form of heat and light.
The process starts when charcoal reaches its ignition temperature.
This happens around 700°F for most charcoal types.
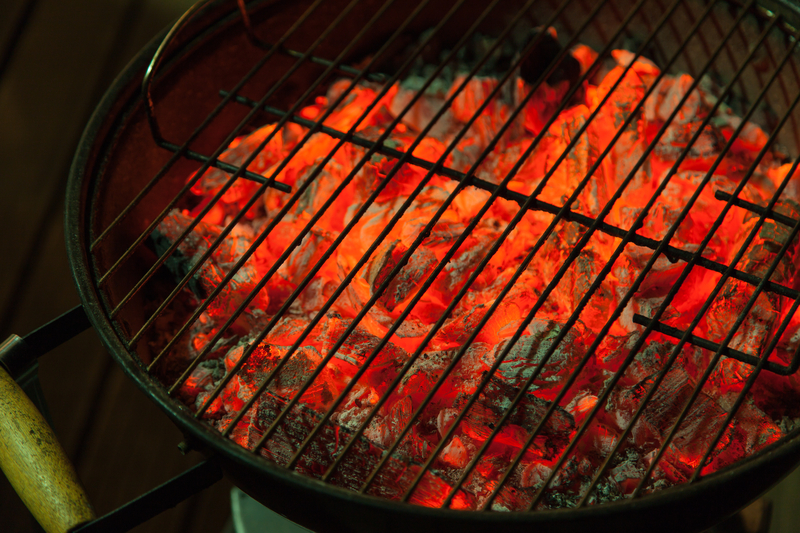
Once lit, charcoal burns at temperatures between 1,000°F and 2,000°F.
The actual cooking temperature depends on how much charcoal you use and how you arrange it.
Heat distribution happens in three ways:
- Direct heat from flames
- Radiant heat from glowing coals
- Convective heat from hot air circulation
The grill’s metal components absorb and reflect this heat.
This creates an even cooking environment when managed properly.
Distance from the coals affects cooking temperature.
Food placed directly over coals gets intense heat.
Food positioned away from coals receives gentler, indirect heat.
Differences Between Briquettes and Lump Charcoal
Briquettes are manufactured from compressed charcoal dust and additives.
They burn longer and more consistently than lump charcoal.
Most briquettes contain binding agents like starch or clay.
Some include lighter fluid for easier ignition.
Lump charcoal comes from burning wood in low-oxygen environments.
This creates pure carbon chunks with irregular shapes.
| Feature | Briquettes | Lump Charcoal |
|---|---|---|
| Burn time | 2-3 hours | 1-2 hours |
| Heat output | Steady, moderate | High, variable |
| Ignition speed | Slower | Faster |
| Ash production | More | Less |
| Cost | Lower | Higher |
Lump charcoal lights faster and burns hotter.
It produces less ash but costs more per pound.
Briquettes offer better value for long cooking sessions.
They maintain steady temperatures for hours.
 Olivette Organic Charcoal Briquettes are crafted from recycled olive tree byproducts and USDA certified for sustainability.
These ready-to-light, reusable briquettes deliver consistent heat and pure flavor without chemicals or waste.
Even better, a 6.6 lb bag burns as long as 20 lb of regular charcoal, making every BBQ both powerful and planet-friendly.
Role of Oxygen in Charcoal Combustion
Oxygen acts as the second fuel in charcoal grilling.
Without enough airflow, charcoal cannot burn properly.
Charcoal grills use two types of vents to control oxygen.
Intake vents let fresh air enter from the bottom.
Exhaust vents allow hot air and smoke to escape from the top.
More oxygen creates hotter fires.
Less oxygen reduces heat and can extinguish coals completely.
The combustion process requires:
- Fresh oxygen entering through bottom vents
- Proper airflow around the coals
- Exit path for burned gases through top vents
Controlling these vents lets you adjust temperature.
Opening both vents increases heat.
Closing the intake vent reduces heat.
Ash buildup blocks airflow and reduces oxygen supply.
This causes temperatures to drop and coals to die out.
Wind affects oxygen flow around your grill.
Strong winds can make fires burn too hot or blow out flames entirely.
Choosing and Preparing Quality Charcoal
The right charcoal makes the difference between a hot, steady fire and one that struggles to maintain heat.
Quality charcoal paired with proper storage creates the foundation for successful grilling sessions.
Selecting the Right Charcoal Type
Two main types of charcoal dominate the market, each with distinct benefits for heat retention.
Briquettes burn longer and provide steady temperatures.
They contain binders and additives that help maintain consistent heat output.
This makes them ideal for longer cooking sessions where temperature control matters most.
Lump charcoal lights faster and burns hotter than briquettes.
It contains no additives, which means cleaner flavor but shorter burn times.
The irregular shapes create gaps that allow better airflow.
Natural briquettes offer a middle ground option.
They contain fewer chemicals while still providing the consistent burn of traditional briquettes.
| Type | Burn Time | Heat Level | Best For |
|---|---|---|---|
| Briquettes | 45-60 min | Medium-High | Long cooks |
| Lump | 30-45 min | High | Quick searing |
| Natural | 40-50 min | Medium-High | All-purpose |
Using Dry and Fresh Charcoal
Moisture kills charcoal performance and makes it nearly impossible to maintain high heat.
Fresh charcoal lights easier and burns hotter than old stock.
Check the production date when buying, as charcoal can absorb moisture over time even in sealed bags.
Wet charcoal produces excess smoke and struggles to reach proper temperatures.
It also creates uneven burning that leads to hot and cold spots on the grill.
Test charcoal quality by checking for a sharp crack when pieces break.
Dull sounds often indicate moisture absorption.
Quality charcoal should feel light and sound hollow when tapped together.
Proper Storage and Handling
Store charcoal in a dry location away from moisture sources.
Garages, basements, and outdoor sheds work well if they stay dry.
Keep bags sealed tight or transfer charcoal to airtight containers.
Metal cans with tight lids prevent moisture from getting in.
Plastic storage bins with secure lids also work effectively.
Never store charcoal near chemicals or strong odors.
Charcoal absorbs smells that can transfer to food during cooking.
Handle lit coal with proper tools only.
Long-handled tongs designed for charcoal prevent burns and allow safe coal placement.
 A barbecue essential — extra-long Grill Tongs built to handle the heat up to 600°F with unbeatable control and comfort.
Crafted entirely from premium stainless steel, these locking tongs are perfect for grilling, cooking, or serving at any feast.
With 17-inch and 12-inch sizes, you’ll have the right tool for every flame, from backyard BBQs to kitchen creations.
Keep a spray bottle nearby for flare-ups, but avoid soaking the coals completely as this drops temperatures quickly.
") Take on any task with these 16.9oz Clear Plastic Spray Bottles, perfect for misting hair, watering plants, cleaning surfaces — or even spraying your charcoal grill before or during cooking.
Take on any task with these 16.9oz Clear Plastic Spray Bottles, perfect for misting hair, watering plants, cleaning surfaces — or even spraying your charcoal grill before or during cooking.
The adjustable nozzle shifts easily from fine mist to strong stream, giving you full control for every job.
Built from heavy-duty, leak-resistant plastic, these bottles are durable, versatile, and ready for home, garden, or BBQ use.
Lighting the Grill for Optimal Heat

Proper lighting creates the foundation for steady, high heat throughout your cooking session.
A chimney starter provides the most reliable ignition method, while correct coal arrangement determines heat zones and cooking control.
Using a Chimney Starter for Even Ignition
A chimney starter is the best tool for lighting charcoal evenly without chemicals.
This metal cylinder uses newspaper and airflow to ignite coals from the bottom up.
Fill the charcoal chimney with the desired amount of charcoal.
Place crumpled newspaper in the bottom chamber below the charcoal.
Light the newspaper through the holes at the bottom.
The flames will travel upward through the coals.
Wait 15-20 minutes until the top coals turn gray with red edges.
This signals that all coals are properly lit and ready.
 Light your grill the fast, easy, and chemical-free way with the Weber Rapidfire Chimney Starter.
Its durable silver steel design and high-capacity chamber let you ignite charcoal evenly and get cooking in minutes.
Perfect for backyard BBQs or camping trips, this grill essential delivers quick, reliable heat every time you fire it up.
Never use lighter fluid with a chimney starter.
The natural airflow provides clean, even heating without chemical taste.
The chimney creates consistent heat across all coals.
This prevents hot spots and cold areas that cause uneven cooking.
Arranging Lit Coals for Heat Control
Pour the lit coal from the chimney starter using heat-resistant gloves.
The arrangement depends on your cooking needs and desired heat zones.
For direct high heat, spread coals evenly across the bottom grate.
Leave small gaps between coals for airflow.
Create a two-zone setup by placing all coals on one side.
This gives you a hot zone and a cooler zone for different cooking methods.
Bank coals higher on one side for multiple temperature zones.
The highest pile creates the hottest area for searing.
Add fresh charcoal around the edges of lit coals.
The burning coals will ignite the new ones and extend cooking time.
Keep coals about one inch apart for proper air circulation.
Too close together blocks airflow and reduces heat.
Alternative Ignition Methods
Electric starters heat coals through direct contact.
Place the heating element under a small pile of charcoal for 8-10 minutes.
Fire starters made from paraffin or wood work well in windy conditions.
Place 2-3 cubes under charcoal and light them directly.
Lighter fluid requires careful application.
Soak coals lightly and wait 5 minutes before lighting to prevent flare-ups.
Natural fire starters like fatwood or birch bark provide chemical-free ignition.
They burn longer than newspaper and work in damp conditions.
Avoid gasoline or other fuels that create dangerous flare-ups.
Stick to products designed specifically for charcoal grills.
Paper towels soaked in cooking oil work as emergency starters.
Roll them tightly and place under a small charcoal pile.
Maintaining and Monitoring Grill Temperature
Keeping a charcoal grill at the right temperature requires careful fuel management and accurate temperature readings.
Success depends on adding charcoal at the right times and using proper tools to track heat levels.
Managing Fuel Levels During Cooking
Fuel levels drop naturally as charcoal burns down during cooking.
Most grilling sessions lasting over an hour will need fresh charcoal added.
Check fuel levels every 30 to 45 minutes.
Look for coals that have turned mostly to ash or appear much smaller than when first lit.
Temperature drops below 225°F signal that fuel is running low.
The grill will struggle to maintain steady heat without enough burning charcoal.
Signs you need more fuel:
- Temperature falling below target range
- Coals covered in white ash
- Reduced heat output from cooking zone
- Flame height decreasing
Plan ahead by keeping extra charcoal ready.
Light new coals in a chimney starter before current fuel runs out completely.
Remove excess ash buildup every hour.
Too much ash blocks airflow and smothers the remaining coals.
Adding More Charcoal Gradually
Add new charcoal in small amounts rather than dumping large quantities at once.
Big additions cause major temperature swings.
Use a chimney starter to pre-light new coals before adding them.
This method prevents temperature drops and reduces smoke spikes.
Steps for adding pre-lit charcoal:
- Light 8-10 pieces in chimney starter
- Wait until coals show red glow
- Pour carefully onto existing coals
- Spread evenly with long-handled tools
Adding unlit charcoal directly to the grill works but causes problems.
Raw coals produce heavy smoke and lower temperatures temporarily.
Space new additions evenly across the coal bed.
Piling charcoal in one spot creates hot spots and uneven cooking.
Wait 10-15 minutes after adding fuel before making vent adjustments.
Temperature needs time to stabilize.
Utilizing a Grill Thermometer
Built-in thermometers on most charcoal grills read incorrectly.
They mount too far from the cooking surface and show inflated numbers.
An air probe thermometer gives accurate readings at grate level.
Place the probe close to food for the most precise temperature monitoring.
 If you’re serious about grilling or smoking, the ThermoPro TP-17 is a game-changer.
It comes equipped with two stainless steel probes — perfect for monitoring both your meat and the ambient air temperature inside your grill or smoker at the same time.
The large backlit LCD display makes it easy to read in any lighting, and the customizable temperature alarms ensure you never overcook or undercook a meal again.
Whether you’re slow-cooking a brisket, smoking ribs, or roasting in the oven, this thermometer brings precision and peace of mind to your cooking setup.
Recommended temperature ranges:
- Low and slow: 225-250°F
- Medium heat: 300-350°F
- High heat: 400°F and above
Check the grill temperature every 5-10 minutes during cooking.
Small adjustments work better than major changes.
Digital thermometers with wireless capability let you monitor from inside.
This feature helps during long cooking sessions.
Position the probe away from direct heat sources.
Placing it directly over coals gives false high readings.
Some thermometers include alarms for temperature limits.
Set alerts when heat goes above or below target ranges.
Mastering Grill Ventilation and Airflow

Your grill needs two things to stay hot: charcoal and oxygen.
The intake damper controls how much air flows in, while the exhaust damper lets hot air and smoke escape.
Adjusting the Intake Damper
The intake damper sits at the bottom of your grill near the charcoal.
This vent controls how much oxygen feeds the fire.
Opening the intake damper makes the fire burn hotter.
More air means more heat.
Closing it reduces airflow and lowers the temperature.
The fire gets less oxygen to burn with.
Start with the intake damper fully open when lighting charcoal.
This gives maximum airflow to get the coals burning well.
Once the grill reaches your target temperature, adjust this damper to fine-tune the heat.
Make small changes and wait 5-10 minutes to see the effect.
For high-heat grilling: Keep the intake damper mostly open (75-100%)
For medium heat: Use a half-open position (50%)
For low and slow cooking: Close it to about 25% open
Never close the intake damper completely during cooking.
This will starve the fire and make it go out.
Regulating the Exhaust Damper
The exhaust damper sits on top of the grill, usually in the lid.
It lets hot air and smoke flow out of the cooking chamber.
Keep this damper open at all times during cooking.
Closing it traps smoke and creates bitter flavors in food.
The exhaust damper works with the intake damper to create airflow.
Air comes in through the bottom and exits through the top.
You can adjust the exhaust damper slightly for fine temperature control.
But most adjustments should happen with the intake damper instead.
Opening it more increases airflow and can raise temperatures slightly.
This also removes more smoke from the grill.
Closing it partially can help hold heat in windy conditions.
But don’t close it more than halfway.
Some grillers close the exhaust damper to shut down the grill after cooking.
This cuts off airflow and extinguishes the coals safely.
Common Vent Adjustment Mistakes
Many people adjust both dampers at the same time.
This makes temperature control much harder to manage.
Stick to adjusting only the intake damper during cooking.
Leave the exhaust damper open.
Another mistake is making big changes to the vents.
Small adjustments work better than dramatic ones.
Change vent positions by 25% at a time.
Wait 5-10 minutes before making another change.
Some grillers panic when temperatures drop and open all vents fully.
This often makes the fire too hot and wastes charcoal.
Closing vents too much is also common.
This can make the fire go out or create too much smoke.
Don’t ignore ash buildup around the intake damper.
Ash blocks airflow even when the damper is open.
Clean ash away from vents regularly.
This keeps air flowing properly to the coals.
Temperature Control Techniques
Controlling heat on a charcoal grill requires setting up proper cooking zones and managing coal placement.
Understanding direct and indirect cooking methods helps maintain steady temperatures while preventing uneven heating across the grill surface.
Direct vs. Indirect Cooking Zones
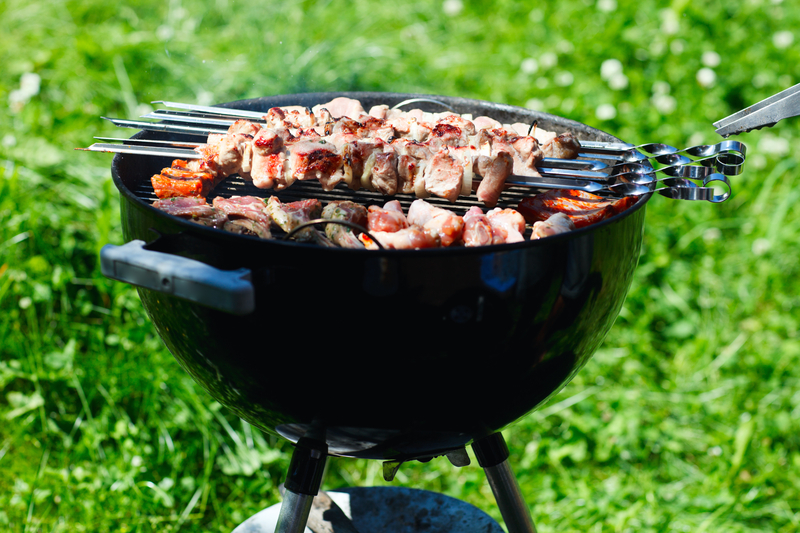
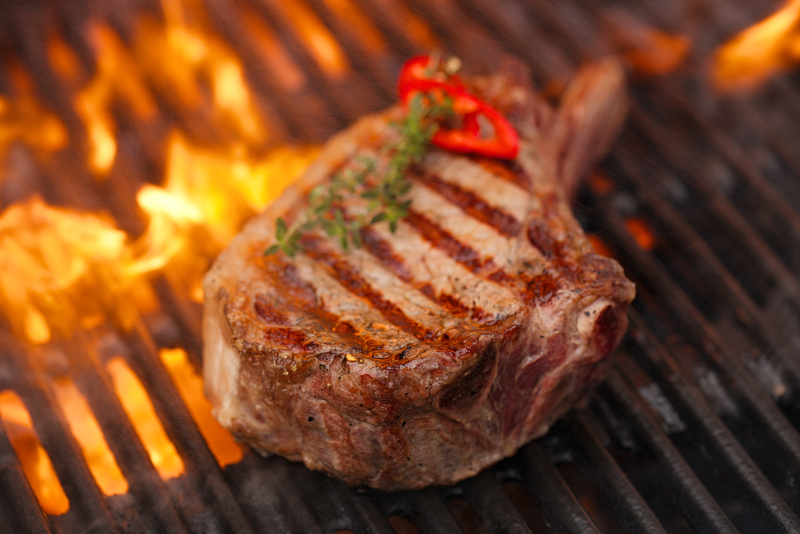
Direct cooking places food right above hot coals.
This method works best for foods that cook quickly like burgers, steaks, and chicken pieces.
The intense heat sears the outside while cooking the inside fast.
Direct heat typically reaches 450-500°F.
This high temperature creates those perfect grill marks everyone wants.
However, thick cuts of meat can burn on the outside before the inside cooks through.
Indirect cooking keeps food away from the coals.
The heat circulates around the food like an oven.
This method suits larger cuts like whole chickens, roasts, and ribs.
Indirect heat stays around 225-300°F.
This lower temperature cooks food evenly without burning.
It takes longer but produces tender, juicy results.
Many grilling sessions use both methods.
A person might sear a steak over direct heat first, then move it to indirect heat to finish cooking.
Arranging Charcoal for Two-Zone Heat
Creating two zones gives total control over cooking temperatures.
After lighting coals in a chimney starter, pile all hot coals on one side of the grill.
Leave the other side empty.
The coal side becomes the direct heat zone.
The empty side serves as the indirect heat zone.
This setup lets a person move food between hot and cooler areas as needed.
For larger grills, use a three-zone setup: Hot coals on one side, medium coals in the middle, and no coals on the third side. This creates high, medium, and low heat zones.
Add fresh coals every hour to maintain heat levels.
Light new coals in the chimney starter before adding them to avoid temperature drops.
This keeps the direct zone hot throughout long cooking sessions.
The two-zone method also provides a safe space if flare-ups occur.
Moving food to the cool side prevents burning while flames die down.
Managing Hot Spots and Cold Spots
Most charcoal grills have uneven heating patterns.
Hot spots form directly above coal piles while cold spots appear in areas with fewer coals.
Learning these patterns helps control cooking results.
Check for hot and cold spots by holding a hand five inches above the grate.
Areas where heat feels intense after two seconds are hot spots.
Spots where a person can hold their hand for five seconds are cooler areas.
Move coals around to even out temperatures.
Use tongs to spread coals more evenly or create small gaps between them.
This reduces extreme hot spots while warming up cold areas.
Rotate food during cooking to ensure even results.
Move items from hot areas to cooler ones every few minutes.
This prevents one side from cooking faster than the other.
Adjust the cooking grate height if the grill allows it.
Raising the grate reduces direct heat intensity.
Lowering it increases heat for better searing power.
Essential Maintenance for Consistent Heat
Regular maintenance keeps charcoal grills running at steady temperatures for longer periods.
Proper ash removal, lid management, and component care directly impact heat retention and cooking performance.
Cleaning Out Ash Regularly
Ash buildup blocks airflow and smothers burning charcoal.
This reduces heat output and makes temperature control difficult.
Most charcoal grills have ash collection pans at the bottom.
Empty these pans every 30-60 minutes during long cooking sessions.
For grills without ash pans, use a long-handled scoop or ash tool.
Remove ash carefully to avoid disturbing the burning coals above.
Signs ash needs removal:
- Temperature dropping despite adequate fuel
- Poor airflow through bottom vents
- Visible ash covering air intake areas
Clean ash when the grill is cool if doing a complete cleaning.
During cooking, remove only excess ash that blocks vents.
Too much ash removal during cooking can cause temperature swings.
Remove just enough to keep air flowing freely.
Keeping the Grill Lid Closed
The grill lid traps heat and creates consistent cooking temperatures.
Opening it frequently causes major heat loss.
Each time someone lifts the lid, internal temperature drops 50-75 degrees.
The grill needs 10-15 minutes to recover this lost heat.
Use a reliable thermometer to monitor temperature without opening the lid.
Place the probe near the food for accurate readings.
Best practices for lid management:
- Open only when adding fuel or checking food doneness
- Keep lid closed during temperature adjustments
- Use clear sections or thermometer ports when available
Plan food placement before opening the lid.
This reduces the time the grill stays open.
Wind makes heat loss worse when the lid is open.
Work quickly in windy conditions to minimize temperature drops.
Routine Grill Component Maintenance
Clean grates prevent food from sticking and allow better heat transfer.
Dirty grates also block airflow around food.
Check air vents monthly for blockages.
Both intake and exhaust vents need clear paths for proper airflow control.
Monthly maintenance checklist:
- Clean cooking grates with wire brush
- Clear all vent openings of debris
- Check gaskets around lid for damage
- Tighten loose handles or hardware
Replace worn gaskets around the grill lid.
Damaged seals let heat escape and make temperature control harder.
Oil grates lightly after cleaning to prevent rust.
Use high-heat cooking oil applied with paper towels.
Inspect the firebox for cracks or damage.
Small holes can affect airflow and heat distribution across the cooking surface.