
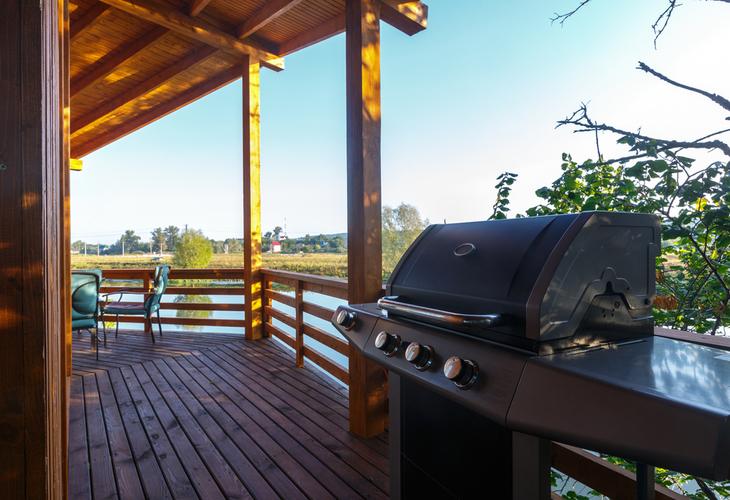
A clean propane grill delivers better-tasting food, prevents dangerous grease fires, and extends the lifespan of your outdoor cooking equipment.
Many grill owners struggle with knowing when and how to properly clean their propane grills, often leading to poor performance and safety hazards.
Regular cleaning after each use combined with deep cleaning at least once annually keeps a propane grill functioning safely and efficiently while preventing flavor transfer between different foods.
The cleaning process involves specific safety precautions since propane grills require careful handling of gas connections and burner components.
This comprehensive guide covers everything from gathering the right cleaning supplies to maintaining burner tubes, cleaning grill grates, and proper storage techniques.
Whether dealing with stubborn grease buildup or performing routine maintenance, these proven methods ensure optimal grill performance and safe outdoor cooking experiences.
Gather Essential Cleaning Supplies

Having the right tools and supplies ready before starting makes grill cleaning more efficient and thorough.
The three main categories include selecting an appropriate grill brush for your grate material, choosing effective cleaning products, and preparing proper washing solutions.
Choosing the Right Grill Brush
The grill brush serves as the primary tool for removing carbonized food and grease from grates.
Different grate materials require specific brush types to avoid damage.
Wire brushes work best for cast iron and thick stainless steel grates.
They provide aggressive scrubbing power to remove stubborn buildup.
Users should inspect wire brushes regularly for loose bristles that could fall onto food.
Nylon brushes suit porcelain-coated and ceramic grates perfectly.
The softer bristles prevent chipping or scratching the protective coating.
These brushes work effectively on warm grates after preheating.
Brass brushes offer a middle ground between wire and nylon.
They clean effectively without being too abrasive for most grate types.
Alternative scrubbing tools include stainless steel scrubbing pads, grill stones, and even crumpled aluminum foil held with tongs.
Some grillers prefer scrapers with long handles for safety when working on hot surfaces.
Selecting Effective Grill Cleaners
Keeping your grill clean is essential for both performance and longevity.
Whether you’ve just purchased your first grill or are a seasoned barbecue enthusiast, using the right products makes maintenance easier and more effective.
Selecting Effective Grill Cleaners
Grill cleaners come in different formulations to tackle various cleaning challenges:
-
Degreasing cleaners cut through heavy grease and burnt-on residue on grates and interior surfaces. They often need a few minutes of application before scrubbing for maximum effectiveness.
-
All-purpose grill cleaners handle general cleaning tasks across multiple components, working on both interior and exterior surfaces.
-
Natural alternatives such as baking soda paste or vinegar solutions provide cleaning power without harsh chemicals, ideal for those avoiding toxins.
It’s important to choose cleaners that match your grill’s materials.
Stainless steel, painted surfaces, and cast iron all require different approaches to avoid damage.
Recommended Grill Cleaning Products
The following products have been highly reviewed by consumers and are suitable for most grill types:
-
Weber Grill Cleaning Kit – Designed for all grill types, including stainless steel models, this kit provides everything needed for thorough cleaning in one convenient pack.
-
BBQ-Aid Grill Brush and Scraper – Perfect for propane and charcoal grills, it works on firebox interiors, cooking grates, and heat spreaders.
-
Citrusafe Grill Cleaning Spray – A natural option that helps break down food and debris. It’s non-toxic, non-flammable, and non-corrosive, making it safe for grates and grill exteriors.
-
Kona Grill Brush – A bristle-free choice that is gentle on porcelain enamel grills, reducing the risk of scratches.
With the right combination of cleaners and tools, keeping your propane grill in top condition becomes a simple, stress-free routine.
A few regular cleaning sessions can ensure your grill stays ready for cooking all season long.
Preparing Soapy Water and Buckets
Soapy water serves as the foundation for most grill cleaning tasks.
Proper preparation ensures effective cleaning without waste or mess.
Water temperature should be warm to hot for dissolving grease effectively.
Cold water cannot break down fats and oils properly.
Dish soap concentration requires approximately one tablespoon per gallon of water.
Too much soap creates excessive suds without improving cleaning power.
Container size matters when soaking large components like grates or flavorizer bars.
A five-gallon bucket accommodates most grill parts comfortably.
Multiple buckets prove useful during deep cleaning sessions.
One holds soapy water for washing, while another contains clean rinse water.
This prevents recontaminating cleaned parts with dirty wash water.
Additional supplies include rubber gloves for hand protection, microfiber cloths for wiping surfaces, and paper towels for drying components thoroughly after cleaning.
Prepping Your Propane Grill for Cleaning
 Proper preparation ensures safe and effective cleaning while protecting both the grill and the person doing the maintenance.
Following these three essential steps prevents accidents and makes the cleaning process more efficient.
Preheating and Cooling Down the Grill
Start by turning on the propane grill and allowing it to heat up for 10 to 15 minutes.
This heating process softens hardened grease and food residue that has accumulated on the grates and interior surfaces.
The heat makes stubborn buildup easier to scrape away during cleaning.
Burnt-on food particles and grease become more pliable when warmed, reducing the scrubbing effort required later.
After preheating, turn off all burners and allow the grill to cool down completely.
The grill should be warm but not hot to the touch before beginning any cleaning work.
Never attempt to clean a hot grill as this creates burn risks.
Wait approximately 30 minutes after turning off the heat before starting the cleaning process.
Disconnecting the Propane Source
Turn off the propane supply valve on the tank by rotating it clockwise until fully closed.
This step prevents gas from flowing to the grill during the cleaning process.
Disconnect the propane tank completely from the grill by unscrewing the coupling nut that connects the gas line to the tank.
Use a wrench if the connection is tight, but avoid over-tightening when reconnecting later.
Move the propane tank to a safe location away from the cleaning area.
Store it upright in a well-ventilated space away from heat sources and cleaning chemicals.
Check that all burner controls are in the off position before proceeding with any cleaning tasks.
Safety Precautions Before Starting
Wear protective equipment including rubber gloves and safety goggles when using degreasers or cleaning chemicals.
These products can irritate skin and eyes upon contact.
Ensure adequate ventilation in the cleaning area, especially when working in garages or covered spaces.
Open doors and windows to allow proper air circulation during the cleaning process.
Keep a fire extinguisher nearby as a precautionary measure, particularly when dealing with grease buildup.
Remove any flammable materials from the immediate work area.
Gather all necessary cleaning supplies before starting, including grill brushes, scrapers, cleaning solutions, and rags.
Having everything within reach prevents interruptions during the cleaning process.
Check the grill’s condition for any visible damage or wear before cleaning.
Address any structural issues or gas line problems before proceeding with maintenance during grilling season.
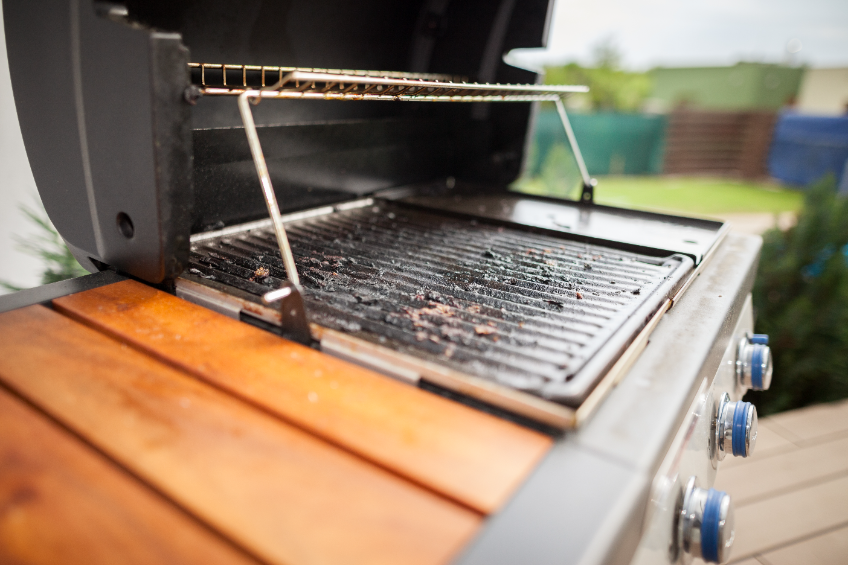
How to Clean the Grill Grates

Clean grill grates require preheating the grill, scraping with a wire brush, creating a baking soda paste for scrubbing, then thorough drying before reinstallation.
This process removes food particles and grease buildup that affects taste and creates unsanitary conditions.
Scraping Off Debris with a Wire Brush
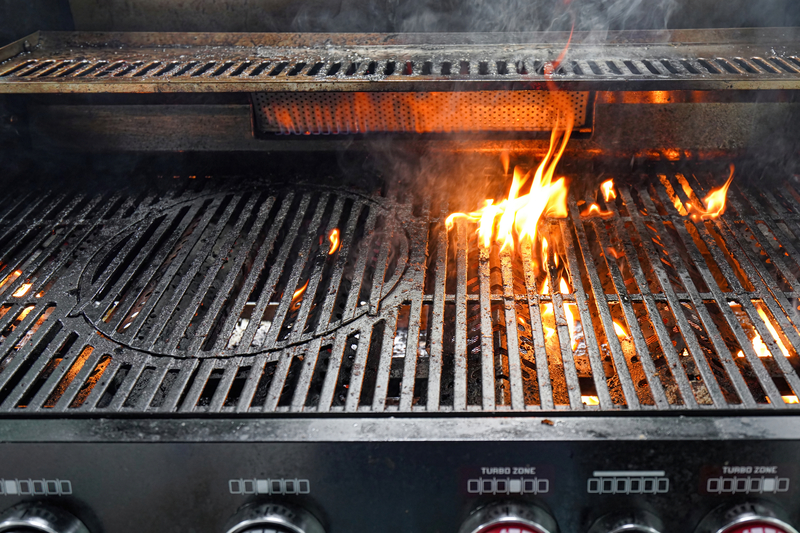
The cleaning process begins with preheating the propane grill to high heat for 15-20 minutes.
This heat burns off food residue and makes debris removal significantly easier.
Once the grill reaches proper temperature, users should employ a wire brush to scrape away loose food particles.
The brush strokes must follow the direction of the grates to prevent damage to the metal surface.
Key scraping techniques:
- Use firm, consistent pressure
- Work systematically across each grate section
- Focus on heavily soiled areas with additional passes
- Allow grates to remain hot during the scraping process
For stubborn buildup, a grill scraper provides additional cleaning power.
Users must exercise caution to avoid scratching or gouging the grate surface with excessive force.
Soaking and Scrubbing the Grates
After initial scraping, grates require deeper cleaning with a baking soda paste solution.
Users create this paste by mixing baking soda with small amounts of water until achieving a thick consistency.
The paste gets applied evenly across all grate surfaces using a sponge or soft cloth.
The mixture should sit for 15-20 minutes to break down grease and remaining food particles.
Cleaning solution process:
- Apply baking soda paste thoroughly
- Wait 15-20 minutes for chemical action
- Pour vinegar over the paste
- Scrub with sponge to remove residue
- Rinse completely with warm water
The vinegar neutralizes the baking soda while dissolving stubborn grease deposits.
Multiple rinses ensure complete removal of cleaning solution residue that could affect food taste.
Drying and Reinstalling the Grates
Complete drying prevents rust formation and prepares grates for seasoning.
Users should employ clean cloths or paper towels to remove all moisture from grate surfaces.
Proper drying steps:
- Remove excess water immediately
- Use lint-free cloths for final drying
- Allow air drying for additional moisture removal
- Check all crevices and joints for remaining water
After drying, grates require seasoning with a thin layer of vegetable oil.
The grill should heat to medium temperature for 10-15 minutes to create a protective coating.
This seasoning process prevents rust while enhancing future grilling performance.
Users can then reinstall the grates and prepare the grill for cooking use.
Cleaning the Burner Tubes and Heat Plates
Burner tubes require regular cleaning to prevent clogs that cause uneven flames and poor heat distribution.
Heat plates also need attention to remove grease buildup that can create flare-ups and unpleasant odors.
Removing and Inspecting Burner Tubes
The grill must be completely cool and disconnected from the gas source before beginning.
Remove the cooking grates and heat plates to access the burner tubes underneath.
Most burner tubes are secured with screws or clips at the control valve end.
Use a screwdriver to carefully remove these fasteners.
Some models have burner tubes that simply lift out after removing the securing hardware.
Lift each burner tube straight up to avoid damaging the gas connections.
Handle the tubes gently since they can bend or crack if dropped.
Inspect each tube for visible damage like cracks, rust, or severe corrosion.
Check the gas ports along the length of each tube for blockages from grease, food debris, or spider webs.
Look for bent or misaligned sections that could affect gas flow.
Small dents are usually acceptable, but major damage requires tube replacement.
Note the original position and orientation of each tube before removal.
This prevents confusion during reassembly.
Clearing Blockages and Buildup
Use a burner cleaning rod or small bottle brush to clean inside each tube.
These tools effectively remove debris without damaging the interior surfaces.
Insert the cleaning rod slowly and push it through the entire length of the tube.
Work it back and forth several times to dislodge stubborn buildup.
For exterior cleaning, use a wire brush to scrub away grease and food residue.
Focus on areas around the gas ports where blockages commonly occur.
Individual gas ports can be cleaned with a paperclip or small wire.
Gently insert the wire into each port and twist to remove clogs.
Avoid enlarging the ports with excessive force.
Compressed air works well for final cleaning.
Blow air through the tubes to remove loose debris that brushing may have loosened.
Soak heavily soiled tubes in warm soapy water for 15-20 minutes.
This softens stubborn grease for easier removal.
Rinse thoroughly and dry completely before reassembly.
Reassembling Burners Safely
Ensure all burner tubes are completely dry before installation.
Any remaining moisture can cause rust or interfere with proper gas flow.
Position each tube in its original location and orientation.
The gas ports should face downward toward the heat plates in most grill designs.
Align the tube end with the control valve connection.
Push gently until the tube seats properly against the valve fitting.
Replace all screws or clips that secure the burner tubes.
Tighten fasteners snugly but avoid overtightening, which can crack the tube material.
Test the connection by gently tugging each tube. Properly installed tubes should not move or shift when lightly pulled.
Reconnect the gas supply and perform a leak test using soapy water on all connections.
Bubbles indicate gas leaks that require immediate attention.
Replace the heat plates and cooking grates in their correct positions.
Run the grill briefly to ensure even flame distribution across all burners.
Maintaining the Interior and Drip Pan

The interior surfaces and drip pan collect the most grease and debris during cooking, making them critical areas that require regular attention.
Proper cleaning prevents flare-ups and extends your propane grill’s lifespan.
Wiping Down the Interior Surfaces
Start by ensuring the propane grill has completely cooled and the gas is turned off.
Remove the cooking grates and flavorizer bars to access all interior surfaces.
Use a scraper or putty knife to remove built-up grease from the cookbox walls.
Work from top to bottom, directing debris toward the drip pan.
Focus on corners where grease typically accumulates.
Essential cleaning steps:
- Scrape the upper cookbox thoroughly
- Clean around burner tubes carefully
- Remove debris from igniters
- Wipe down all surfaces with damp cloth
Apply warm soapy water with a stiff brush to stubborn areas.
Steel wool works effectively on heavily soiled sections without damaging the interior.
Pay special attention to the burner tubes, gently removing any spider webs or debris that could block gas flow.
Clear igniters ensure reliable startup performance.
Cleaning or Replacing the Drip Pan
The drip pan prevents grease from spilling into the grill cabinet and causing potential fire hazards.
Most propane grills use either disposable or permanent drip pans.
For disposable drip pans:
- Remove the full pan carefully
- Dispose of it in regular trash
- Insert a clean replacement pan
- Ensure proper positioning under grates
For permanent drip pans:
- Remove the pan from the grill
- Scrape excess grease into trash
- Soak in warm soapy water for 15-20 minutes
- Scrub with stiff brush or steel wool
Rinse permanent pans thoroughly and dry completely before reinstalling.
Check that the pan sits level to prevent grease from pooling in one area.
Replace disposable pans every 3-5 cooking sessions or when half full.
Clean permanent pans after each use to prevent grease buildup and potential flare-ups.
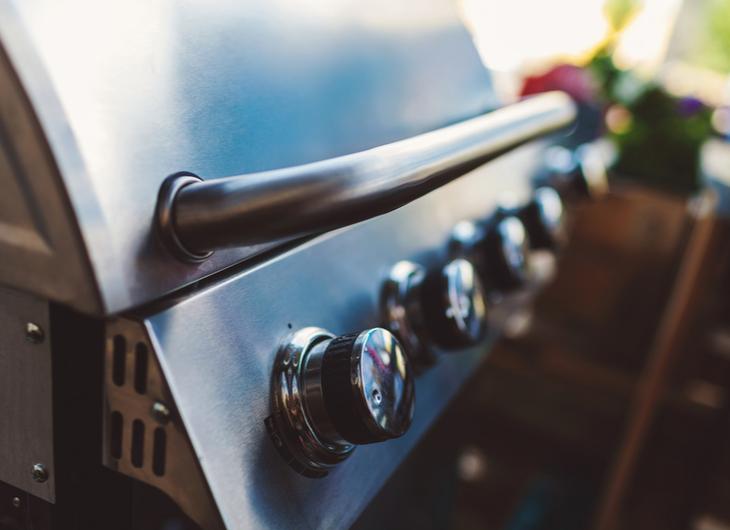
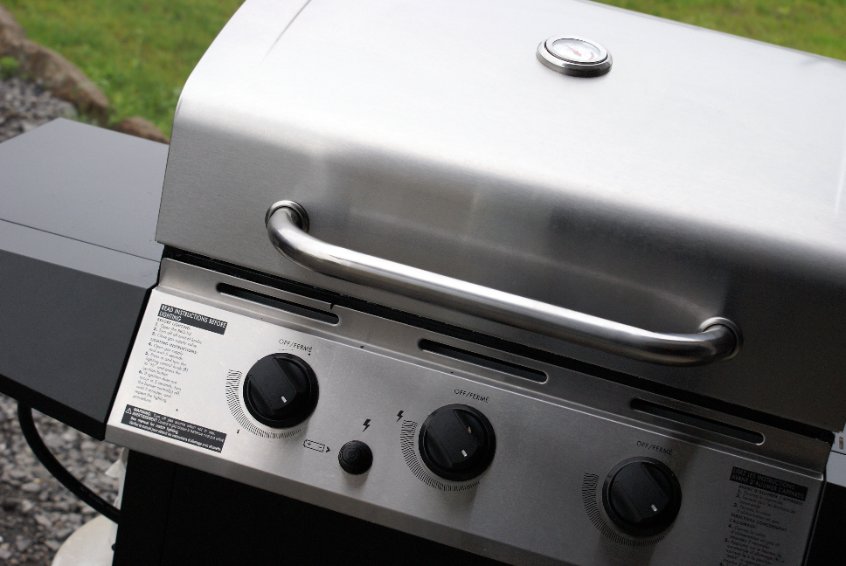
Cleaning the Exterior of the Grill
 A clean exterior protects your propane grill from rust and maintains its appearance.
The process involves wiping surfaces with soapy water, treating stubborn spots with specialized cleaners, then polishing and drying thoroughly.
Wiping Down Surfaces with Soapy Water
Mix warm water with a few drops of mild dish soap in a bucket or spray bottle.
This soapy water solution effectively cuts through grease and everyday grime without damaging the grill’s finish.
Dip a soft cloth or sponge into the solution and wring out excess water.
Wipe all exterior surfaces starting from the top and working downward.
Pay special attention to handles, knobs, and areas around the grease tray where buildup commonly occurs.
These spots collect the most residue during cooking sessions.
Key cleaning points:
- Control knobs and handles
- Side tables and shelves
- Front panel and doors
- Base and wheels
Rinse the cloth frequently in clean water to avoid spreading grease around. The soapy water breaks down most surface dirt and prepares stubborn areas for deeper cleaning.
Using a Grill Cleaner for Stubborn Spots
Commercial grill cleaner tackles tough grease stains and burnt-on residue that soapy water cannot remove.
Choose a cleaner specifically designed for outdoor grills to avoid damaging the surface.
Apply the grill cleaner according to manufacturer instructions.
Most products require spraying the solution onto the affected area and allowing it to sit for several minutes.
Scrub gently with a non-abrasive sponge or soft-bristled brush.
Avoid steel wool or harsh abrasives that can scratch stainless steel or painted surfaces.
For baked-on grease spots, make a paste using baking soda and water.
Apply this mixture to the stain and let it work for 10-15 minutes before scrubbing.
Rinse thoroughly with clean water after using any grill cleaner.
Residual chemicals can attract dirt or affect the grill’s finish if left on the surface.
Polishing and Drying the Exterior
Dry all surfaces completely using clean, lint-free towels.
Water spots can permanently mark stainless steel surfaces if allowed to air dry.
For stainless steel grills, apply a specialized stainless steel cleaner or a small amount of mineral oil to a microfiber cloth.
Polish in the direction of the grain to restore shine and create a protective barrier.
Stainless steel care tips:
- Always follow the grain direction
- Use circular motions sparingly
- Apply light, even pressure
- Buff to remove streaks
Check for any missed spots or water streaks during the polishing process.
A properly cleaned and dried exterior resists rust formation and maintains its appearance between grilling sessions.
Apply a thin coat of car wax to painted surfaces for additional protection against weather elements.
This extra step helps preserve the finish during outdoor storage.
Routine Maintenance and Storage Tips
 Consistent maintenance practices and proper storage significantly extend your propane grill’s lifespan while ensuring optimal performance.
Regular post-cooking care, protective covering, and thorough seasonal cleaning form the foundation of effective grill maintenance.
Regular Cleaning After Each Use
Quick cleaning after every grilling session prevents grease buildup and makes deep cleaning sessions easier.
This routine takes only 10-15 minutes but saves hours of scrubbing later.
Turn off the gas and disconnect the propane tank immediately after cooking.
Allow the grill to cool until it’s warm but not hot to touch.
Scrape the grates with a grill brush while they remain warm.
The heat helps loosen food particles and grease more effectively than cold cleaning.
Essential after-use tasks:
- Brush grill grates clean
- Empty grease tray when needed
- Wipe exterior surfaces with damp cloth
- Clean burner protectors or heat tents
Remove any visible food debris from the firebox using a scraper or putty knife.
Accumulated debris attracts pests and creates fire hazards.
Wipe down the exterior with a clean, damp cloth to remove grease splatters and fingerprints.
For stainless steel surfaces, wipe with the grain direction.
Using a Grill Cover
A high-quality grill cover provides essential protection against weather elements and extends your grill’s service life significantly.
Covers prevent rust, fading, and component deterioration.
Choose covers made from heavy-duty, weather-resistant materials like vinyl or polyester with UV protection.
The cover should fit snugly without being too tight.
Key cover features to consider:
- Water-resistant or waterproof material
- UV protection to prevent fading
- Proper ventilation to prevent moisture buildup
- Secure fastening straps or drawstrings
 You can find plenty of great options online, but one that stands is the GrillTough Heavy Duty BBQ Grill Cover.
This cover is built with thick, high-grade materials designed to handle outdoor conditions all year long. Here’s what makes it a great pick:
-
Heavy-Duty Construction: Made from thick, rip-resistant fabric that won’t easily tear or fade under UV exposure.
-
Weatherproof Protection: The waterproof coating keeps your grill dry, even during heavy rain or early morning dew.
-
Secure Fit: Adjustable fastening straps help keep the cover snug and in place, even on windy days.
-
Universal Sizing: Fits a variety of grill types and brands, so you don’t need to worry about compatibility.
What to Look For When Buying a Grill Cover
When shopping for a BBQ cover, keep these key features in mind:
| Feature | Why It Matters |
|---|---|
| Durable Material (e.g., 600D polyester, heavy vinyl) | Provides superior protection from tearing and UV damage. |
| Waterproof or Water-Resistant Design | Prevents moisture buildup and rust. |
| UV and Fade Resistance | Keeps the cover looking good over time. |
| Adjustable Straps or Drawstrings | Secures the cover tightly during windy weather. |
| Air Vents | Reduces condensation and prevents mold. |
| Proper Fit | Ensures maximum protection and prevents fabric stress. |
Always ensure the grill is completely cool before applying the cover.
Trapped heat can damage the cover material and create condensation problems.
Store the grill in a dry, covered area when possible.
Even with a cover, indoor storage in garages or sheds provides better protection than outdoor exposure.
Remove the cover periodically to check for moisture buildup underneath.
Trapped moisture leads to rust and corrosion over time.
Seasonal Deep Cleaning for Grilling Season
Deep cleaning at the start and end of grilling season maintains peak performance and prevents component failure.
This thorough process typically requires 1-2 hours but pays dividends in grill longevity.
Spring preparation tasks:
- Remove and soak grates for 30 minutes
- Clean burner tubes and clear clogged holes
- Empty and wash grease management system
- Inspect gas connections for leaks
Disassemble removable components including grates, heat shields, and burner tubes.
Soak grates in hot, soapy water while cleaning other parts.
Use a shop vacuum to remove debris from the firebox.
Scrape stubborn residue with a putty knife and wipe down with soapy water.
Check burner ports for clogs using a pipe cleaner or toothpick.
Clear blockages ensure even heat distribution and prevent flare-ups.
End-of-season storage preparation:
- Perform complete deep cleaning
- Dry all components thoroughly
- Apply light oil coating to prevent rust
- Disconnect and store propane tank safely
Run the grill on high for 15 minutes after reassembly to burn off cleaning residue and verify proper operation.