
Grilling is one of the best ways to spend a warm afternoon, relaxing with friends and family.
Great food and great company go hand in hand and exploring new and unique recipes is a great way to expand both your palate and your cooking skills.
But you don’t have to stop at grilling.
A smoker can give you a new and interesting way to cook with amazing results that will leave your guests impressed.
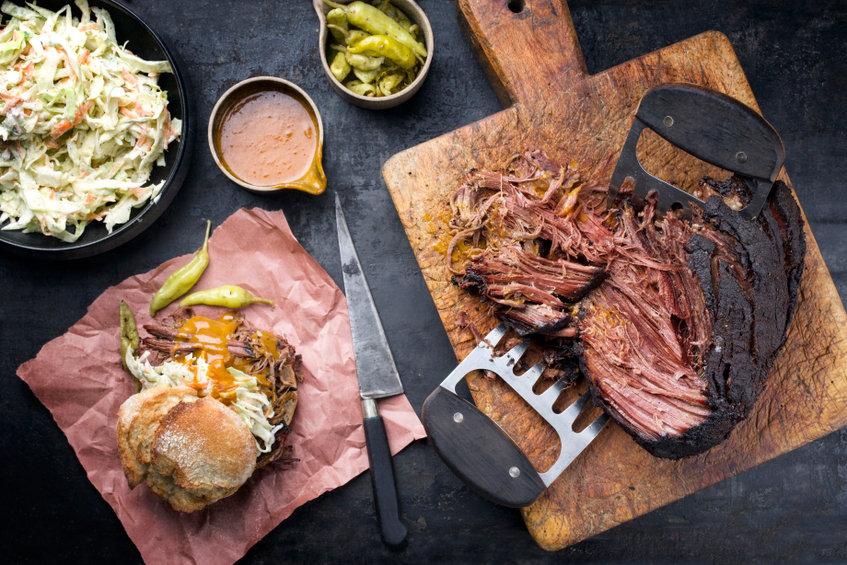
Whether you cook for groups or your family at home, smoked delicacies will delight your tastebuds and you can work with a range of ingredients from fish and chicken to large beef cuts, pork, and game.
An electric smoker is the easiest way to get started, and we’re going to explain the basics of using one.
Getting Started – The Basics of an Electric Smoker
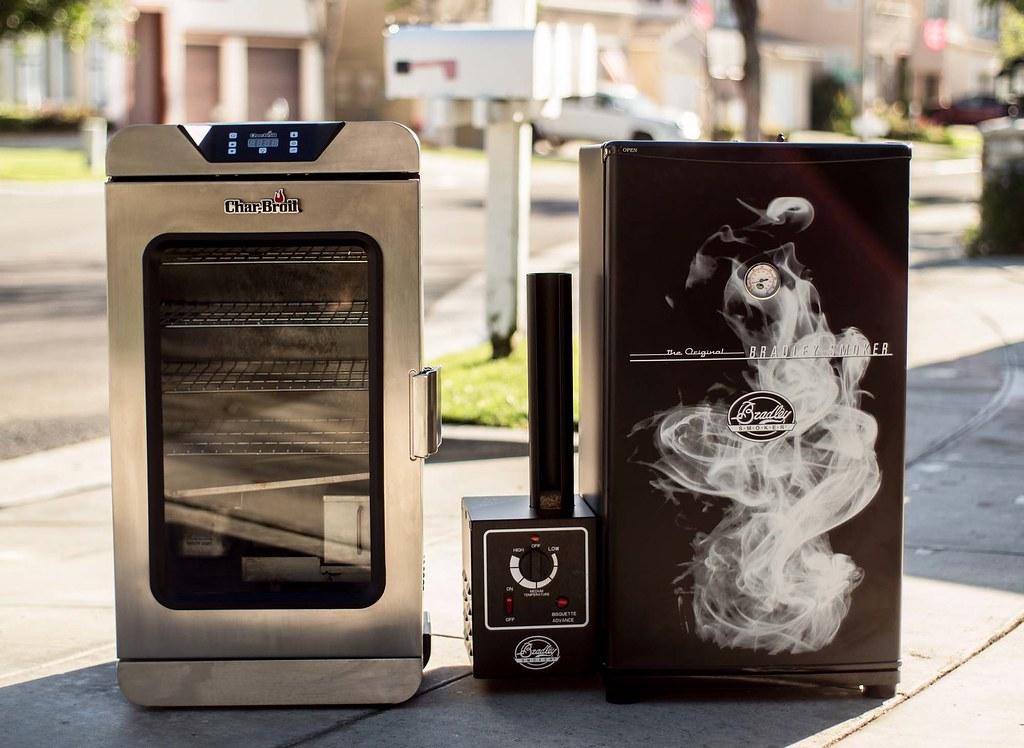 Before you do anything, make sure that you have fully assembled your electric smoker using the instructions provided in the packaging.
Read the user manual and safety instructions in detail and keep these handy in case you need to reference them at any time.
Modern smokers all follow a similar procedure for getting started and cooking your ingredients. These are…
- Connecting the smoker to a power outlet.
- Setting the temperature.
- Adding wood chips or pellets for delicious smoke flavor.
- Setting the time for your recipe.
- Closing the door and letting the smoker do its magic.
When your smoker is brand new, you’ll also need to season it to remove any traces of oils and liquids that are present from the manufacturing process.
How to Season Your New Smoker
No matter the brand, your new smoker will require seasoning.
It’s not nearly as in-depth as seasoning a cast iron pan or cooking grid. It’s simply a process of heating the smoker to remove any contaminants on the inside surface.
- Take some paper towels and wet them with a vegetable oil suited to seasoning. Flaxseed oil is a good choice, you can try a product like this Barlean’s Fresh Flaxseed Oil.
- Coat all surfaces of the interior (except the door if it is glass) with the oil. The interior should be lightly greased but not dripping. Start with a small amount of oil and apply more to your paper towels as necessary.
- Once the inside is fully coated, close the door and turn on the smoker. Set the temperature to around 270°F and leave it running for three hours.
The excess oil will burn off and this will remove any deposits and odors left from manufacturing.
It will also sterilize your electric smoker. Let everything cool down before cooking for the first time.
It’s Time to Cook – How to Get Started with Your Electric Smoker
The beauty of an electric smoker is that there’s no complication or need for solid fuel.
The electric element serves as a fuel source to ignite your smoker chips and infuse delicious flavor.
Take a look at the recipe you are following and note the cooking time and temperature for smoking.
Set the temperature and timer on your smoker, and you’re almost ready to go. Add 20 minutes to the time indicated by the recipe as you will use this for preheating.
Before you can start cooking, you’ll need to place some wood chips.
You can use natural chips or formed pellets.
Most people stick to wood chips because they’re natural and the flavor is often better because there are no additives.
Placing Wood Chips in Your Electric Smoker
You can choose any type of wood chips to use in your smoker.
Certain types of smoke work best with specific ingredients, and you can experiment to find a flavor that you will love.
Here’s a quick guide for common ingredients:
- Apple Wood works well with lighter meat like pork, poultry, and seafood.
- Oak is a favorite for red meat, darker fish, and game meat.
- Cherry has a unique and slightly sweet flavor. It is excellent for pork and beef.
- Hickory has a strong smoky flavor and works well for red meat and turkey. Try it with brisket.
- Pecan has a subtle flavor that is versatile for all types of meat.
- Mesquite is the heaviest smoke flavor used for outdoor cooking and it works best with dark meat including game and beef.
You can get a variety pack to try a few different smoke flavors, like this Western BBQ Smoking Pack of Apple, Mesquite, Hickory, and Cherry.
Load the chips into the tray of your smoker and you are ready to go. You don’t need to soak wood chips for use with an electric smoker.
Preheat Before You Add Ingredients
When following a recipe, it’s important to preheat your smoker.
Cooking times are provided with the assumption that your smoker is already up to temperature.
Turn on your smoker (check that you have set the temperature and timer) and let it run for 20 minutes.
If you want to add water for moisture, do this during the preheating cycle.
Use room temperature water, it will come up to temperature with the electric smoker.
Most modern electric smokers have water trays.
If yours doesn’t simply add a cup of water to an aluminum bowl at the bottom of the smoker.
Arrange Your Food and Wait for the Magic to Happen
You can now quickly and carefully add your ingredients to the smoker after the preheating is done.
Put heavier and bulkier items on the lower racks.
Give at least half an inch of space between ingredients to ensure thorough cooking.
Close the door, and the cooking process will begin.
All you have to do now is sit back and wait for your delicious smoked ingredients.
Smoking at home is a great way to enjoy large cuts of meat, sausages, whole birds, or even specialty preparations like homemade salami or pepperoni.
You can even smoke ingredients like hard cheese at a low temperature.
If you find yourself reading this and don’t yet have an electric smoker, you’ll be happy to learn that they aren’t incredibly expensive.
The Masterbuilt Digital Electric Smoker MB20071117 is 30 inches, has a wood chip loading system, and a digital thermostat for easy setup and temperature control.
Enjoy smoking at home with our simple instructions to use your electric smoker.