

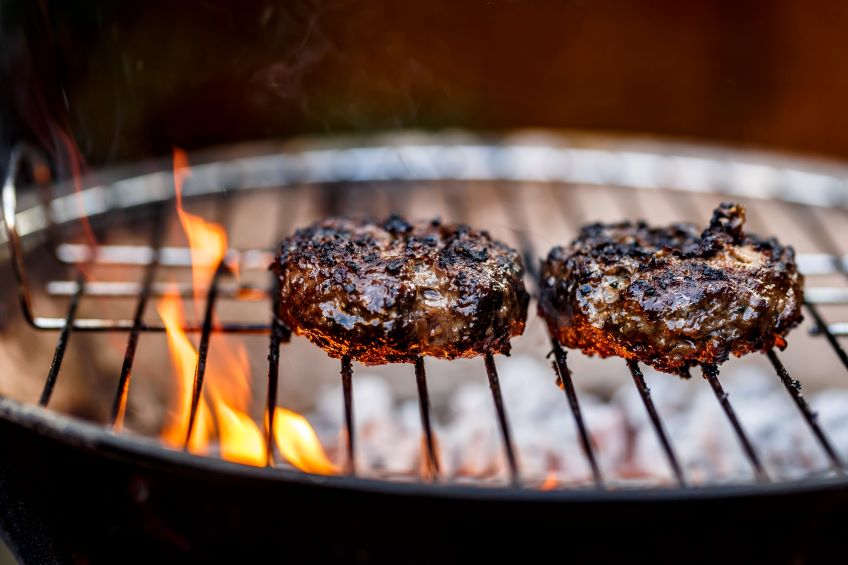
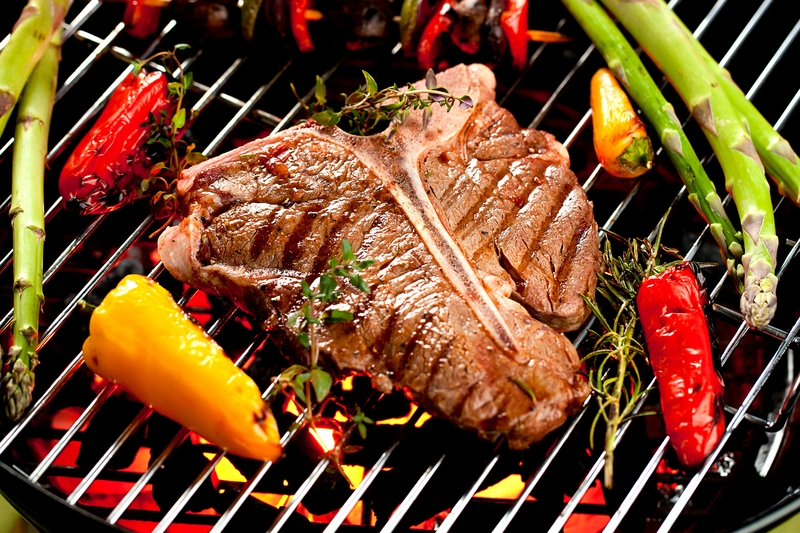
 Nothing ruins a backyard cookout faster than charcoal that won’t stay lit.
Many grillers struggle with this common problem, leading to half-cooked meals and frustrated guests waiting around a cold grill.
The key to keeping a charcoal grill lit lies in ensuring proper airflow, using dry charcoal, arranging the coals correctly, and being patient during the lighting process.
Most grilling failures happen because people rush the setup or don’t understand how fire needs oxygen to burn consistently.
This guide covers everything from selecting the right type of charcoal to mastering proper lighting techniques and troubleshooting when things go wrong.
Readers will learn practical setup methods, temperature management skills, and proven solutions to common problems that cause charcoal grills to go out unexpectedly.
Essential Steps for Keeping a Charcoal Grill Lit
Success in charcoal grilling depends on proper lighting methods, smart charcoal placement, and choosing the right fire starters.
These three key areas work together to create a strong, lasting fire that burns evenly throughout the cooking process.
Proper Lighting Techniques
The lighting method determines whether charcoal burns consistently or struggles to stay lit.
A chimney starter offers the most reliable approach for lighting charcoal.
Fill the chimney starter with the desired amount of charcoal.
Place crumpled newspaper or fire starter cubes in the bottom chamber.
Light the newspaper through the holes at the base.
The flames will rise through the charcoal, creating an even burn pattern.
Airflow management plays a crucial role during lighting.
Open both the top and bottom vents completely when starting the fire.
This allows maximum oxygen flow to feed the flames.
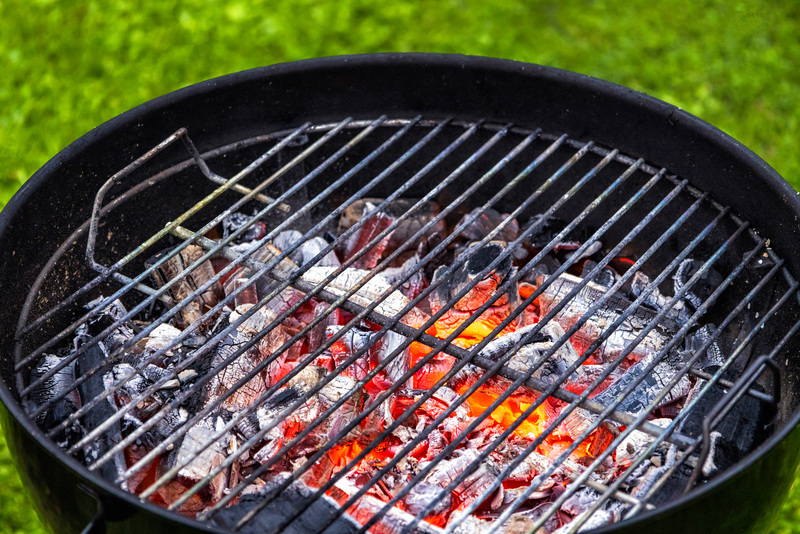
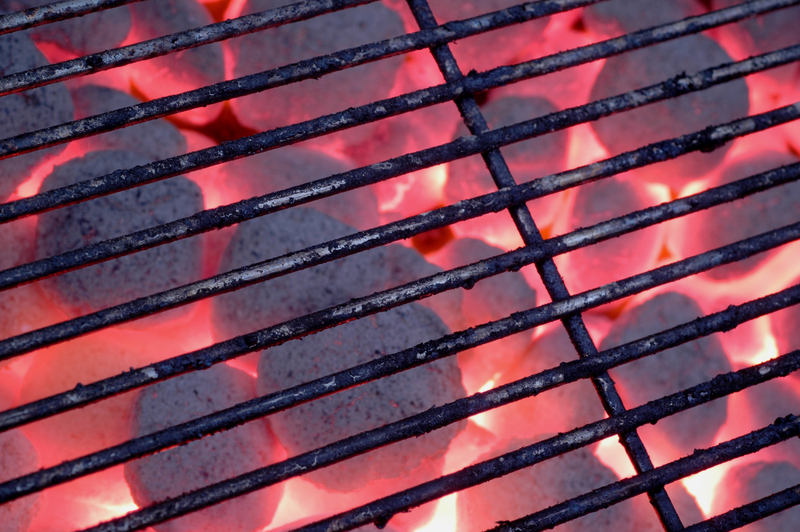
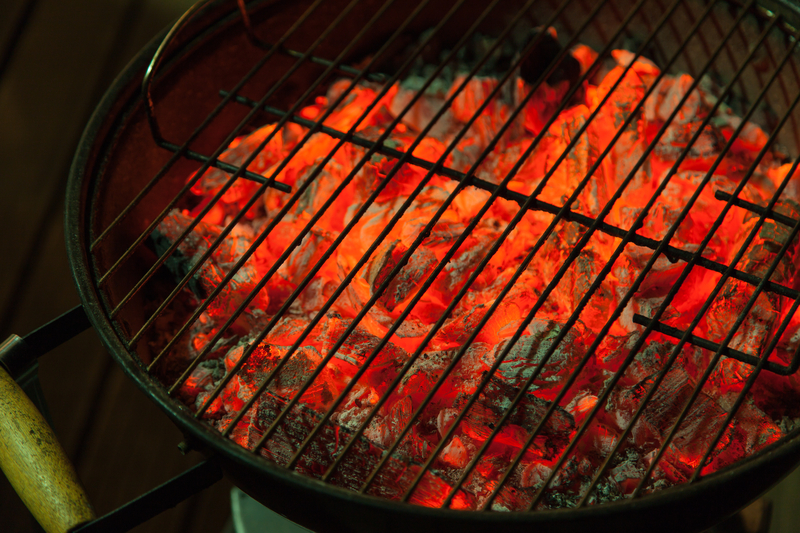
The charcoal should show orange glowing coals with light ash covering after 15-20 minutes.
Avoid using excessive lighter fluid, which can create uneven burning and off flavors.
If using lighter fluid, apply a light coating and wait 2-3 minutes before lighting.
Optimal Charcoal Arrangement
How charcoal is arranged affects heat distribution and burn duration.
The pyramid method works well for even heating across the grill surface.
Create a pyramid shape with charcoal pieces touching each other.
This allows heat to transfer between pieces and maintains burning temperatures.
For longer cooking sessions, bank coals to one side of the grill.
This creates different heat zones for various cooking needs.
Two-zone setup benefits:
- Direct heat for searing
- Indirect heat for slower cooking
- Flexibility to move food as needed
Leave space between charcoal pieces for air circulation.
Packed charcoal restricts airflow and can suffocate the fire.
Add fresh charcoal to the edges of burning coals when replenishing.
This prevents temperature drops during long cooking sessions.
Effective Use of Fire Starters
Fire starters provide reliable ignition and help maintain consistent burning.
Different types work better for specific situations and preferences.
Common fire starter options:
| Type | Best For | Burn Time |
|---|---|---|
| Cubes | Quick lighting | 8-10 minutes |
| Liquid | Large amounts | 5-7 minutes |
| Natural | Chemical-free | 10-12 minutes |
Paraffin cubes light easily and burn hot enough to ignite charcoal effectively.
Place 2-3 cubes among the charcoal before lighting.
Natural fire starters made from wood shavings and wax provide chemical-free options.
They take slightly longer to ignite but burn cleanly.
Electric fire starters work well for frequent grillers.
They heat a small area of charcoal quickly without any additives or chemicals.
Position fire starters in multiple spots for larger amounts of charcoal.
This creates several ignition points and speeds up the overall lighting process.
Choosing the Right Charcoal
The type of charcoal a griller chooses directly affects how well the fire stays lit and burns.
Different charcoal types offer unique burning characteristics, quality levels, and burn times that impact grilling success.
Charcoal Briquettes versus Lump Charcoal
Charcoal briquettes are made from compressed charcoal dust mixed with binding agents and additives.
They light more slowly but burn at consistent temperatures for longer periods, providing steady, predictable heat.
") For example, Kingsford Original Charcoal Briquettes use their signature “Sure Fire Grooves” to catch flame faster and maintain an even burn, making them a go-to choice for dependable grilling.
For example, Kingsford Original Charcoal Briquettes use their signature “Sure Fire Grooves” to catch flame faster and maintain an even burn, making them a go-to choice for dependable grilling.
Lump charcoal, by contrast, comes from natural hardwood pieces burned without oxygen.
It lights faster and burns hotter than briquettes, producing less ash and giving food a cleaner, wood-smoked flavor.
 A standout option is FOGO Premium Oak Restaurant Grade All-Natural Hardwood Lump Charcoal, which contains medium and small pieces that ignite quickly and deliver robust heat for both grilling and smoking.
Briquettes like Kingsford work best for longer cooking sessions such as smoking or roasting, since their uniform size and density help maintain stable temperatures over time.
Lump charcoal like FOGO, on the other hand, is perfect for high-heat grilling and searing because it reaches very high temperatures quickly while adding authentic hardwood flavor.
Weather plays a role, too: briquettes can absorb moisture in humid conditions, making them harder to light, while lump charcoal like FOGO resists dampness more effectively and performs more reliably in less-than-ideal weather.
Selecting High-Quality Charcoal
Quality charcoal burns longer and stays lit more reliably.
Poor charcoal crumbles easily and produces excessive ash that blocks airflow.
Signs of quality briquettes:
- Uniform size and shape
- Solid construction without cracking
- Minimal dust in the bag
- Even gray color
Signs of quality lump charcoal:
- Large, chunky pieces
- Few small fragments
- Natural wood smell
- Dark black color
Avoid charcoal that feels light or breaks apart when handled.
Check the bag for excessive dust or powder at the bottom.
Store charcoal in dry places to prevent moisture absorption.
Impact of Charcoal Types on Burn Time
Burn time varies significantly between charcoal types and affects how long a grill stays lit.
| Charcoal Type | Burn Time | Heat Level | Best Use |
|---|---|---|---|
| Briquettes | 2-3 hours | Medium-consistent | Long cooking |
| Lump charcoal | 1-2 hours | High-variable | Quick grilling |
Briquettes burn slower because binding agents control the burn rate.
This makes them ideal for cooking methods that need steady heat over time.
Lump charcoal burns faster and hotter but for shorter periods.
The irregular shapes create air pockets that increase burning speed.
Grillers often need to add more lump charcoal during longer cooking sessions.
Dense hardwood lump charcoal lasts longer than softwood varieties.
Oak and hickory burn slower than pine or cedar-based options.
Mastering Charcoal Grill Setup
Proper setup forms the foundation of successful charcoal grilling.
Clean preparation and strategic charcoal arrangement create the ideal conditions for maintaining steady heat throughout the cooking process.
Cleaning and Prepping the Grill
A clean grill burns better and stays lit longer.
Old ash blocks airflow and prevents proper combustion.
Remove all ash from the firebox using a metal scoop or vacuum.
Ash creates barriers that stop oxygen from reaching the coals.
Clean the cooking grates with a wire brush.
Food residue can fall onto coals and create flare-ups that waste fuel.
Check both bottom and top vents for debris.
Clogged vents restrict airflow and cause temperature problems.
Essential prep steps:
- Empty ash catcher completely
- Scrub grates until metal shows
- Clear all vent openings
- Wipe down interior surfaces
Store the grill in a dry location before use.
Moisture makes charcoal harder to light and keeps burning.
Position the charcoal grill away from walls or overhangs.
Good air circulation helps maintain consistent burns.
Arranging Charcoal for Even Heat
Smart charcoal placement creates different heat zones for versatile cooking.
The arrangement affects how long coals stay lit.
Two-zone setup works best:
- Hot zone: Pile coals on one side for direct cooking
- Cool zone: Leave other side empty for indirect cooking
Stack unlit charcoal in a pyramid shape before lighting.
This arrangement allows flames to spread upward through the pile.
Use enough charcoal to create a single layer across the bottom grate.
Too little charcoal burns out quickly.
Light coals from multiple points using a chimney starter.
This method creates even ignition without lighter fluid taste.
Wait until coals develop a gray ash coating before spreading.
This indicates they reached proper cooking temperature.
Spread hot coals with long-handled tools only.
Keep some coals stacked higher for intense searing heat when needed.
Managing Airflow and Temperature
Proper airflow control is the key to keeping charcoal burning hot and steady.
The grill vents work together to create the right amount of oxygen flow that feeds the fire.
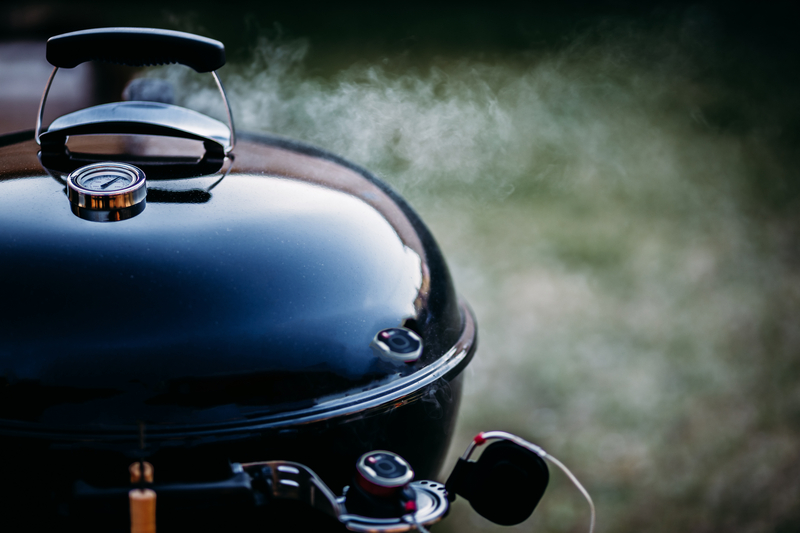
Adjusting Grill Vents
The bottom vents control the primary air supply to the charcoal.
Opening these vents wider increases airflow and makes the fire burn hotter.
The top vents create a draft that pulls air through the grill.
When both top and bottom vents are open, air flows from bottom to top through the charcoal.
Bottom Vent Settings:
- Wide open: High heat (400°F+)
- Half open: Medium heat (300-400°F)
- Quarter open: Low heat (250-300°F)
Top Vent Guidelines:
- Keep mostly open during cooking
- Close only to lower temperature slowly
- Never close completely while cooking
Start with both vents wide open when lighting.
Adjust the bottom vent to control temperature once the charcoal is hot.
Maintaining Consistent Oxygen Flow
Charcoal needs steady oxygen to burn properly.
Blocked air vents or ash buildup can choke the fire and cause it to die out.
Clean the bottom vents before each use.
Remove any ash or debris that might block airflow.
Position the charcoal to allow air circulation.
Stack coals loosely rather than packing them tight together.
Check that nothing blocks the top vent.
Food grease or ash can clog the opening and reduce airflow.
Monitor the fire throughout cooking.
If the temperature drops suddenly, open the vents wider to increase oxygen flow.
Lighting Methods and Tools

Getting charcoal lit properly requires the right method and tools for your specific needs.
A chimney starter offers the most reliable results, while lighter fluid provides quick ignition with some trade-offs, and electric options work well for consistent lighting.
Using a Chimney Starter
A chimney starter is a metal cylinder that lights charcoal quickly without chemicals.
It uses airflow to create consistent heat that spreads evenly through the coals.
How to Use:
- Fill the top chamber with desired amount of charcoal
- Place 2-3 lighter cubes or newspaper in bottom chamber
- Light the material at the bottom
- Wait 15-20 minutes until coals glow red with gray ash
The charcoal chimney starter eliminates the need for lighter fluid.
This prevents chemical taste from affecting food flavor.
Most chimney starters hold enough charcoal for a full grilling session.
They work with both lump charcoal and briquettes equally well.
Key Benefits:
- No chemical taste
- Even lighting
- Consistent results
- Reusable tool
Place the chimney on a heat-safe surface like concrete or grill grates.
Never use it on wooden decks or near flammable materials.
 The Kingsford Heavy Duty Deluxe Charcoal Chimney Starter is a compact, silver-steel chimney starter designed for ease of use.
It helps light charcoal quickly and evenly without lighter fluid, using natural airflow.
Its sturdy build and ergonomic handle make it a practical tool for any charcoal grill or barbecue setup.
Lighter Fluid Pros and Cons
Lighter fluid ignites charcoal fast but comes with important considerations.
It soaks into coals and burns off during the lighting process.
Pros:
- Quick ignition (5-10 minutes)
- Works in windy conditions
- No special equipment needed
- Widely available
Cons:
- Can leave chemical taste if not burned off completely
- Creates more smoke initially
- Requires proper ventilation
- Safety concerns with storage
When using lighter fluid, apply it evenly across the charcoal pile.
Wait 2-3 minutes before lighting to let it soak in properly.
Safety Tips:
- Never add fluid to hot coals
- Store away from heat sources
- Use only as directed on label
- Keep fire extinguisher nearby
Let coals burn until the fluid completely burns off.
This takes about 10-15 minutes after ignition.
The chemical taste disappears once flames die down and coals develop gray ash coating.
 Zippo Lighter Fluid is a tried-and-true, clean-burning naphtha formula designed for Zippo windproof lighters.
Its fast ignition and low odor make it a convenient choice for lighting fires quickly.
While it’s primarily marketed for lighters, many grillers also use it to help get charcoal started — just be sure to use sparingly and allow any excess to burn off before placing food over the coals.
Electric Starters and Alternatives
Electric charcoal starters use heated coils to ignite charcoal without chemicals or flames.
They plug into standard outlets and heat up in 5-10 minutes.
How Electric Starters Work:
- Insert heating element into charcoal pile
- Plug into electrical outlet
- Wait 8-12 minutes for coals to catch
- Remove starter once charcoal glows
These tools work best for small batches of charcoal.
They require access to electricity near the grill location.
 The 650 W Electric Charcoal Starter is a stainless steel (304 grade) fire-lighter tool with heating element coils and a 25-inch power cord.
It’s designed to ignite briquettes, charcoal, or “coal” quickly and efficiently, without the need for lighter fluid.
Ideal for BBQ grills, smokers, fireplaces, or campfires — just insert the coils into the fuel pile and plug it in for fast, clean ignition.
Alternative Methods:
- Newspaper and matches: Twist newspaper into tight bundles and place under charcoal pyramid
- Fire starters: Wax-based cubes that burn longer than newspaper
- Propane torch: Direct flame application for quick lighting
Electric starters eliminate lighter fluid taste and work in most weather conditions.
However, they take longer than fluid and need power access.
Each method has specific advantages depending on grilling location and personal preferences.
Troubleshooting Common Issues
Even experienced grillers face problems when lighting charcoal or keeping their grill burning.
Damp charcoal, faulty starter methods, and strong winds are the main culprits that prevent a steady fire.
Addressing Damp or Old Charcoal
Moisture is the biggest enemy of charcoal lighting.
When charcoal absorbs water from humid air or improper storage, it becomes difficult to ignite and won’t stay lit.
Signs of damp charcoal include:
- Takes much longer to light than usual
- Produces white smoke instead of clear flames
- Dies out quickly after lighting
- Feels heavier than normal
Store charcoal in a dry place away from moisture.
Use airtight containers or sealed bags to prevent humidity from getting in.
Old charcoal can also cause problems.
Briquettes older than two years may have broken-down binders that affect burning.
Lump charcoal lasts longer but can still absorb moisture over time.
If charcoal feels damp, spread it in direct sunlight for several hours before grilling.
This helps remove excess moisture naturally.
Problems with Starter Methods
Starter fluid problems happen when grillers use too little fluid or wait too long before lighting.
Pour starter fluid evenly over all charcoal pieces, not just one spot.
Wait 30 seconds after adding fluid before lighting.
This lets the charcoal absorb the liquid properly.
Waiting longer causes the fluid to evaporate.
Common starter mistakes:
- Adding more fluid after lighting (dangerous)
- Using wet newspaper or kindling
- Not using enough starter material
- Closing vents too early
Chimney starters work better than fluid in many cases.
They provide consistent heat and don’t require chemicals.
Fill the chimney with charcoal and light newspaper underneath.
Electric starters offer another reliable option.
They heat charcoal directly without flames or chemicals.
Maintaining Fire in Windy Conditions
Wind can blow out flames or make charcoal burn too fast.
Position the grill to block prevailing winds when possible.
Use natural windbreaks like walls or fences.
Partially close the grill lid during windy conditions.
Leave enough space for air flow but block strong gusts.
Too much wind makes charcoal burn unevenly.
Stack charcoal in a tight pyramid shape during windy weather.
This protects inner coals from wind while maintaining airflow.
The outer coals shield the inner ones.
Wind management tips:
- Open bottom vents fully
- Keep top vents partially open
- Add extra charcoal to compensate for faster burning
- Monitor temperature more frequently
Strong winds may require moving the grill to a sheltered location.
Garages with open doors or covered patios work well for protection.
Maximizing Flavor and Grilling Experience
A well-maintained charcoal fire produces the best smoky flavors and burns long enough for extended cooking sessions.
Wood chips and proper coal management are the keys to getting restaurant-quality results at home.
Enhancing Smoky Flavor
Wood chips add deep, complex flavors that make charcoal grilling special.
Soaking chips in water for 30 minutes prevents them from burning too quickly.
Popular wood chip varieties:
- Apple – mild, sweet flavor for pork and chicken
- Hickory – strong, bacon-like taste for beef and ribs
- Cherry – fruity flavor that adds reddish color
- Oak – medium smoky flavor that works with most meats
Place soaked chips directly on hot coals or in a foil packet with holes.
Add 2-3 handfuls every 45 minutes to maintain steady smoke.
The key is balance.
Too many chips create bitter flavors.
Too few chips won’t give enough smoky taste.
Position food away from direct flames when smoking.
This lets smoke circulate around the meat without burning it.
Extending Burn Times for Larger Meals
Large meals need steady heat for 2-4 hours.
The minion method works best for long cooking sessions.
Fill the charcoal bowl with unlit coals.
Light 15-20 briquettes in a chimney starter.
Pour the hot coals on one side of the unlit charcoal.
The lit coals slowly ignite nearby unlit coals.
This creates a slow burn that lasts 3-4 hours without adding more fuel.
Heat management tips:
- Keep bottom vents half open
- Adjust top vents to control temperature
- Add 5-6 fresh coals every hour for very long cooks
Bank coals to one side for indirect cooking.
This prevents food from burning while maintaining steady heat.
Quality charcoal burns longer than cheap brands.
Lump charcoal burns hotter but faster than briquettes.